
Our how-to video and these instructions will explain the complete process of installing a Thinkware dash cam in your vehicle.
For more information or to purchase the Thinkware F800 Pro dash cam or hardwire cable as seen in the video above, please click below:
These instructions also apply to the following Thinkware models (and more) as well:
- Thinkware U1000
- Thinkware Q800 Pro
- Thinkware F770
- Thinkware FA200
- Thinkware F100
- Thinkware F50
Thinkware Dash Cam Installation
Click on any image below to view a larger version.

Welcome to another how-to guide from The Dash cam Store, today we’re going to demonstrate how to hardwire a Thinkware dash cam in a Toyota Prius C. This guide will be helpful to some of you DIYer’s out there but, don’t hesitate to reach out and contact us for further assistance. We have experienced professionals that successfully complete installations like this on a daily basis. Or, if you’re in the central Texas area and are looking to get a dash cam professionally installed, we’d be more than happy to help you. Please click here to schedule your dash cam installation appointment today.

The Dash cam Store carries a wide variety of dash cams: Here at The Dash cam Store we carry a wide variety of in-car video cameras, but today we’re bringing the spotlight to the high-end Thinkware brand of dash cams. We currently carry the Thinkware F800 Pro, the FA200 and the F100 which are all high quality and highly capable dash cams, but this guide applies to all other Thinkware cams as well, including the F70, F770, and even the brand new QA100. Be sure to check out our other videos where we unbox and go into detail about these dash cams. Today, we’ll be installing the F800 Pro.
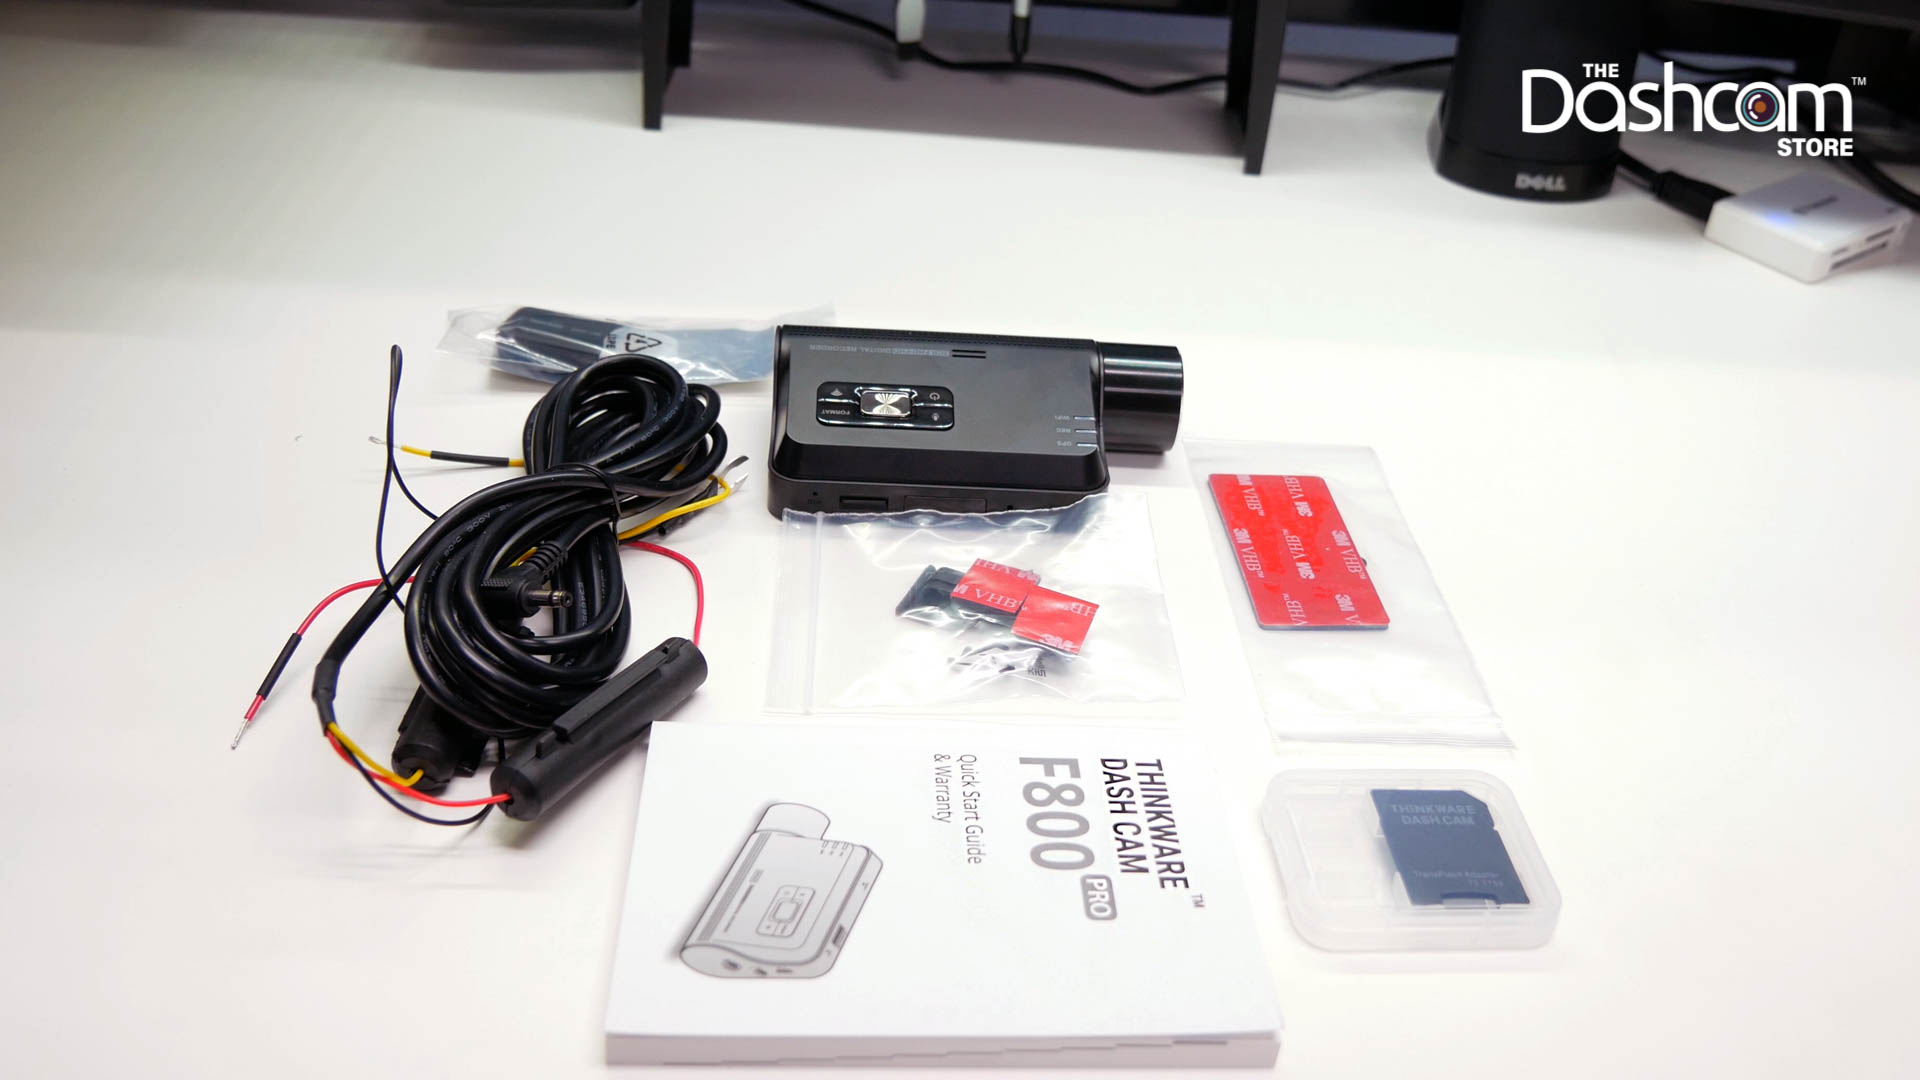
Thinkware F800Pro unboxing: So here is the Thinkware F800 Pro and its original packaging, let’s take a quick look at everything included in the box:
- The Thinkware F800 Pro front-facing & rear-facing cameras
- A mount with 3M adhesive
- Thinkware dash cams are sold with either a car charger, which directly plugs into your vehicle’s cigarette outlet, or direct-wire harness. This box happens to have the car charger cable in it, but we won’t be using that today. If you haven’t purchased your Thinkware system yet and plan on hardwiring it, be sure to pick the kit that comes with the direct-wire harness instead of the car charger cable
- Three Adhesive cable holders
- A Thinkware MicroSD card (either 32, 64, or 128gb) with an SD card adapter
- A USB MicroSD card reader
- And a quick start guide

Thinkware dash cams have a built-in voltage control module: Being that this is a Thinkware dash cam, the great thing is that you won’t need an external voltage control module such as BlackVue’s Power Magic pro which watches over your vehicle’s battery power, so you don’t accidentally end up with a drained battery. Instead of requiring a separate module to conduct this task, Thinkware dash cams have this feature built in. Meaning, the dash cam will automatically shut off if your dash cam notices your battery levels dropping below a certain threshold.
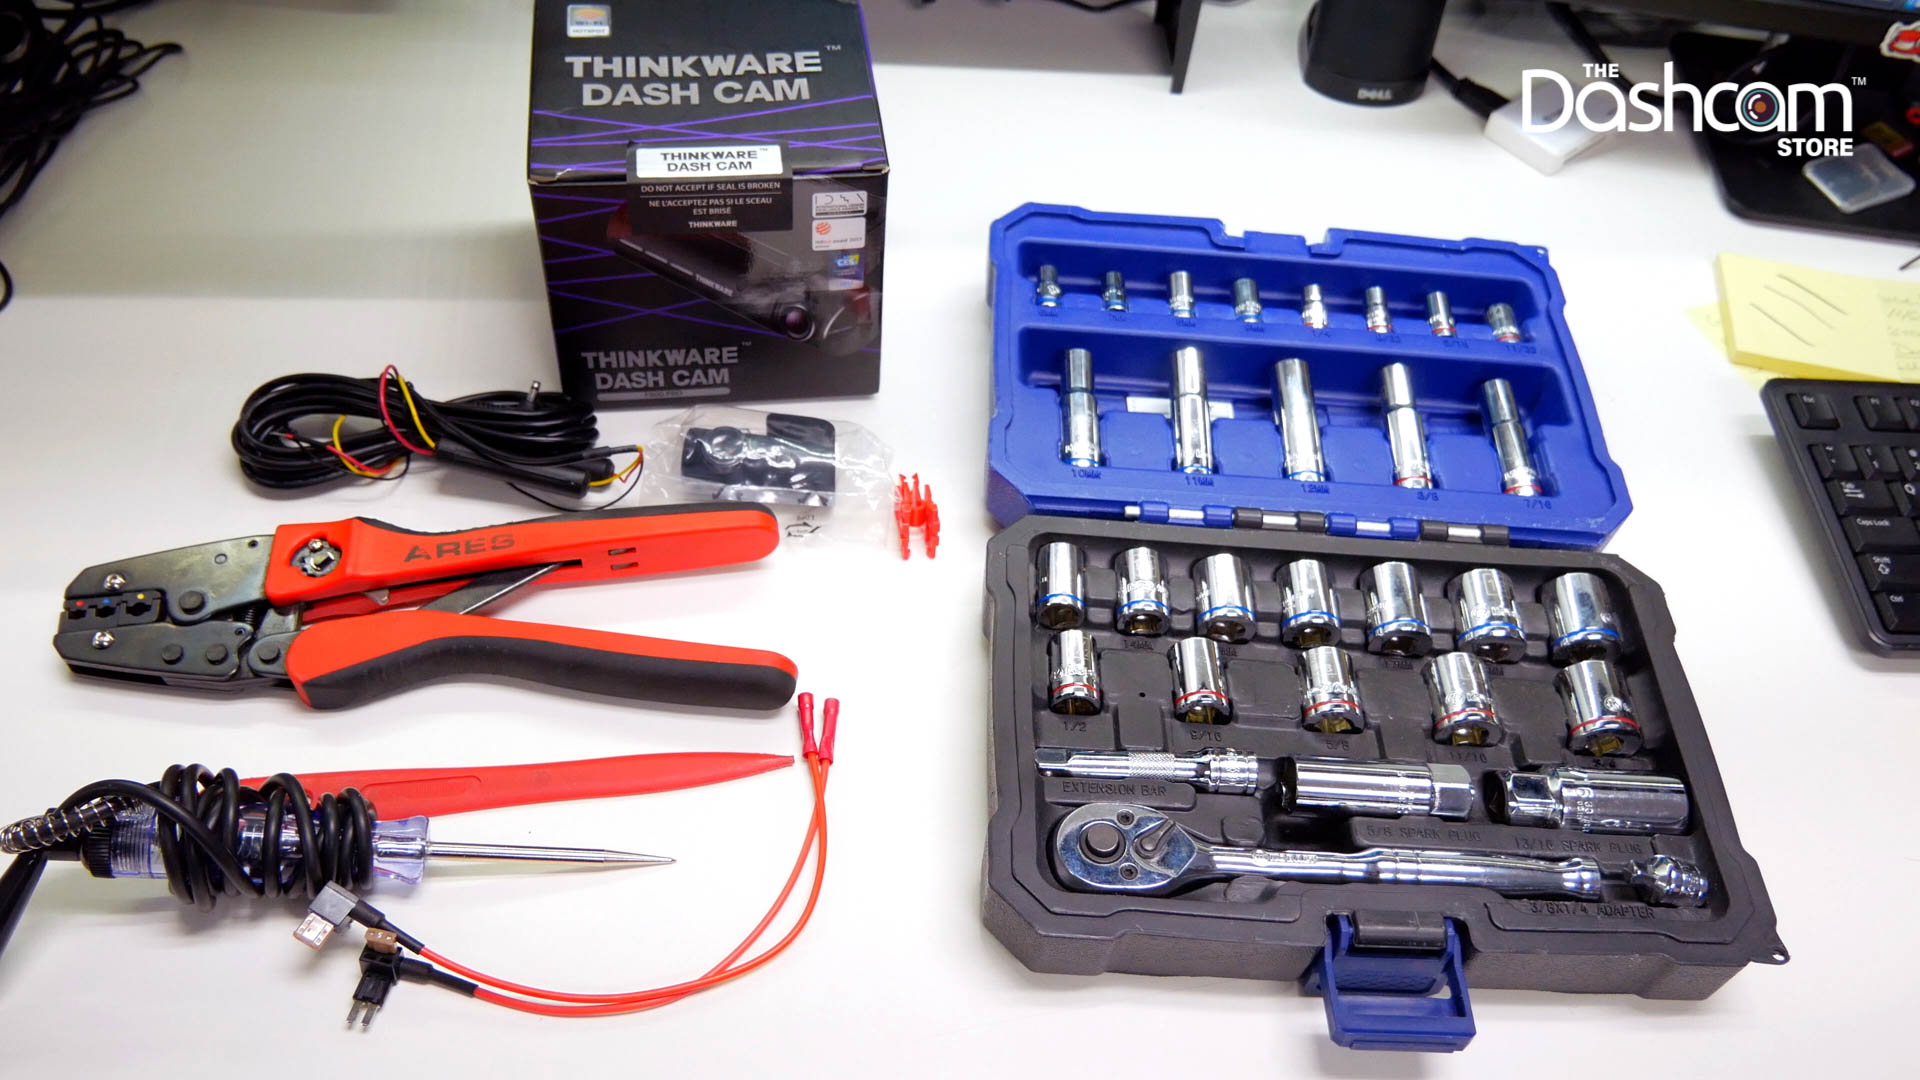
Review of everything used in this installation: before we head to the garage and begin installing the F800 Pro, let’s review everything we’ll be using in today’s hardwire installation:
- A Thinkware F800 Pro w/ Rear Camera
- A Thinkware Direct-Wire Harness. This kit connects your Thinkware dash camera directly to your vehicle’s fuse panel, which allows the camera’s parking surveillance mode to function while the vehicle’s ignition is turned off
- A set of fuse taps, fuse taps allow for a non-invasive installation of a dash cam or almost any other electrical accessory into your vehicle. No cutting of wires or splicing is required! Be mindful when purchasing a set of fuse taps to make sure they fit your vehicle’s specific fuse type. Or you can purchase our fuse tap bundle, which includes all 4 types of fuses, just to be sure you have what you need for installation
- A circuit tester, to test our fuses to identify constant and switched fuse circuits
- A fuse puller, most cars have one of these tools in their fuse box.) Or a small pair of needle-nose pliers
- A plastic trim tool, we’ll be using the trim tool to guide and tuck your cables along and under vehicle trim, body panels, and weather-stripping
- A basic socket set, to loosen a bare metal bolt or stud for a place to securely attach our ground wire
- A crimp tool or pair of pliers, to crimp the fuse taps to the direct-wire harness
Most of these items can be found on our website so you can avoid the trip to multiple websites or stores to get everything you need to complete this installation. You’ll be able find the Thinkware F800 Pro, the Thinkware Direct Hardwiring Kit, fuse taps, a circuit tester and a trim tool and many other dash cams and dash cam accessories. Unfortunately, we don’t sell basic hand tools like a socket set but, we’ve got you covered on everything else. Now that we have all we need to complete this installation, let’s get acquainted with our technician here at The Dashcam Store.

Introduction to our technician: This is Matt, he’s our lead technician here at The Dashcam Store and he is extremely knowledgeable about anything related to dash cams and automobiles. He will be demonstrating how to hardwire a Thinkware dash cam today.

Locating the vehicle’s fuse box: Now that we’ve got all of that covered, let’s begin the installation process. The first thing we have to do is locate a power source for the dash cam which means locating the vehicle’s fuse box. The fuse box controls the electrical flow throughout your vehicle. If you’re not sure where your fuse box is located, you can always refer to your vehicle’s manual to identify the location of your fuse box. We do have a full video on our YouTube page about locating your fuse box if you need help with this step. Now that we’ve located the vehicle’s fuse box, we’ll have to use our “Circuit Tester” to identify a constant fuse and a switched fuse, because our “Thinkware Direct Hardwiring kit” requires connection to a constant power source and a switched power source.
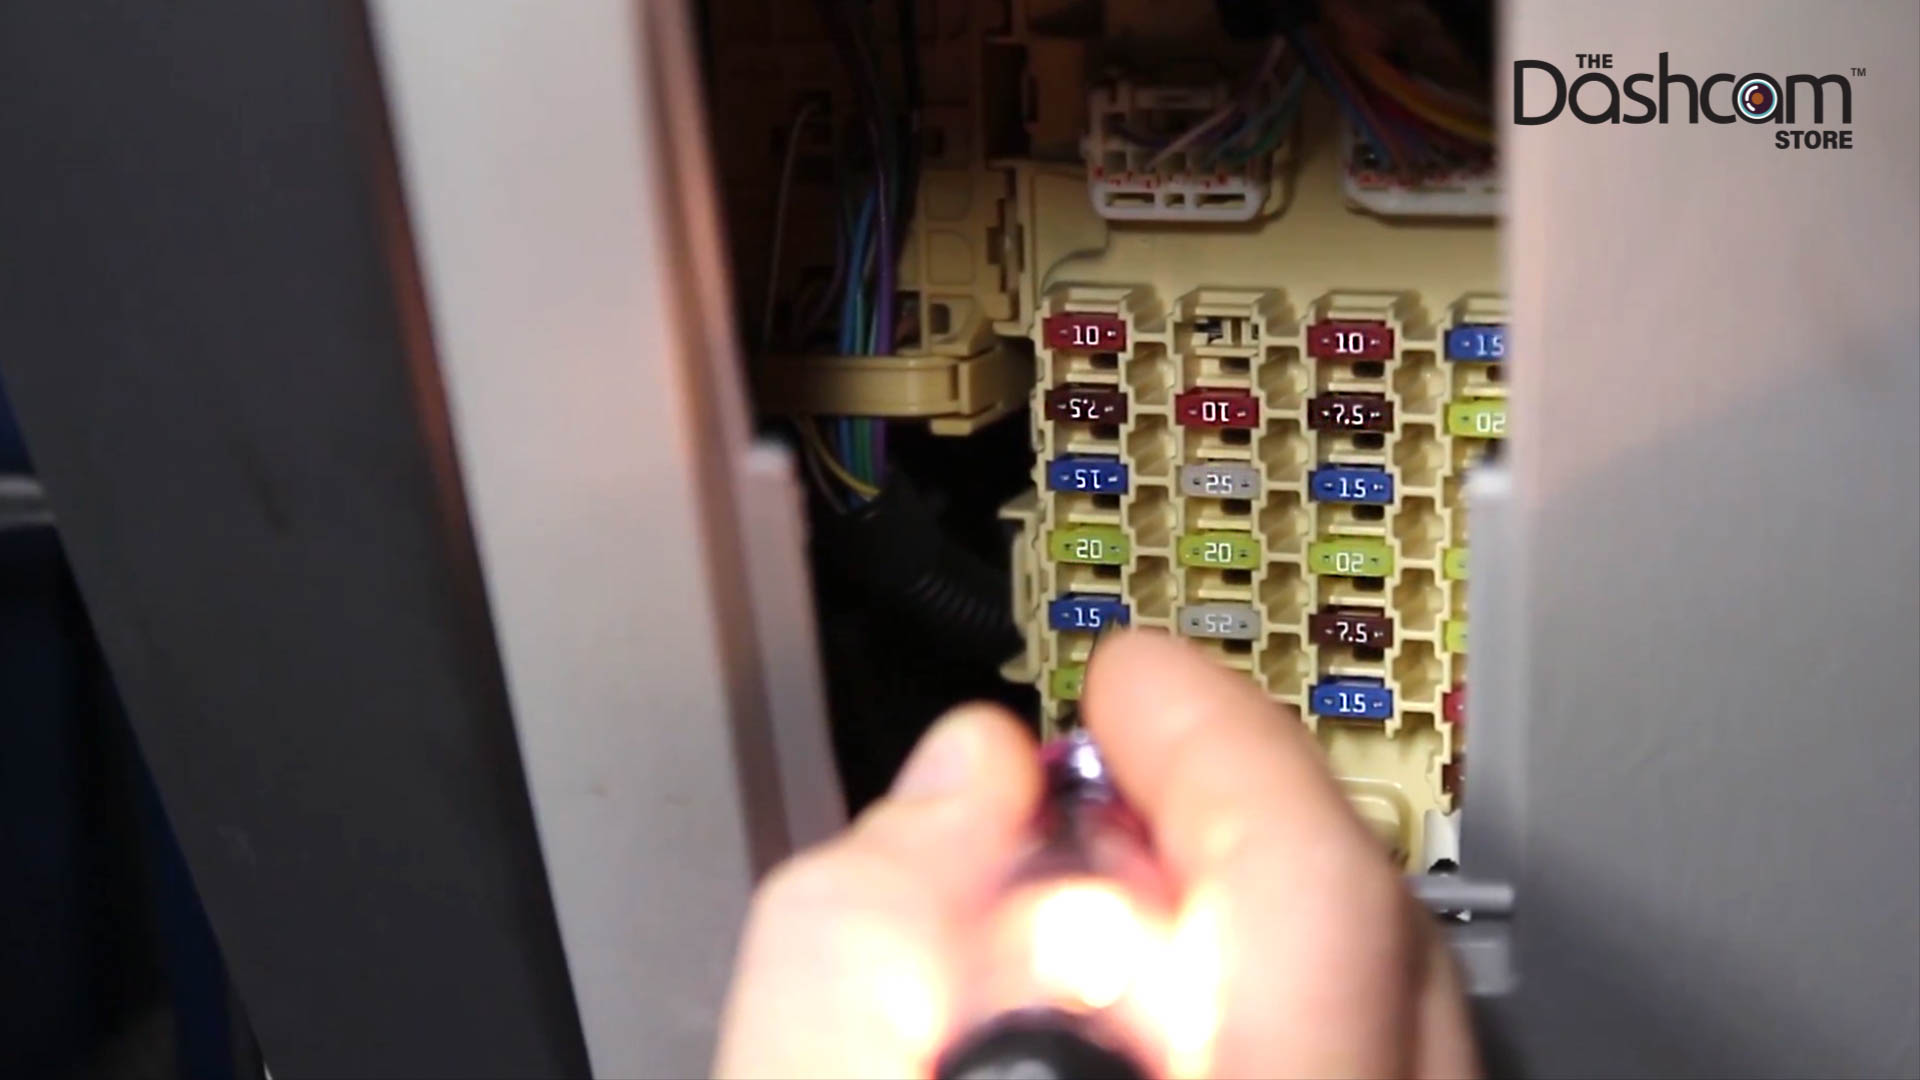
Identifying constant and switched fuses: Basically, constant fuses are fuses that remain energized even when the vehicle’s engine is shut off, and switched fuses operate in tandem with your vehicle’s ignition, turning on when the engine is on and turning off when the vehicle’s ignition is shut off. Before we can use our circuit tester to test which fuses are constant and which aren’t, we’ll have to ground it before we can check our fuses. You can ground the circuit tester by connecting the end attached with a metal prong on any bare unpainted metal surface such as bolts, studs or screws connected to the vehicle’s frame. Now that we’ve located the vehicle’s fuse box and grounded our circuit tester, we can begin probing for a constant and switched fuse.
If you’d like to learn a little bit more about this process, please see our full video about identifying constant and switched fuses below:
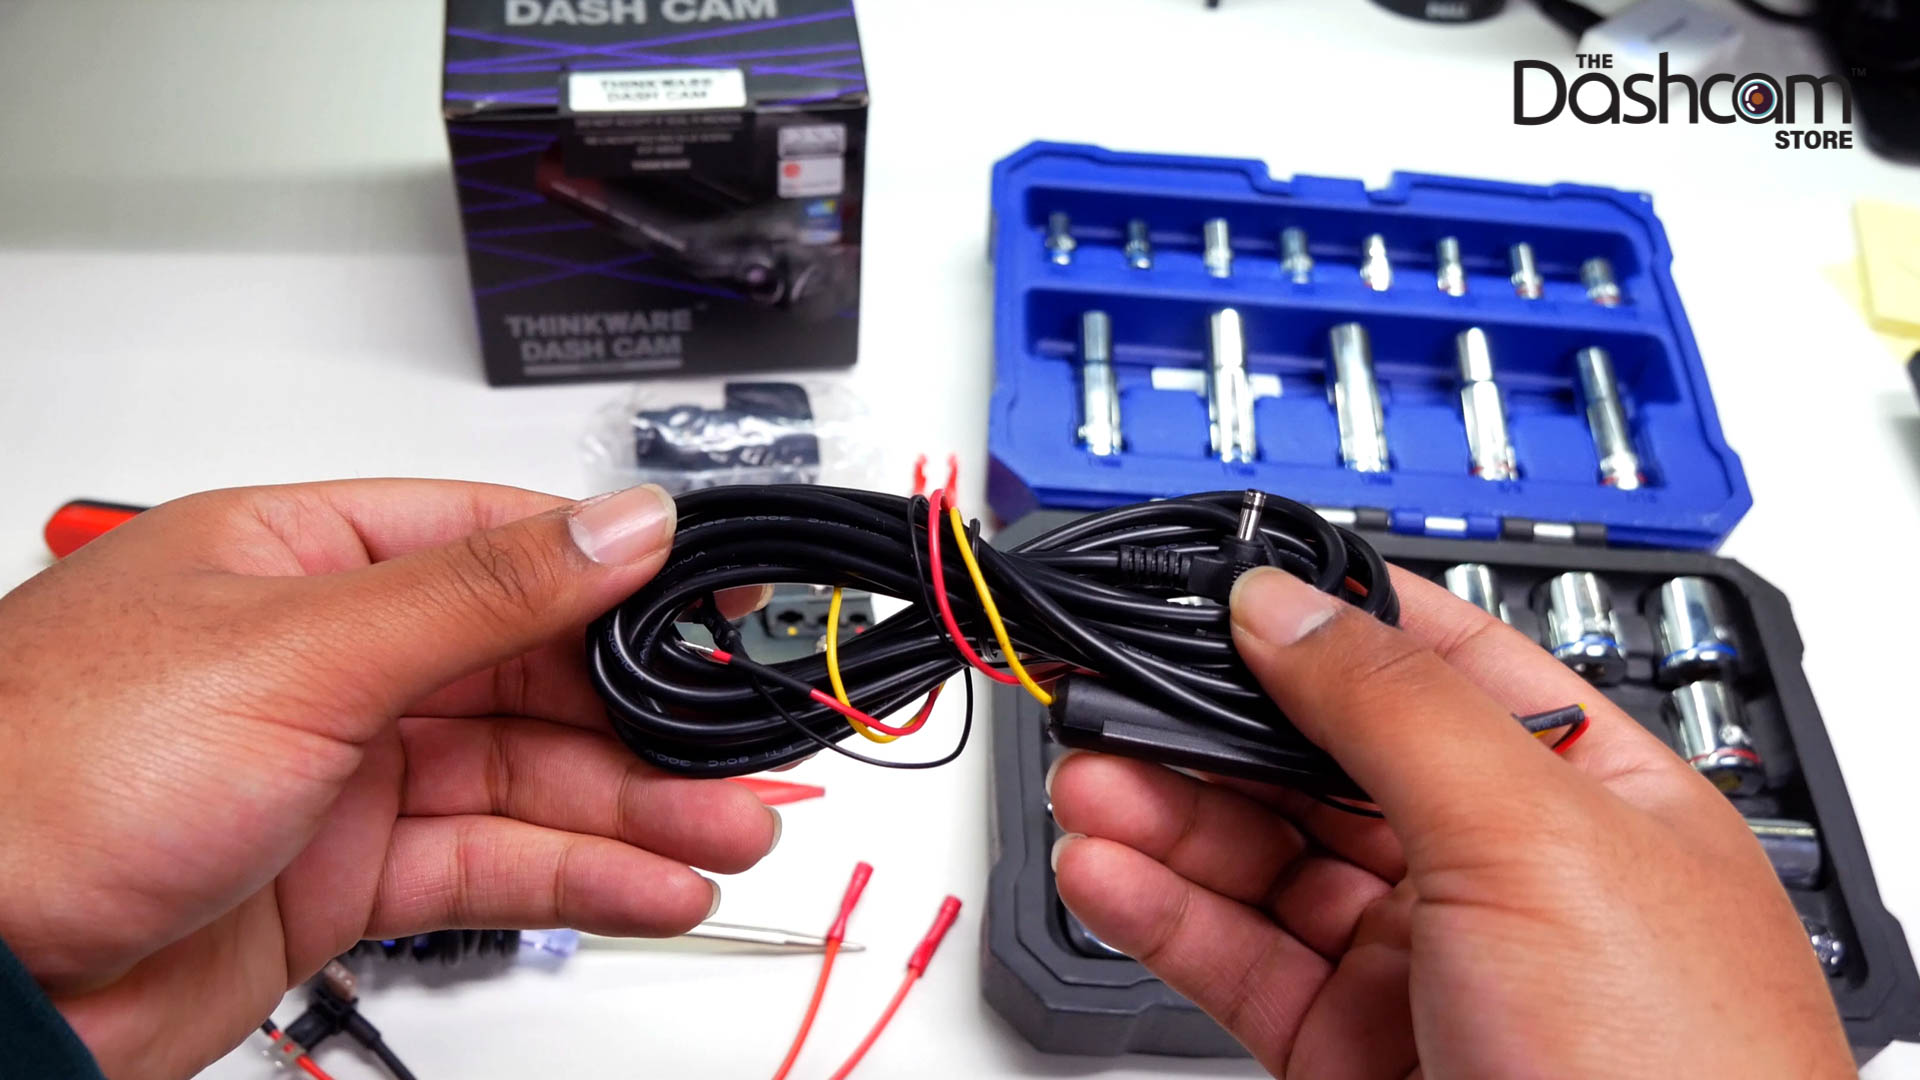
Thinkware direct hardwiring kit: After we’ve identified the constant and switched fuse that we’ll be using, let’s grab our Thinkware direct hardwiring kit. The yellow wire will need to be connected to the fuse using constant power, the red wire will need to be connected to a fuse using switched power. Finally, the black wire with the “C” shaped metal prong will need to be grounded on a bare metal bolt or stud.
If you’d like to learn a little bit more about identifying a proper ground point, please see our full video below:
Now, one at a time we’ll remove the fuses we’ve identified as constant and switched. We can use the fuse puller tool, which typically can be found inside your vehicle’s fuse box, or a small set of pliers to remove the fuse from the fuse box.
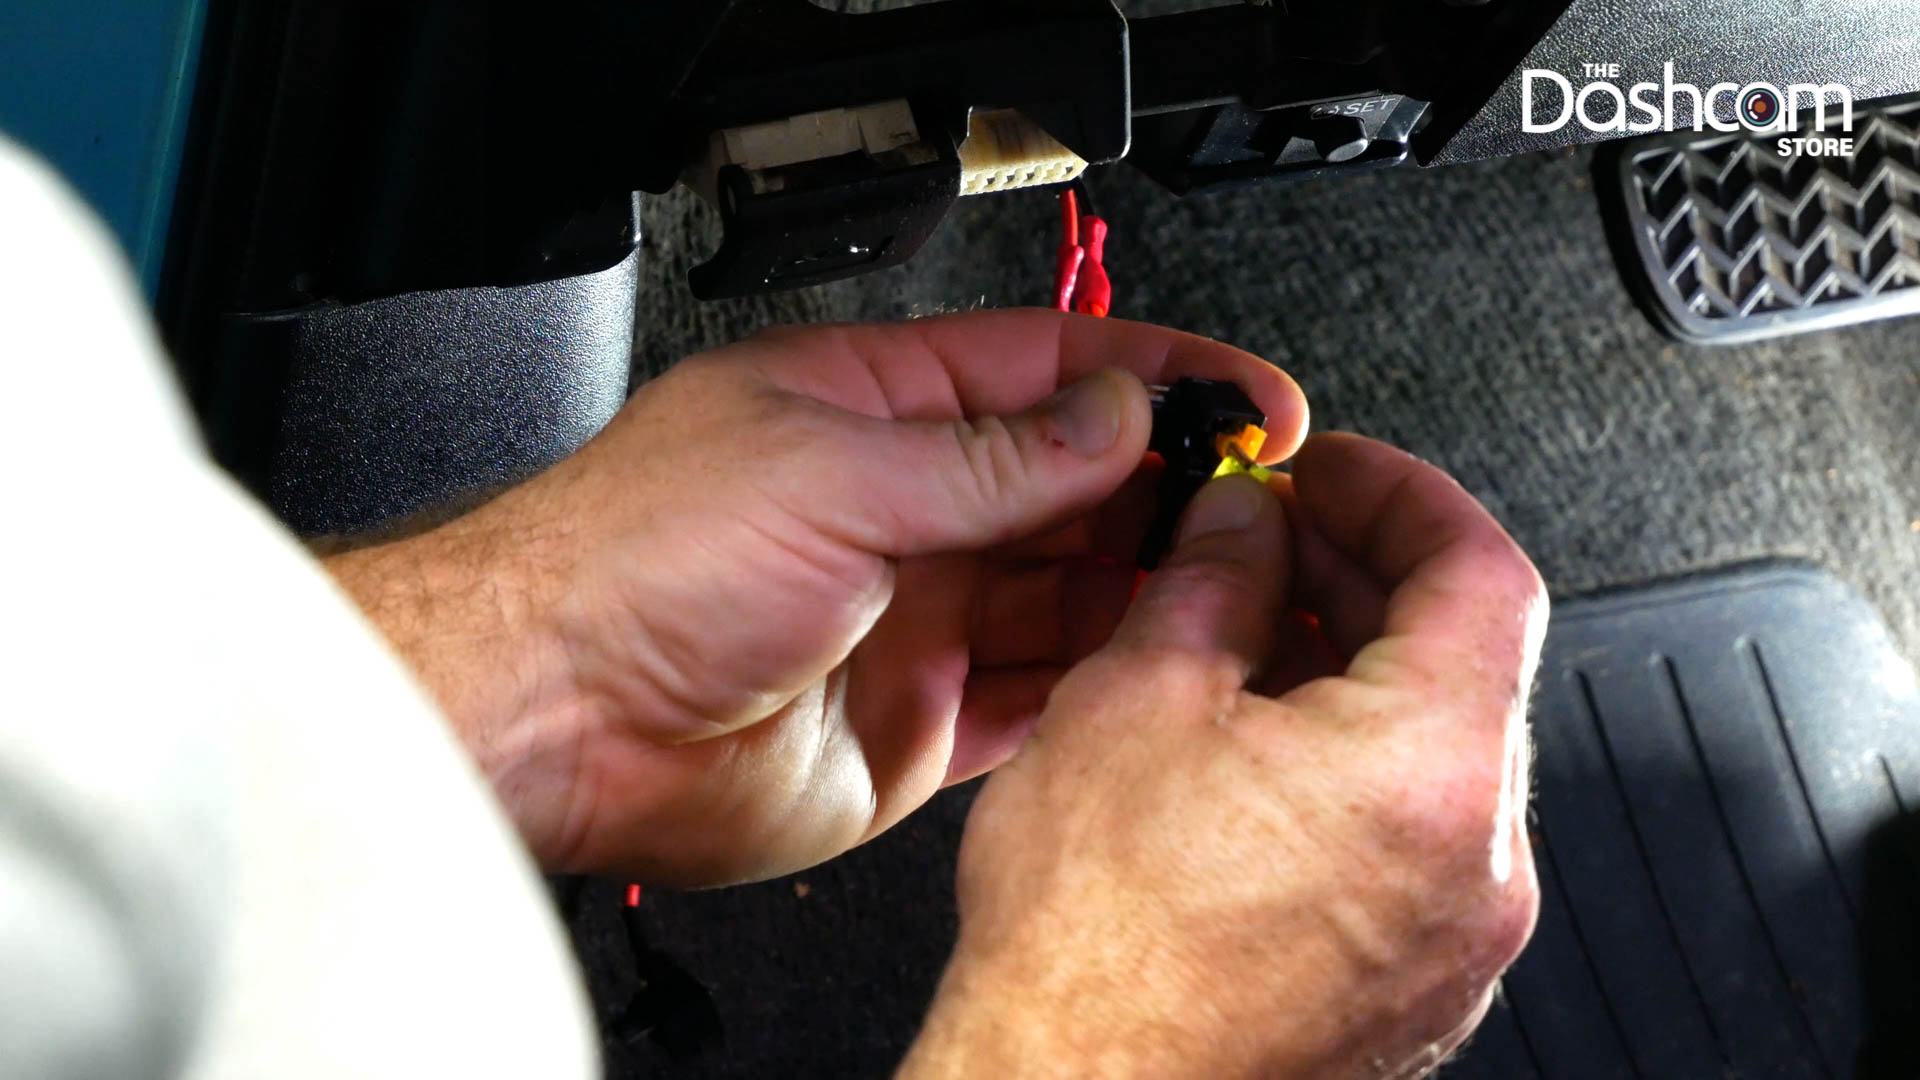
Plugging the removed fuse into the fuse tap: After removing the fuse, we’ll grab one of our fuse taps and insert the fuse we removed to the empty slot in the fuse tap. Then we need to connect the fuse tap securely to Thinkware’s Hardwiring Kit using a crimp tool or a pair of pliers. You want to make sure you get a nice complete crimp here so you don’t have any intermittent power issues later. Then finally, we’ll plug the fuse tap into the fuse box. Then, repeat the process for the other fuse and fuse tap.
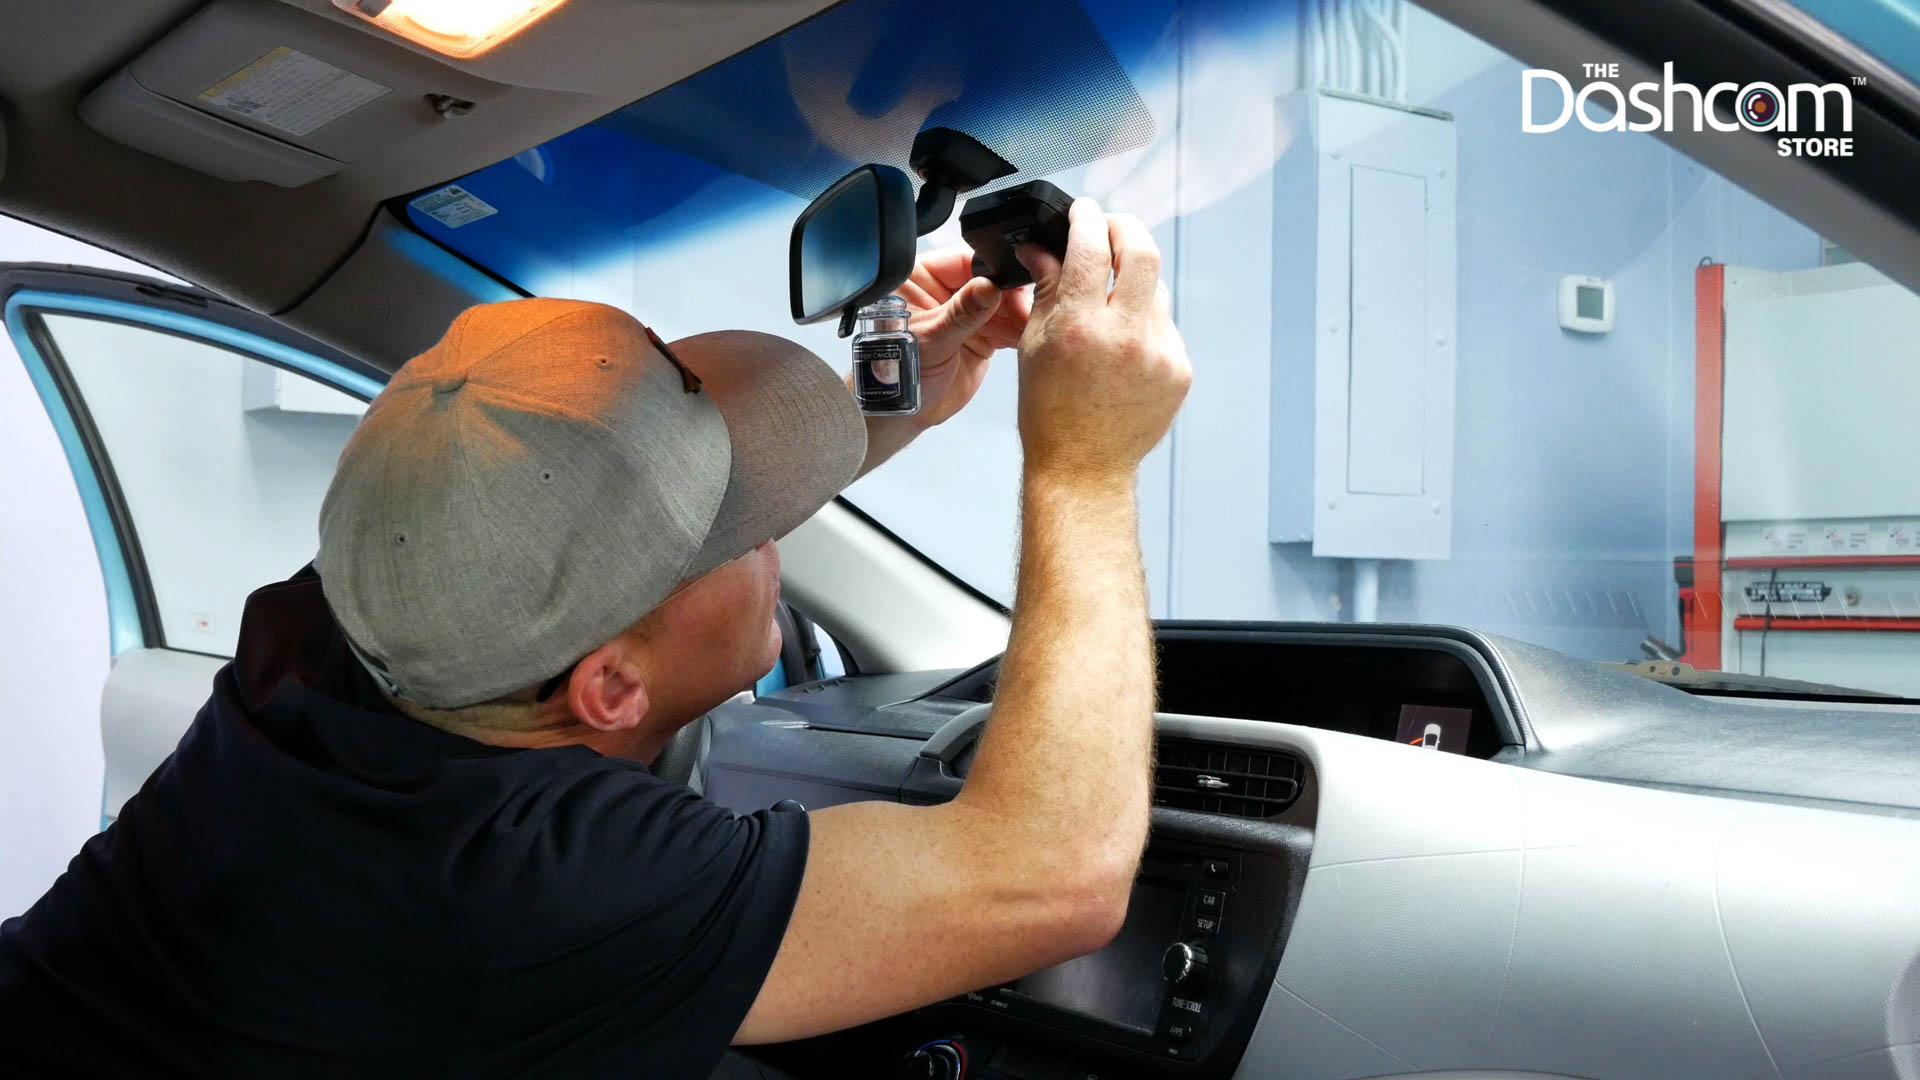
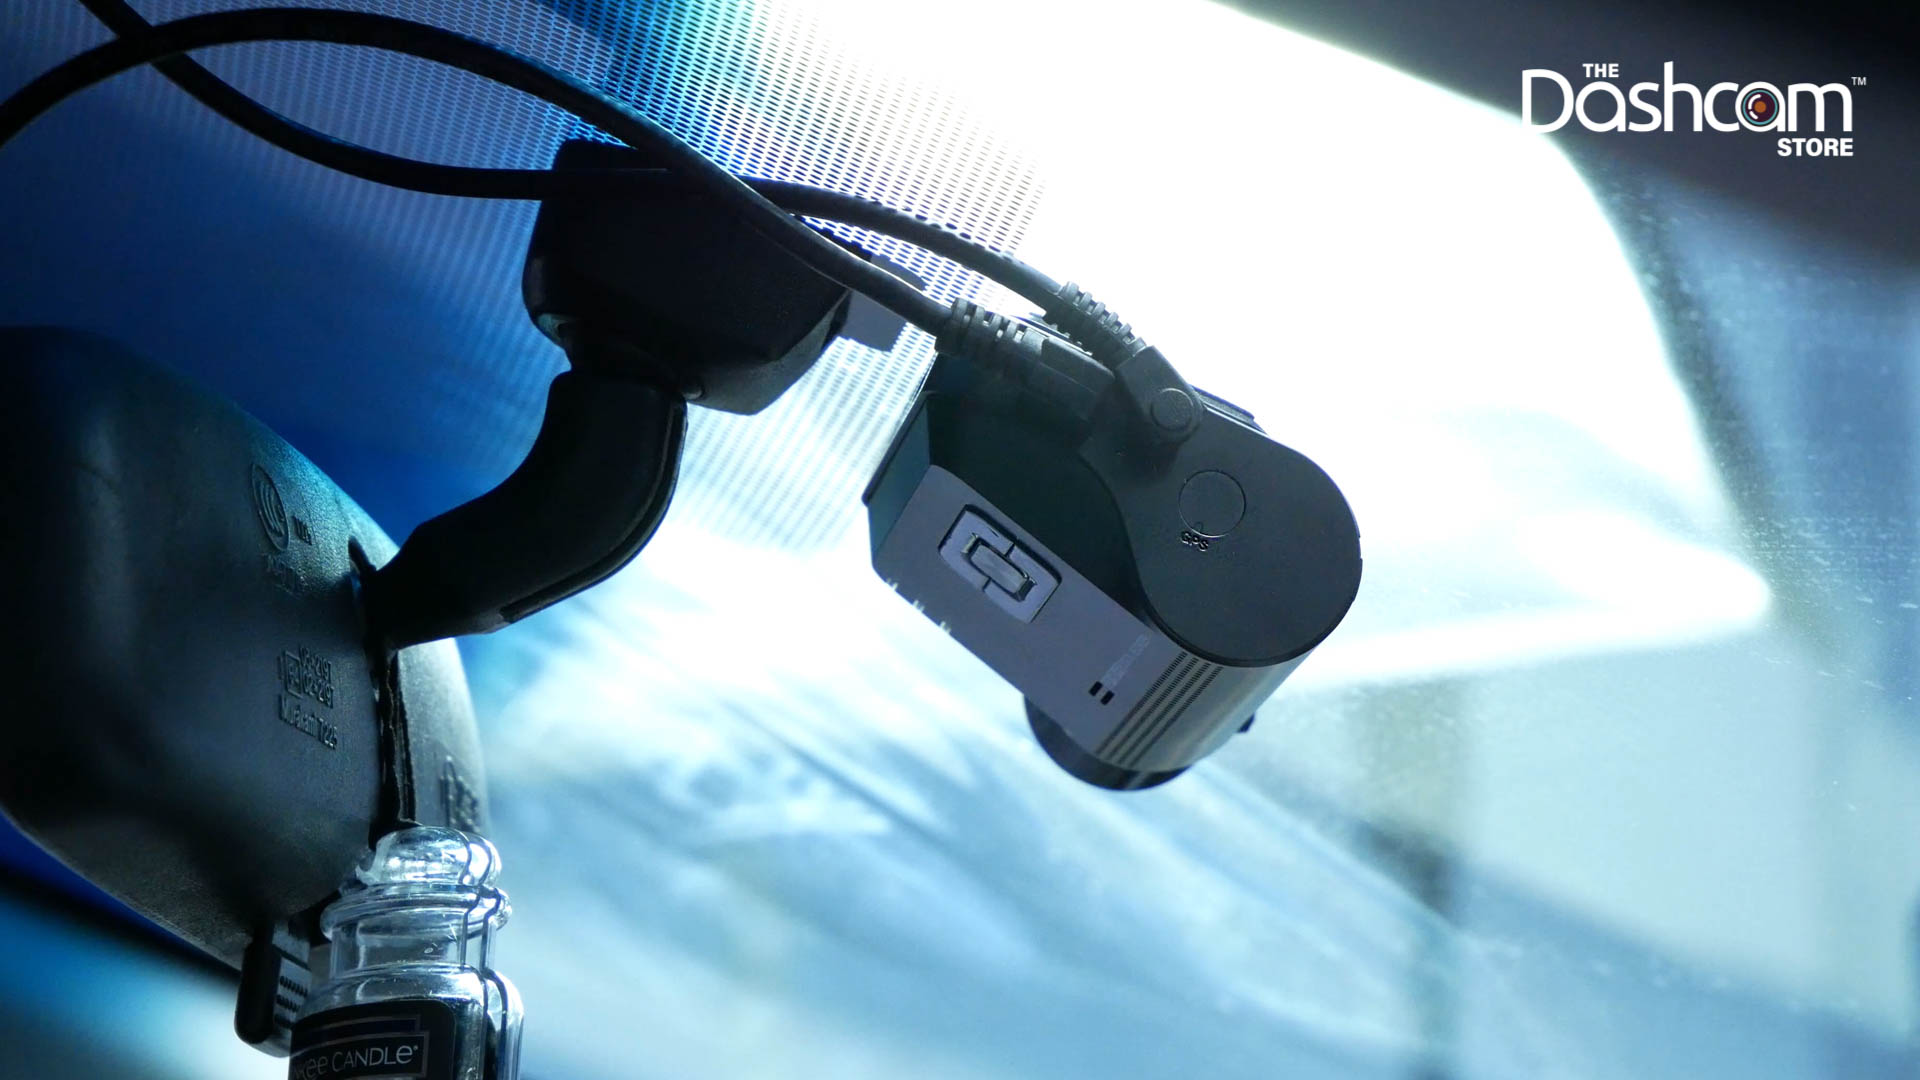
Mounting the front facing dash cam: Now, we mount our front facing camera. Be sure to thoroughly clean the windshield where the adhesive will be attached and allow it dry completely as well. This step is very important to ensure a secure and long-lasting attachment of your adhesive pad to the windshield glass.
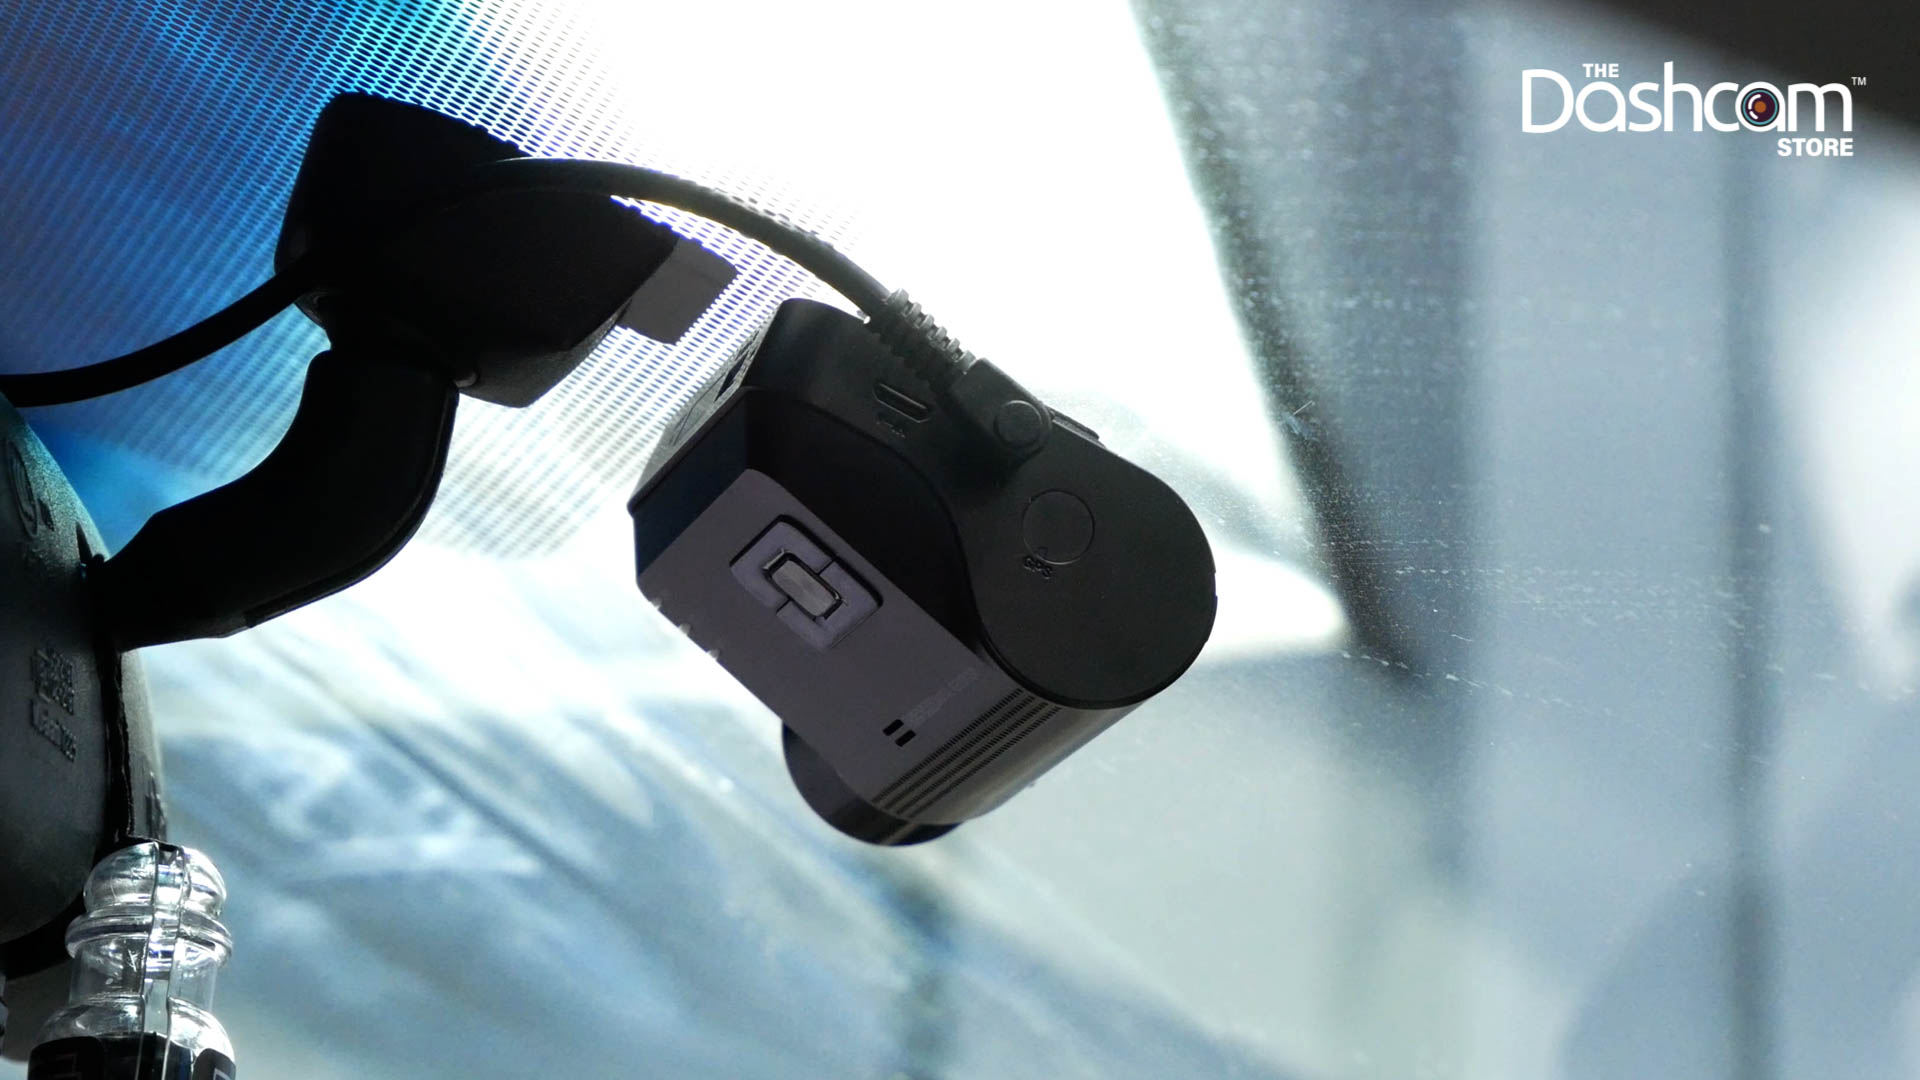
Plugging in the power cable: Next, we’ll run the power cable from the front camera down to where the fuse box is located. Then we’ll plug the power cable for the Thinkware F800 Pro directly into the “DC in” slot. Be sure to double check what slot you’re plugging the cable into, because incorrectly doing so can cause damage to your dash cam. We’ll be using the trim tool for this part to safely tuck excess cables into the headliner. As we make our way to the “A” pillar we’ll continue tucking the wiring along the headliner. Don’t worry about the excess cables being loose, we’ll use our provided cable clips to secure the cables in place later.
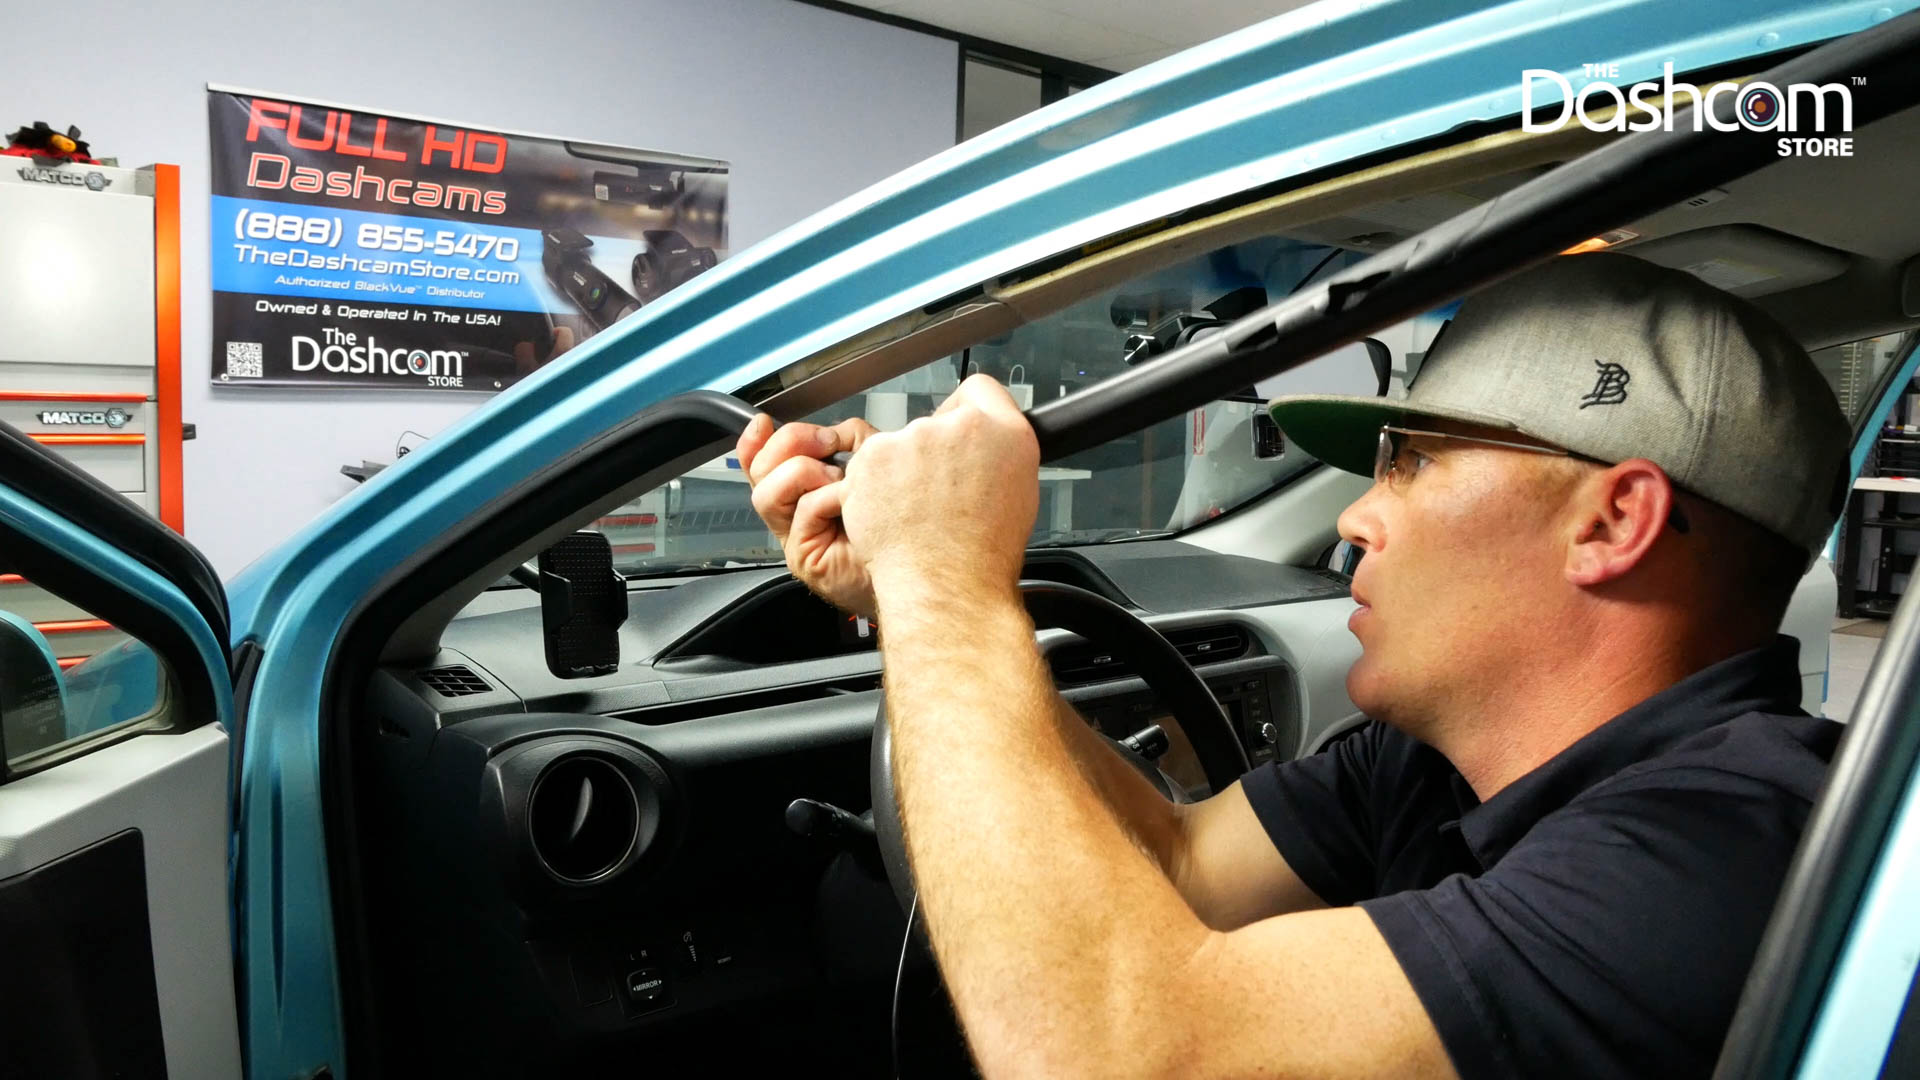
Tucking away wires: This may vary for some but, to tuck some of the wiring away we’re going to have to temporarily remove the weather stripping on the vehicle’s door for easier access to the “A” pillar. Lightly tug on the weather stripping and it will come off creating a convenient gap behind the “A” pillar allowing us to take advantage of the space to tuck our cables behind.
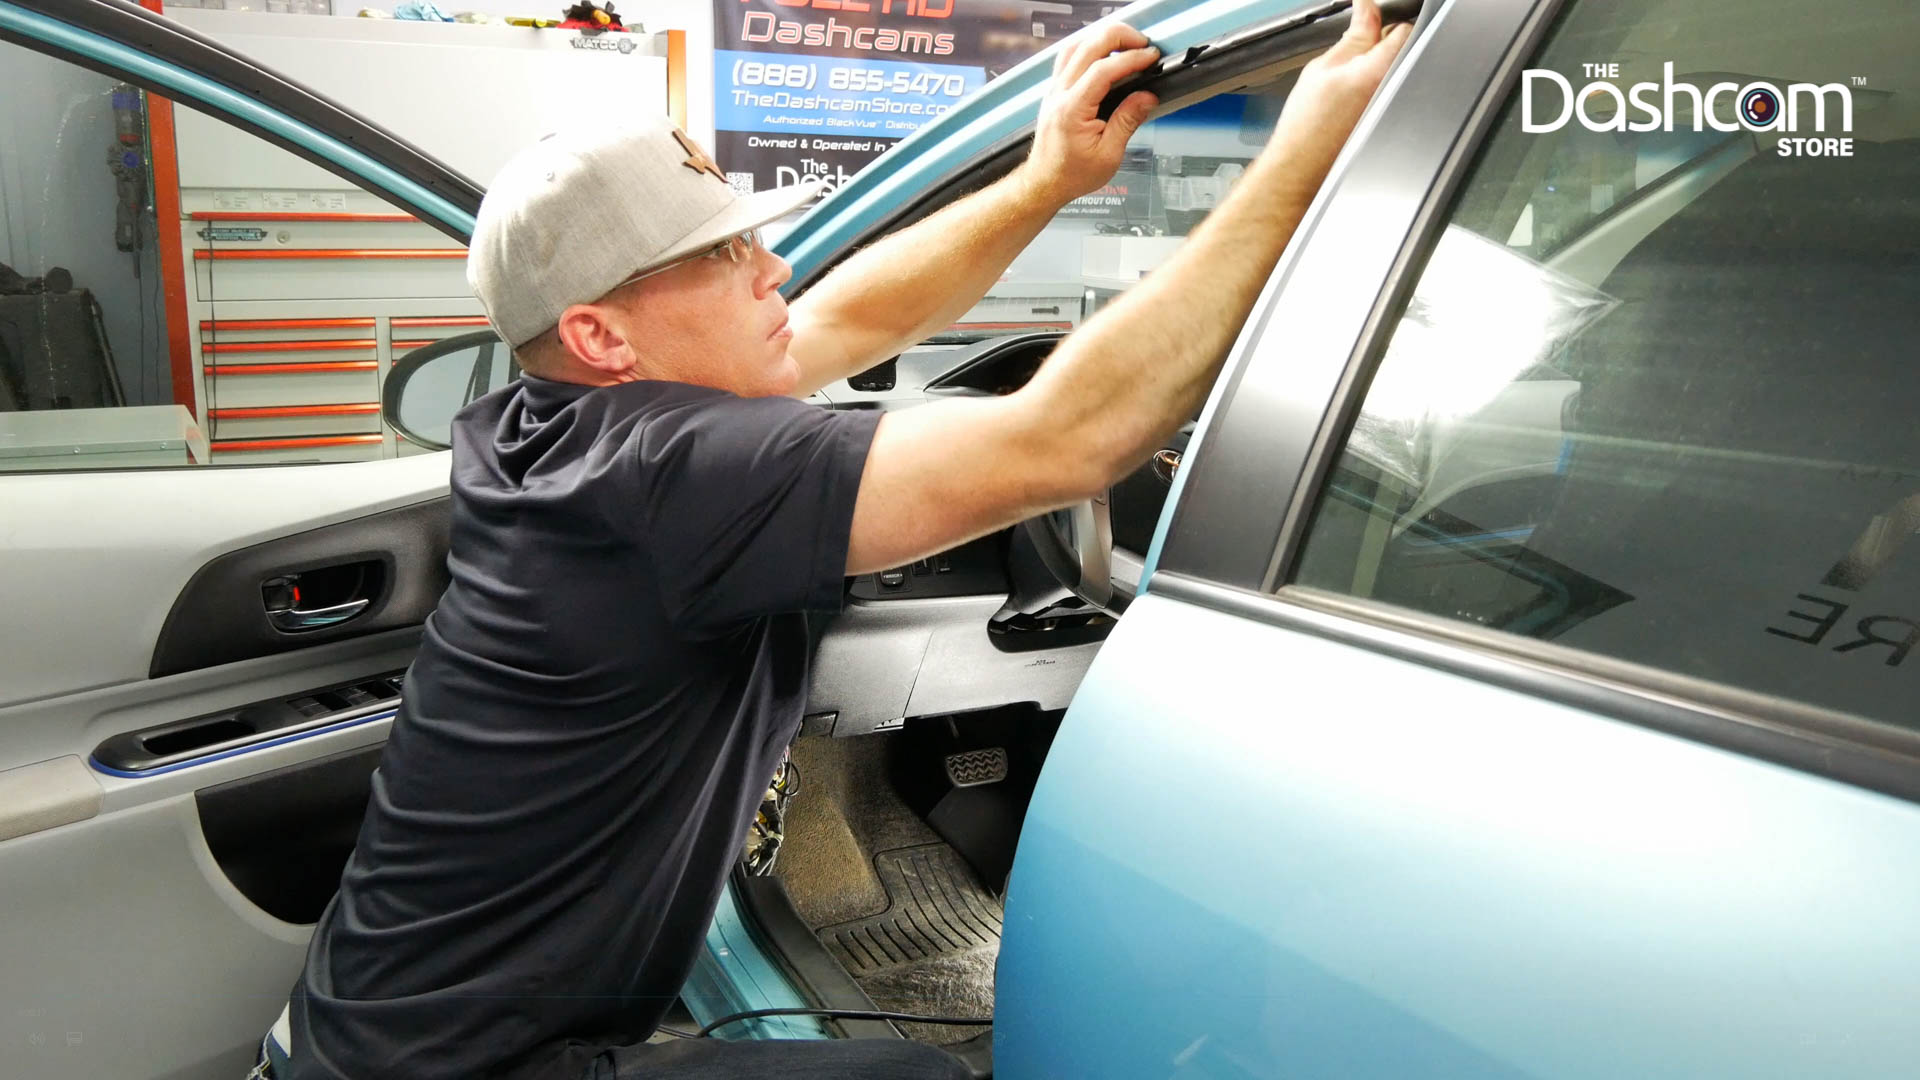
Buttoning up the front camera installation: Be careful when tucking the cables into and around the “A” pillar to avoid interference with any side-curtain air bags that may be located behind the “A” pillar or headliner. If your vehicle is equipped with airbags like this, please consult a professional for the best way to route the cable so that it does not interfere with airbag deployment in the event of an accident. Typically, the cable can be routed behind the path of airbag deployment, but every vehicle is different so please verify this yourself for your own specific vehicle.
From here, we’ll just continue running the cable down to the fuse box. Once all the cables are hidden behind the interior of your vehicle trim, we can make sure everything is properly secured in place. Now that you’ve drawn the wire you can button up your install and test for proper operation. Congratulations, you’ve successfully installed a 1-channel system! But, if you opted for the rear camera as well, this installation now becomes a 2-channel system. Let’s move on to the rear cam installation.
Powering the rear camera: Now we’re going to plug in the cable needed to power the rear camera; this cable plugs into the micro USB port. After plugging in the cable, we’ll continue running the cables through the headliner all the way to the back of the vehicle by the trunk hatch. We’ll have to run the cable over the top of the “B” pillar and then we’ll thread it around the “C” pillar as well. Once again, to make things easy we’ll temporarily remove the weather stripping by lightly tugging on it to remove it, then we’ll have enough of a gap to continue threading the cable through the “B” pillar all the way to the trunk of the vehicle.

Mounting the rear camera: Now that we’re at the trunk of the vehicle we can take a second and mount our rear camera. Make sure the surface area where you’ll be mounting your camera is clean before mounting your dash cam. Then we’ll feed the cable through the rubber grommet up into the trunk trim. Once you’ve finished running the cable through the rubber grommet into the trunk panel of the vehicle, we’ll snap the trunk panel back into place and finally we can plug the cable into the rear dash cam.
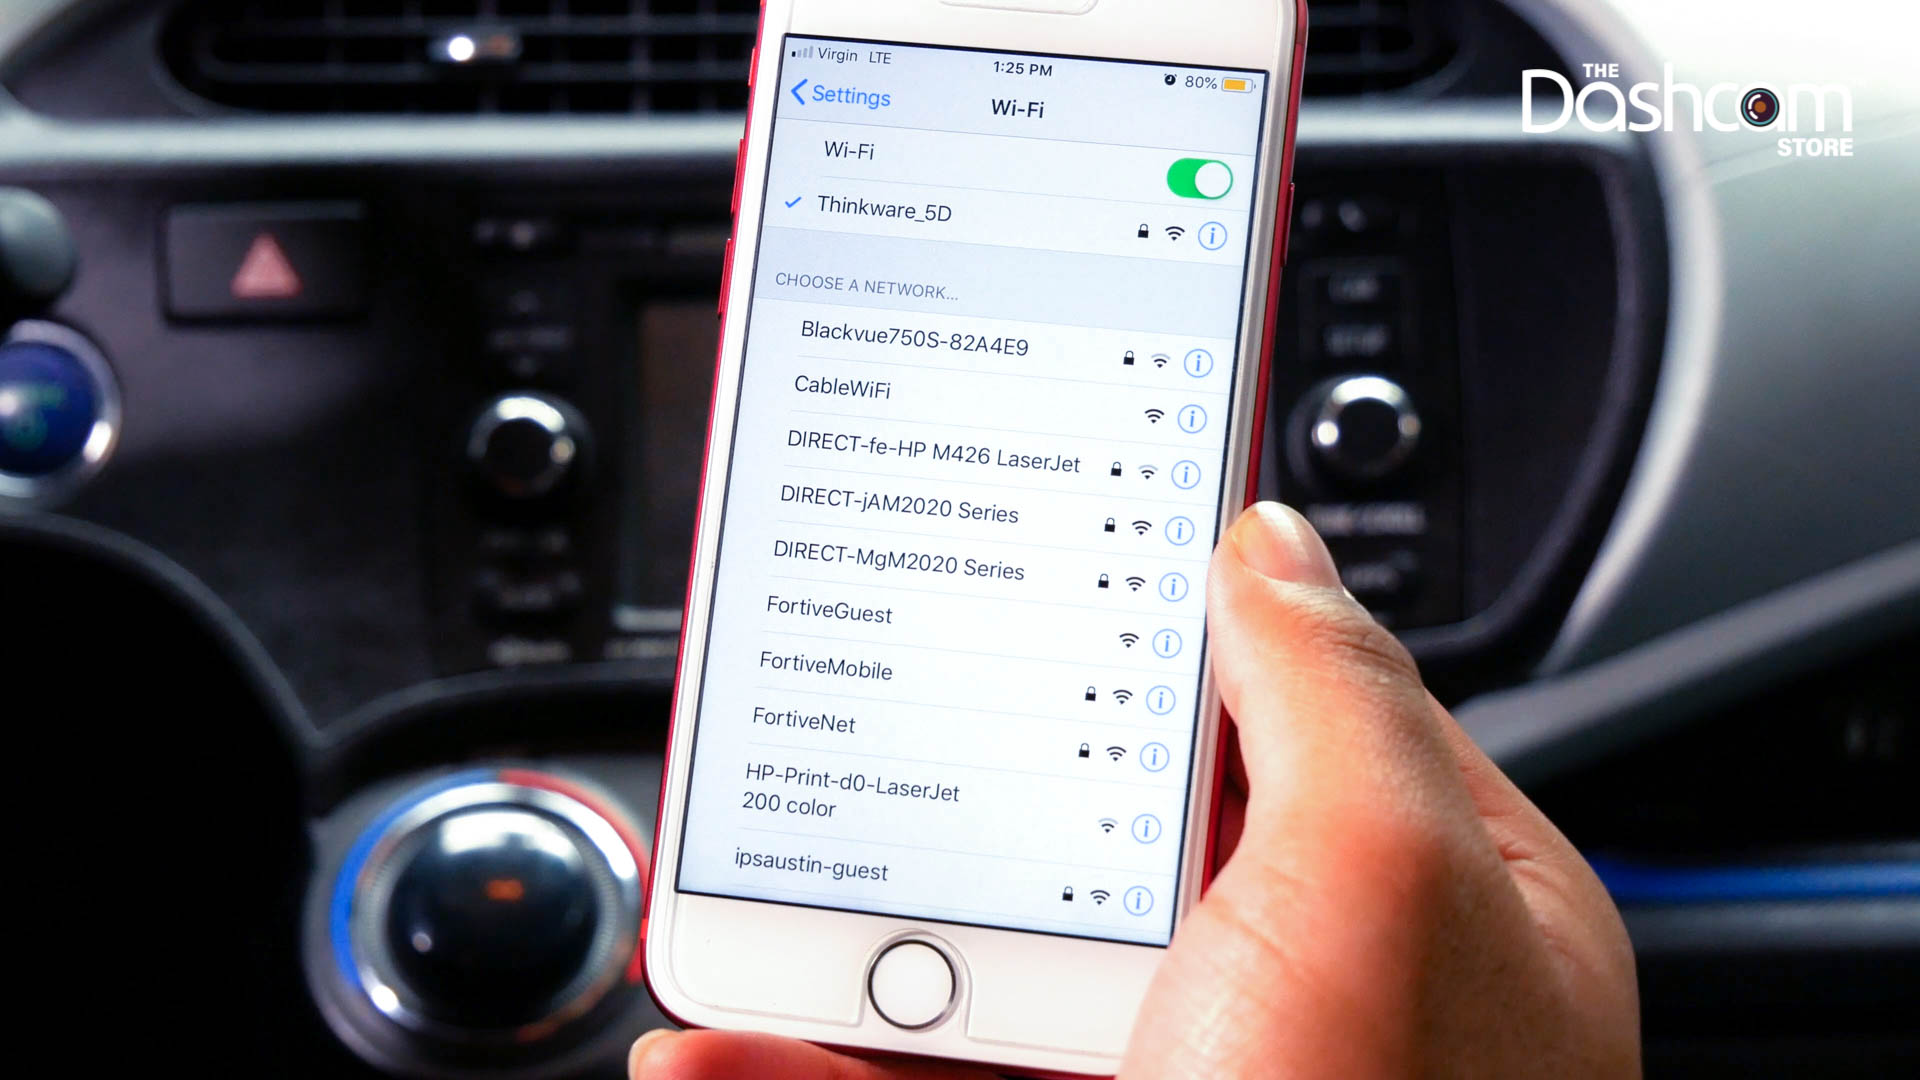
Connecting to your dash cam’s Wi-Fi: Both cameras are connected to power and all wires are hidden, let’s go ahead and power on our dash cams and check out the Thinkware application! In the Thinkware Application you can view and adjust dash cam settings but, first you’ll have to connect to your camera’s Wi-Fi. Connect to a network with the name Thinkware and a corresponding number assigned to it. The default password is “123456789”.
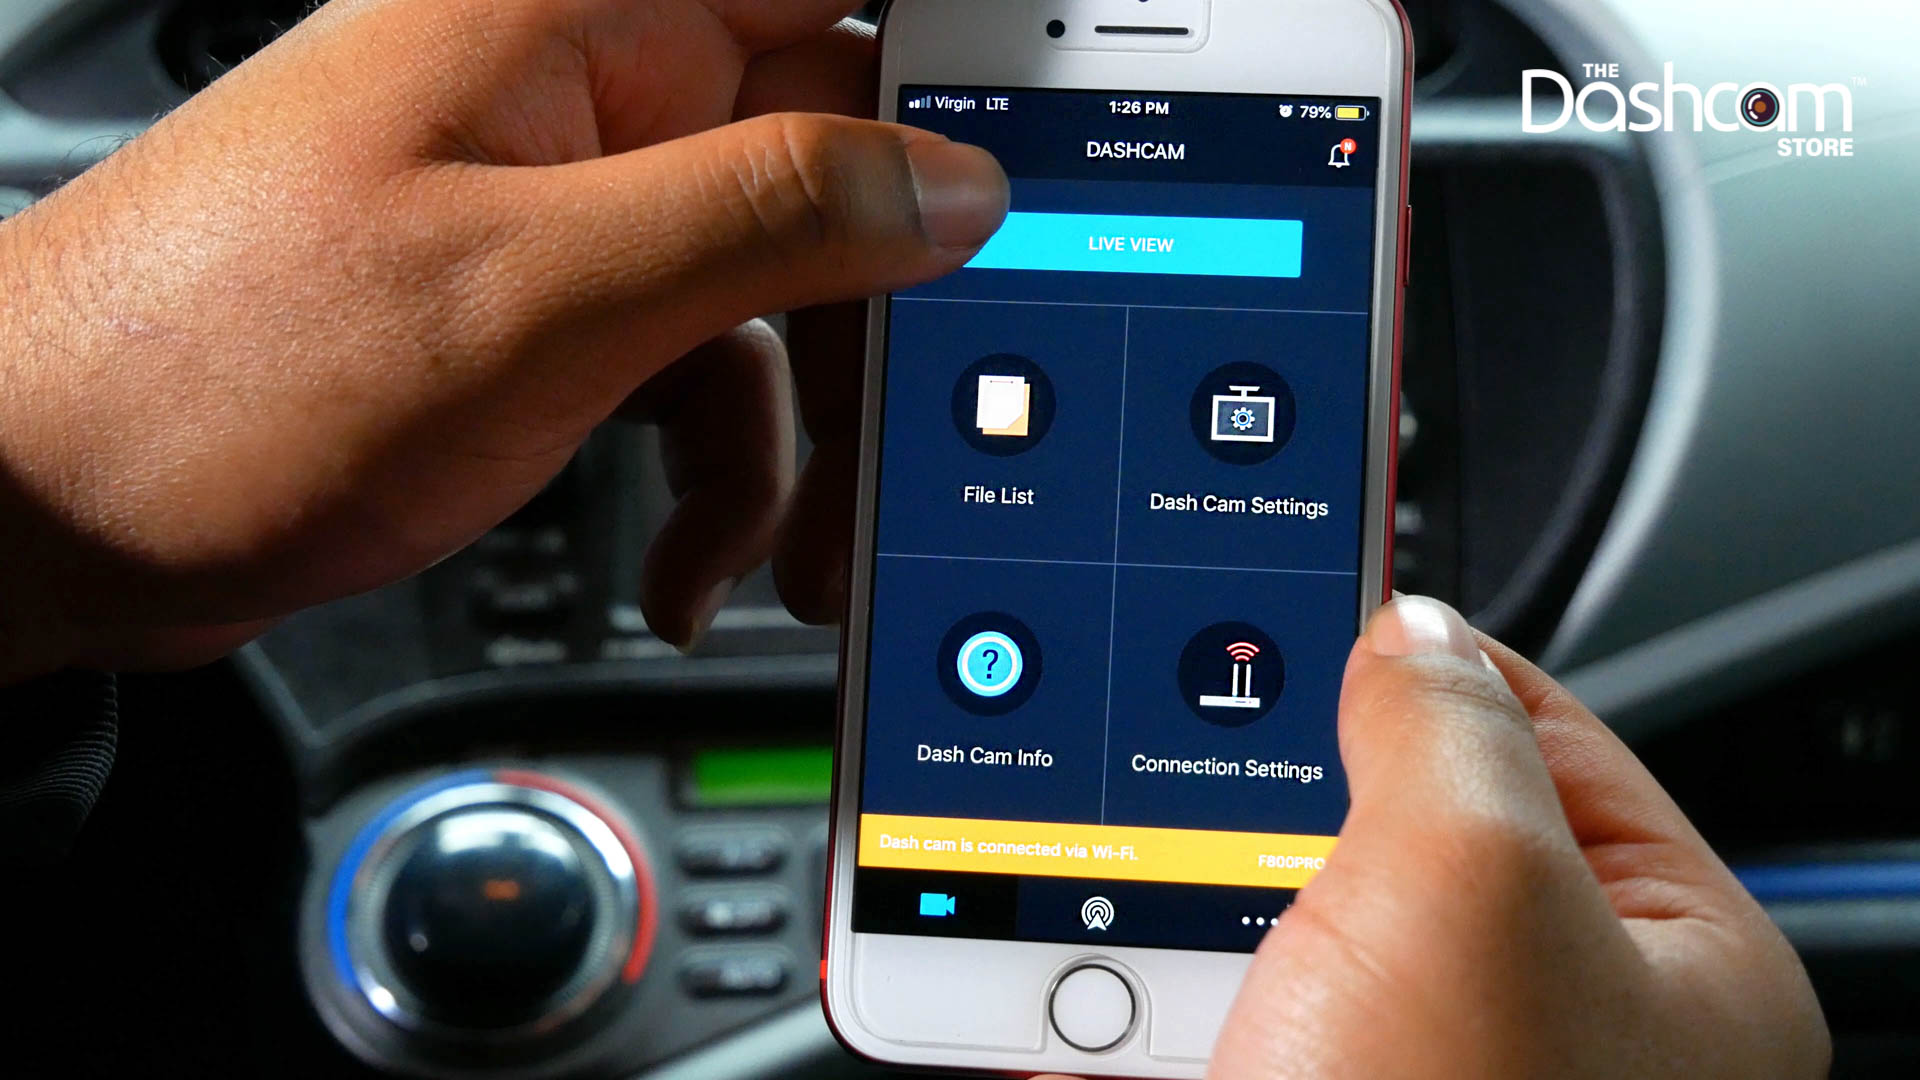
Helpful features of the Thinkware smartphone app:
- "Live View" allows a view of your dash cam’s camera angle/alignment
- "Dash cam Setting" enables you to format your SD card and adjust various dash cam settings from camera sensitivity, to volume of your camera’s audio cues
- And finally, in "File List" you can stream and view your video files from parking mode incidents, motion detection incidents, manual recordings and continuous recordings

And there you have it! Today we learned how to hardwire a Thinkware dash cam to take advantage of the advanced parking mode and to get a cleaner, wire-free install.
For more information or to purchase the Thinkware F800 Pro dash cam or hardwire cable as seen in the video above, please click below:
Thank you for reading, and as always drive safe!
To request additional information, please don't hesitate to contact us. We give our best effort to respond to all inquiries within 1 business day.