
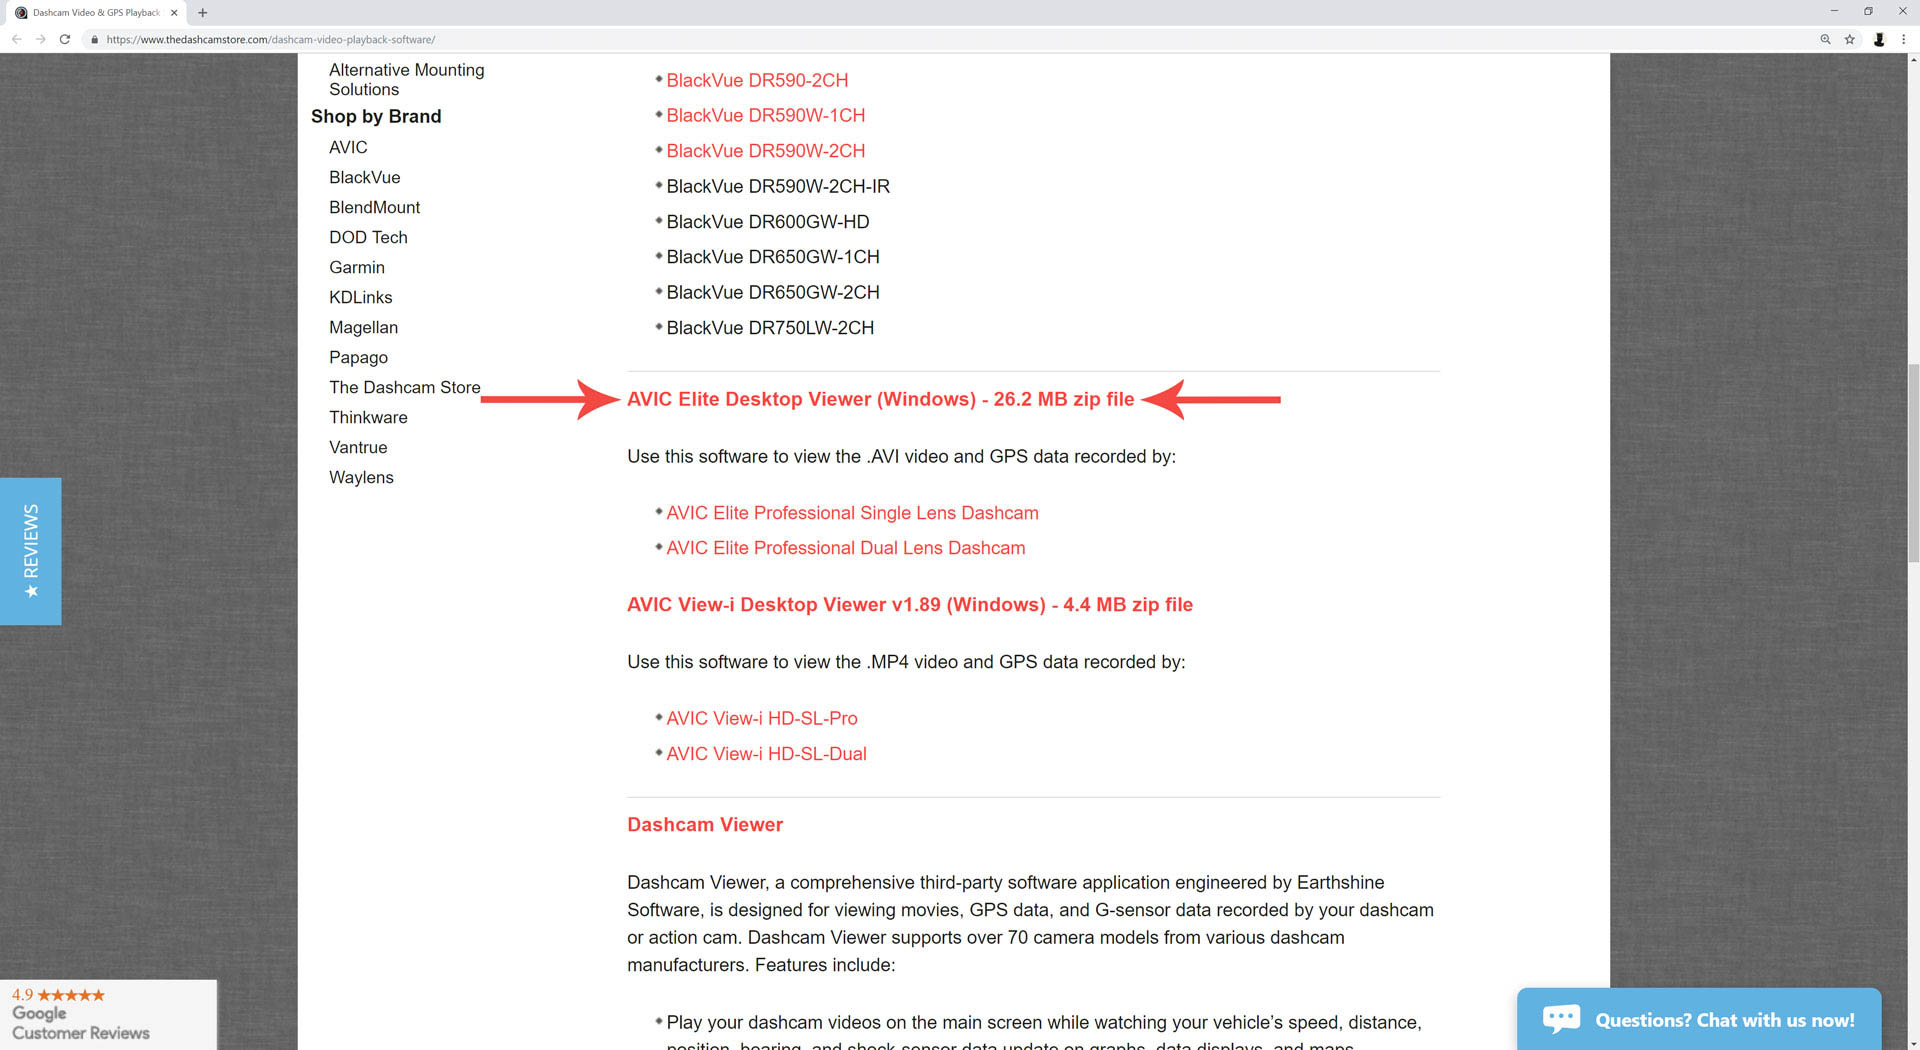
Step 1 - Downloading the AVIC Elite Viewer Software
You may download the AVIC Elite Viewer software from our video playback software downloads page or download directly by clicking the link below.
Direct download link: AVIC Elite PC Viewer (Windows) - 29.2 MB zip file
Step 2 - Running the AVIC Elite Viewer Setup
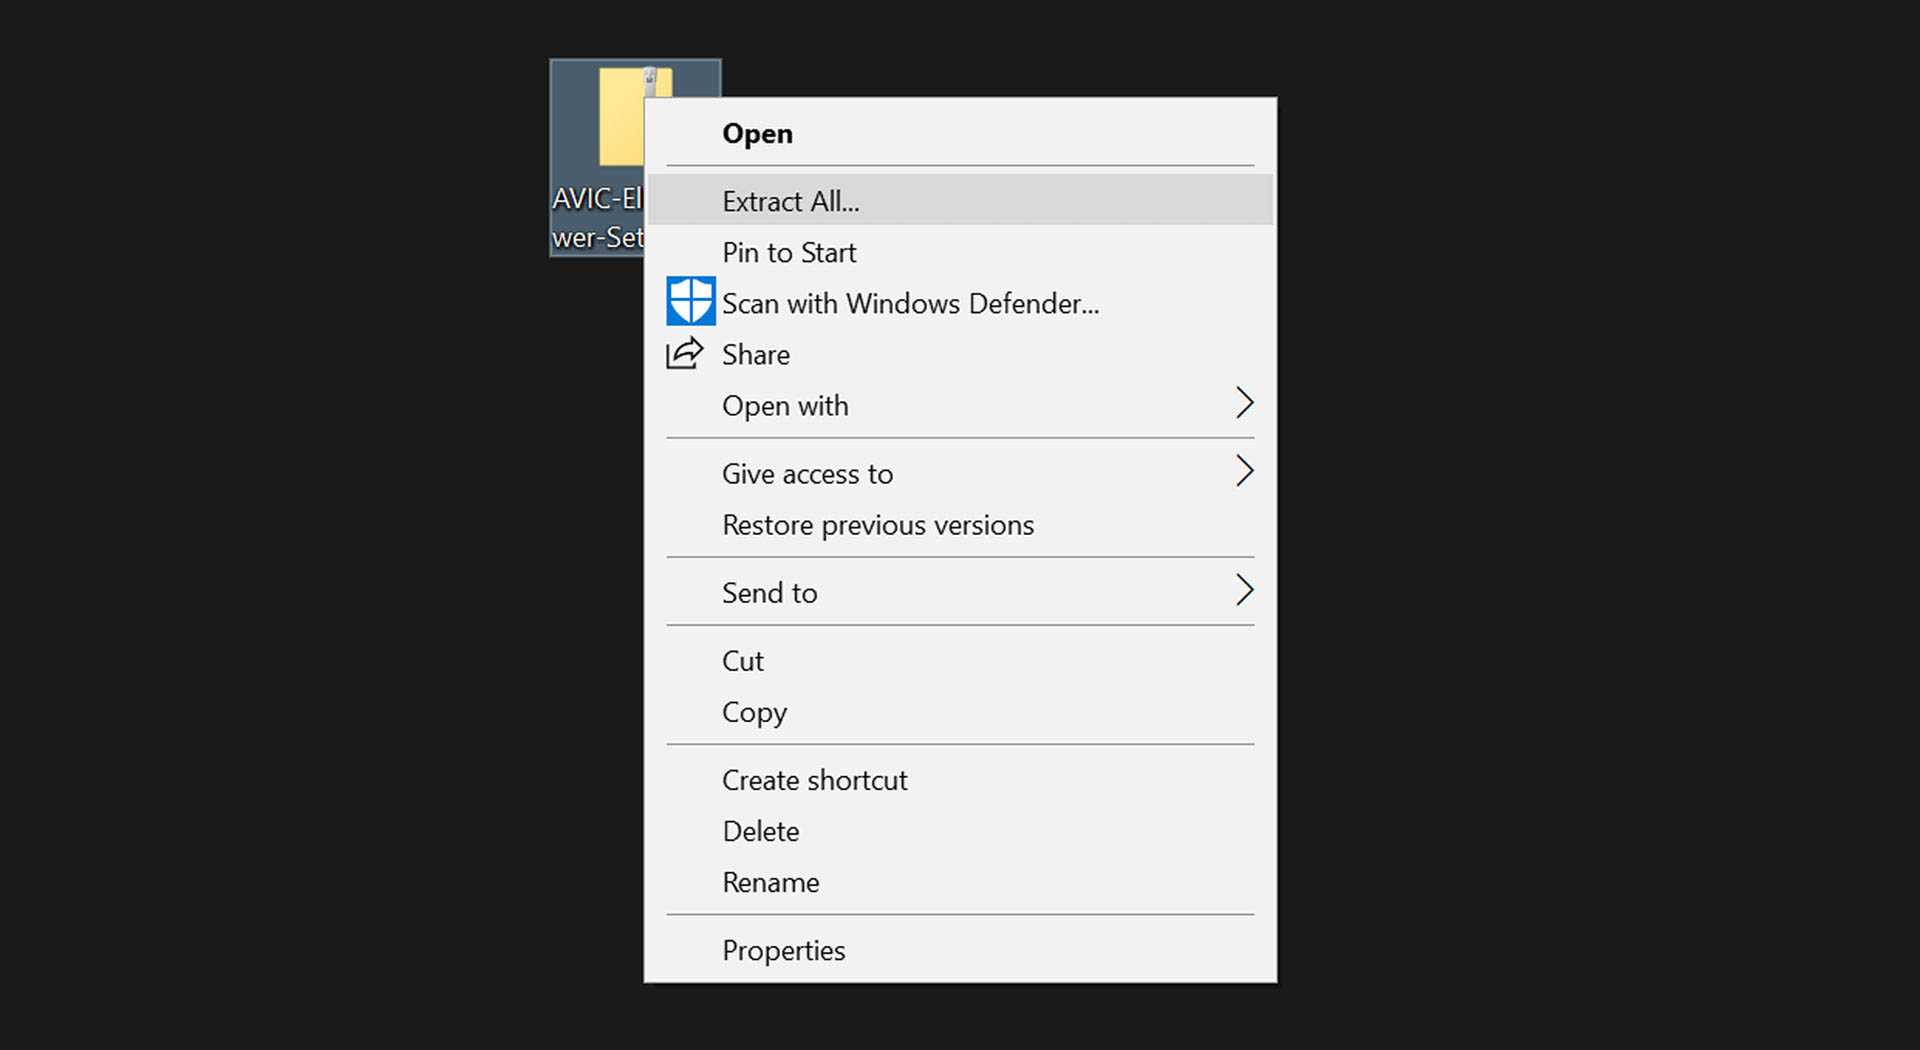
After downloading the software, you’ll need to navigate to where you saved the “AVIC-Elite-Viewer-Setup.zip” file. Once you’ve located the AVIC-Elite-Viewer-Setup.zip file, you'll need to extract the files (because the files come in a “zipped” folder). To extract, simply right click on the “zipped” AVIC-Elite-Viewer-Setup folder and then click on the text “Extract All”.
You'll be prompted to select a location for the files to be unzipped (extracted) to; you can create a new folder for these files or you can save the files to your desktop or another location which automatically creates a folder named “AVIC-Elite-Viewer-Setup”.
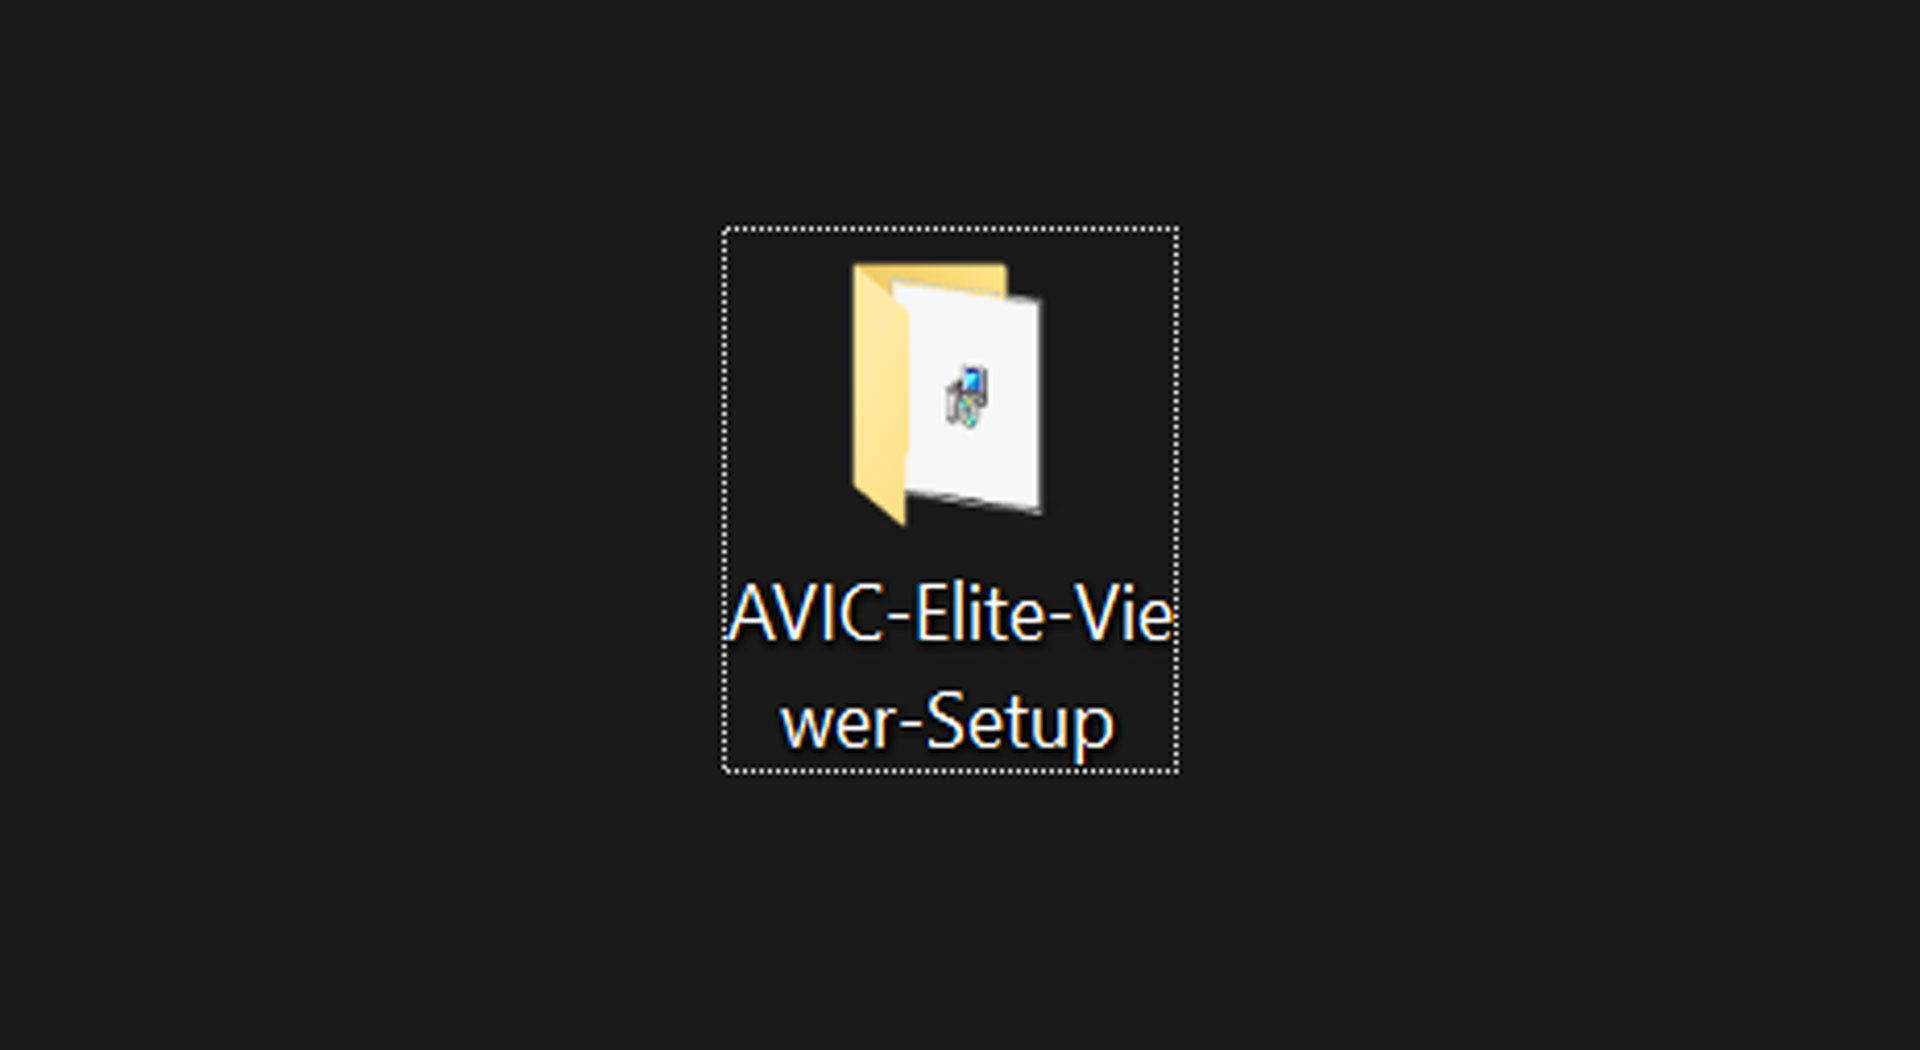
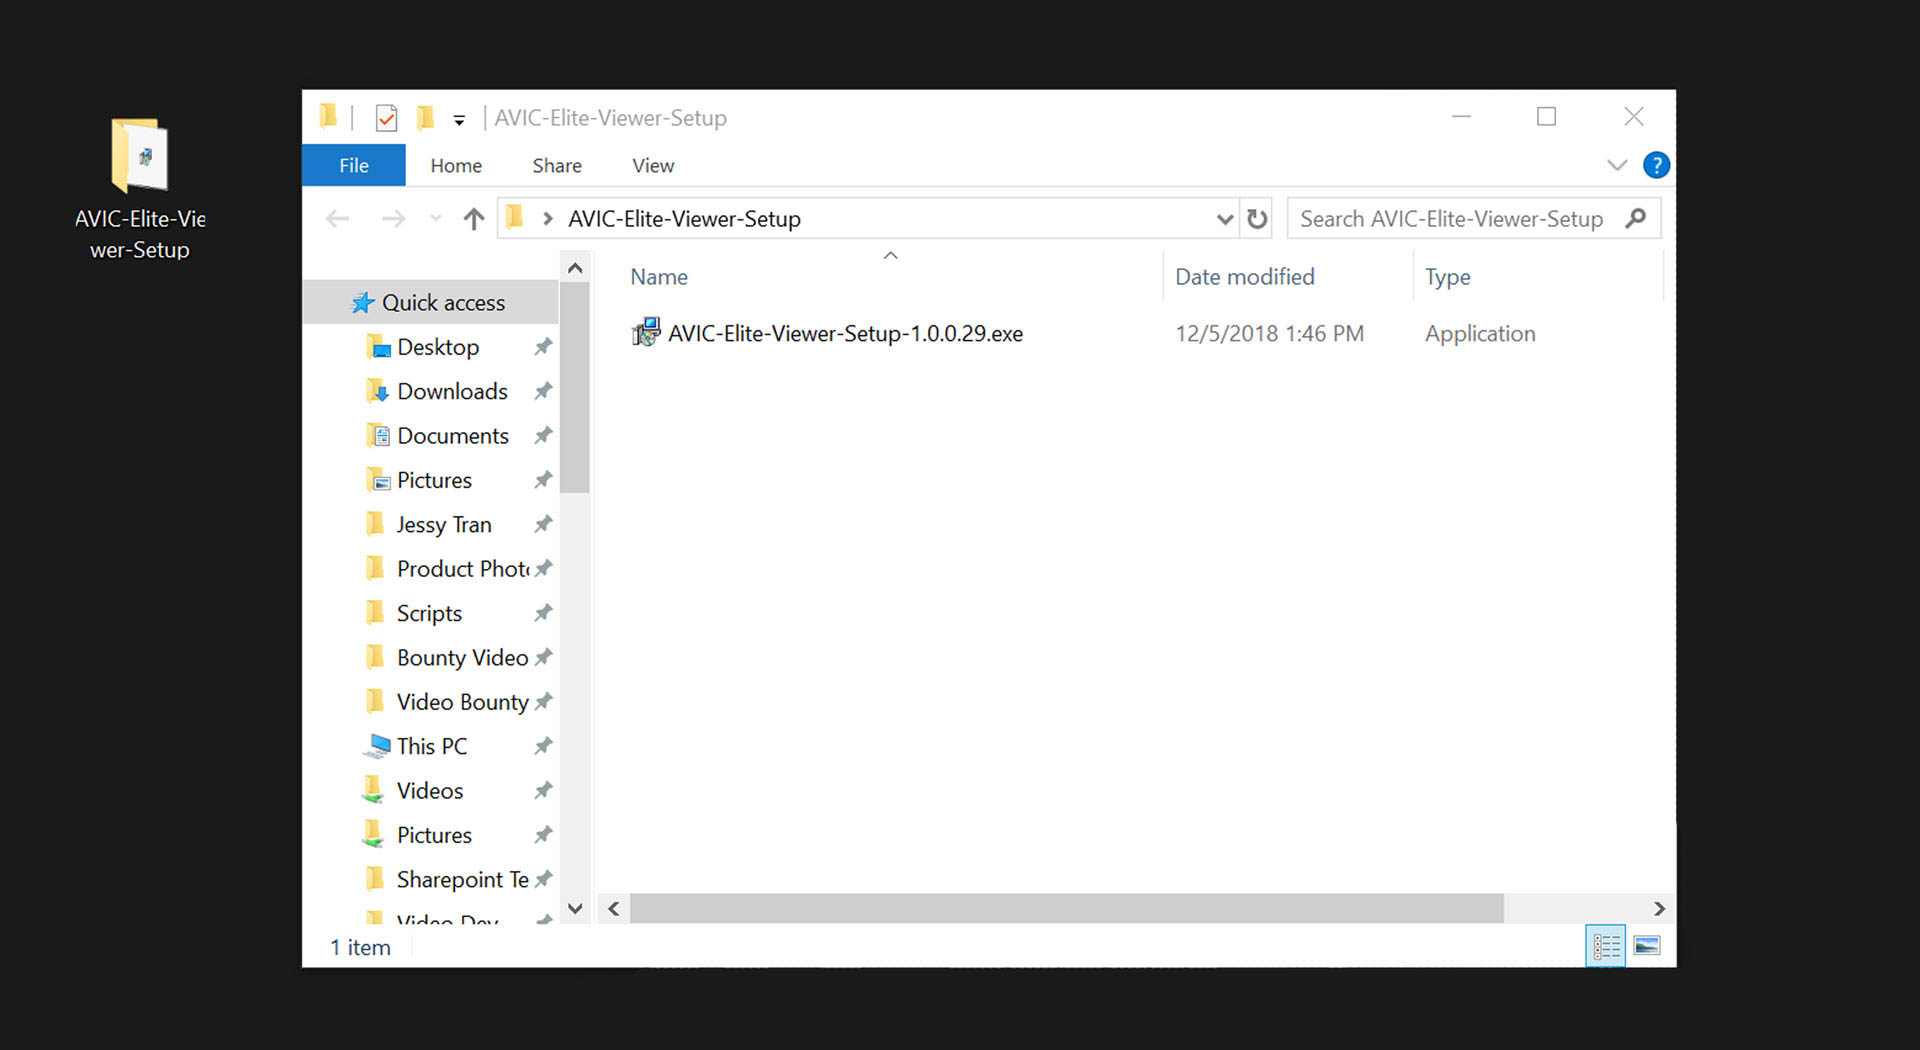
Now that the files are extracted, open the “AVIC-Elite-Viewer-Setup” folder at the location you’ve designated during the extraction. Once you’ve opened the folder, double click on “AVIC-Elite-Viewer-Setup.exe” to start the setup process.
Step 3 - Installing the AVIC Elite Viewer Software
You’ll see a new “Setup” window displayed. This “Setup” window will ask if you’d like to create a desktop shortcut. Having a desktop shortcut is up to your discretion; it doesn’t affect the files in any way. It simply creates a shortcut icon located on your desktop for convenient access to open the program in the future.
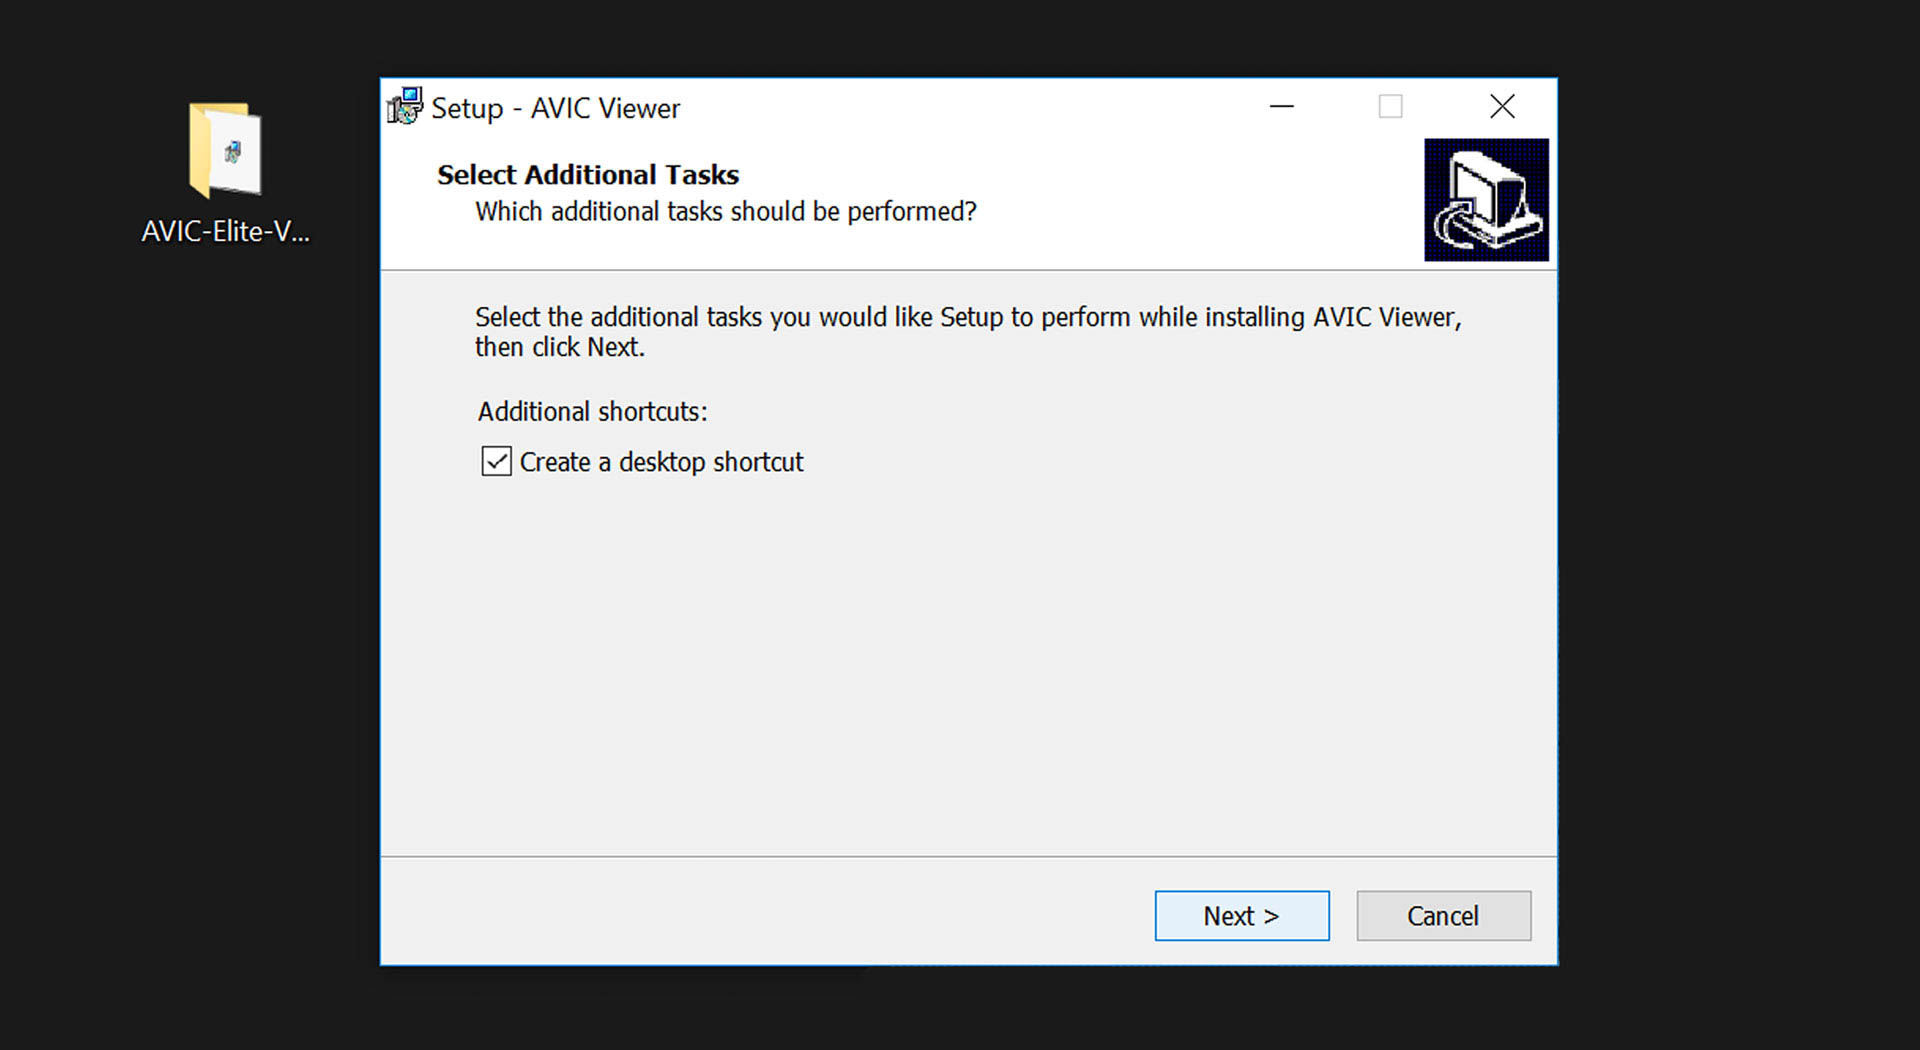
Mouse over to the bottom of the screen and click “Next.” Then click "Install" to proceed with installing the AVIC Elite Viewer Software. When the software is finished installing, the next screen will ask if you want to “Launch AVIC Viewer”. You can leave this checked if you plan on running the program immediately or you can uncheck it and run the program later. Click on “Finish” to proceed.

If you chose to leave the “Launch AVIC Viewer” box checked in the previous screen, the program will immediately start up. At this point if the software is up to date, it will open to the AVIC Elite Viewer application. If the application isn’t up to date the software will automatically begin to update to the latest version. Just be patient if you see the "updating" window, as this process may take several minutes to complete (the latest updates are being applied automatically over the internet).
Step 4 - Importing AVIC Video Files For Playback
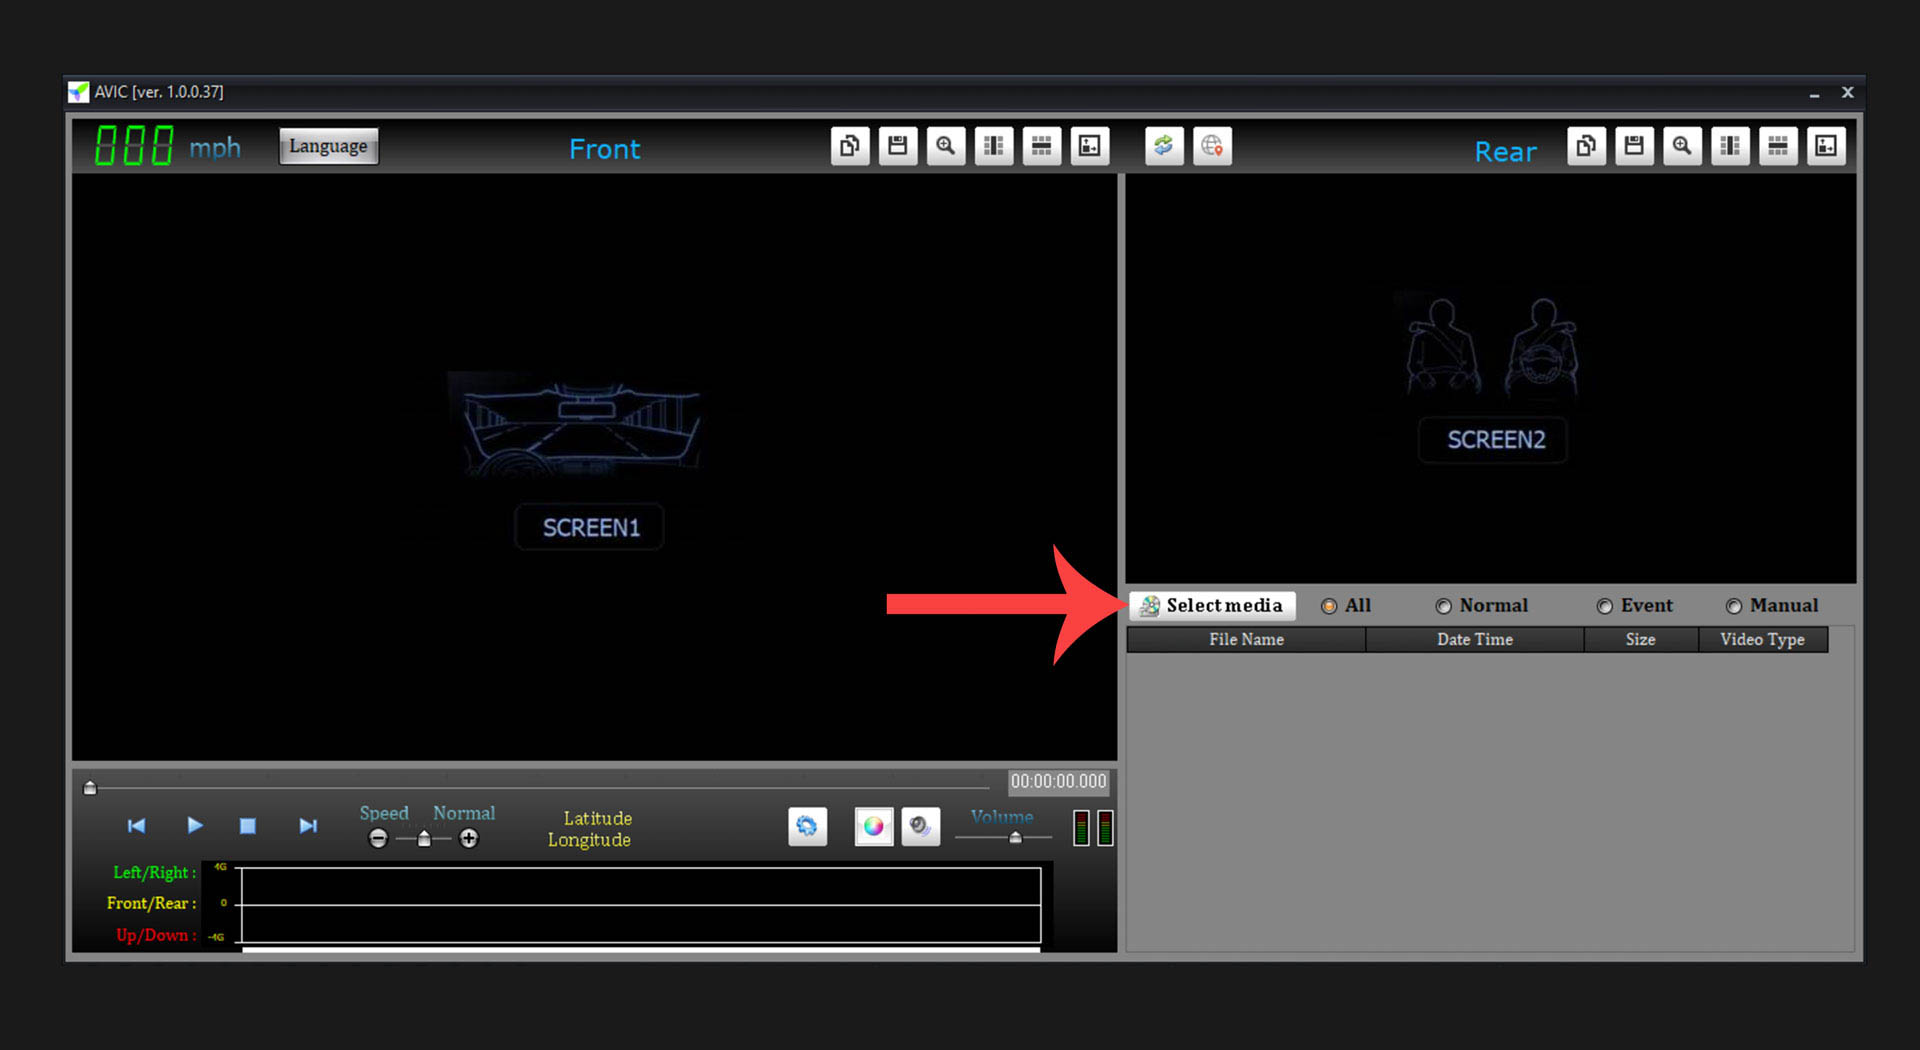
Once the AVIC Elite Viewer application is open, it should look like this. Navigate over to the “Select Media” button to begin importing your video files. Once you click on the “Select Media” button there will be three options to import your footage: “Disk, File, and folder”.
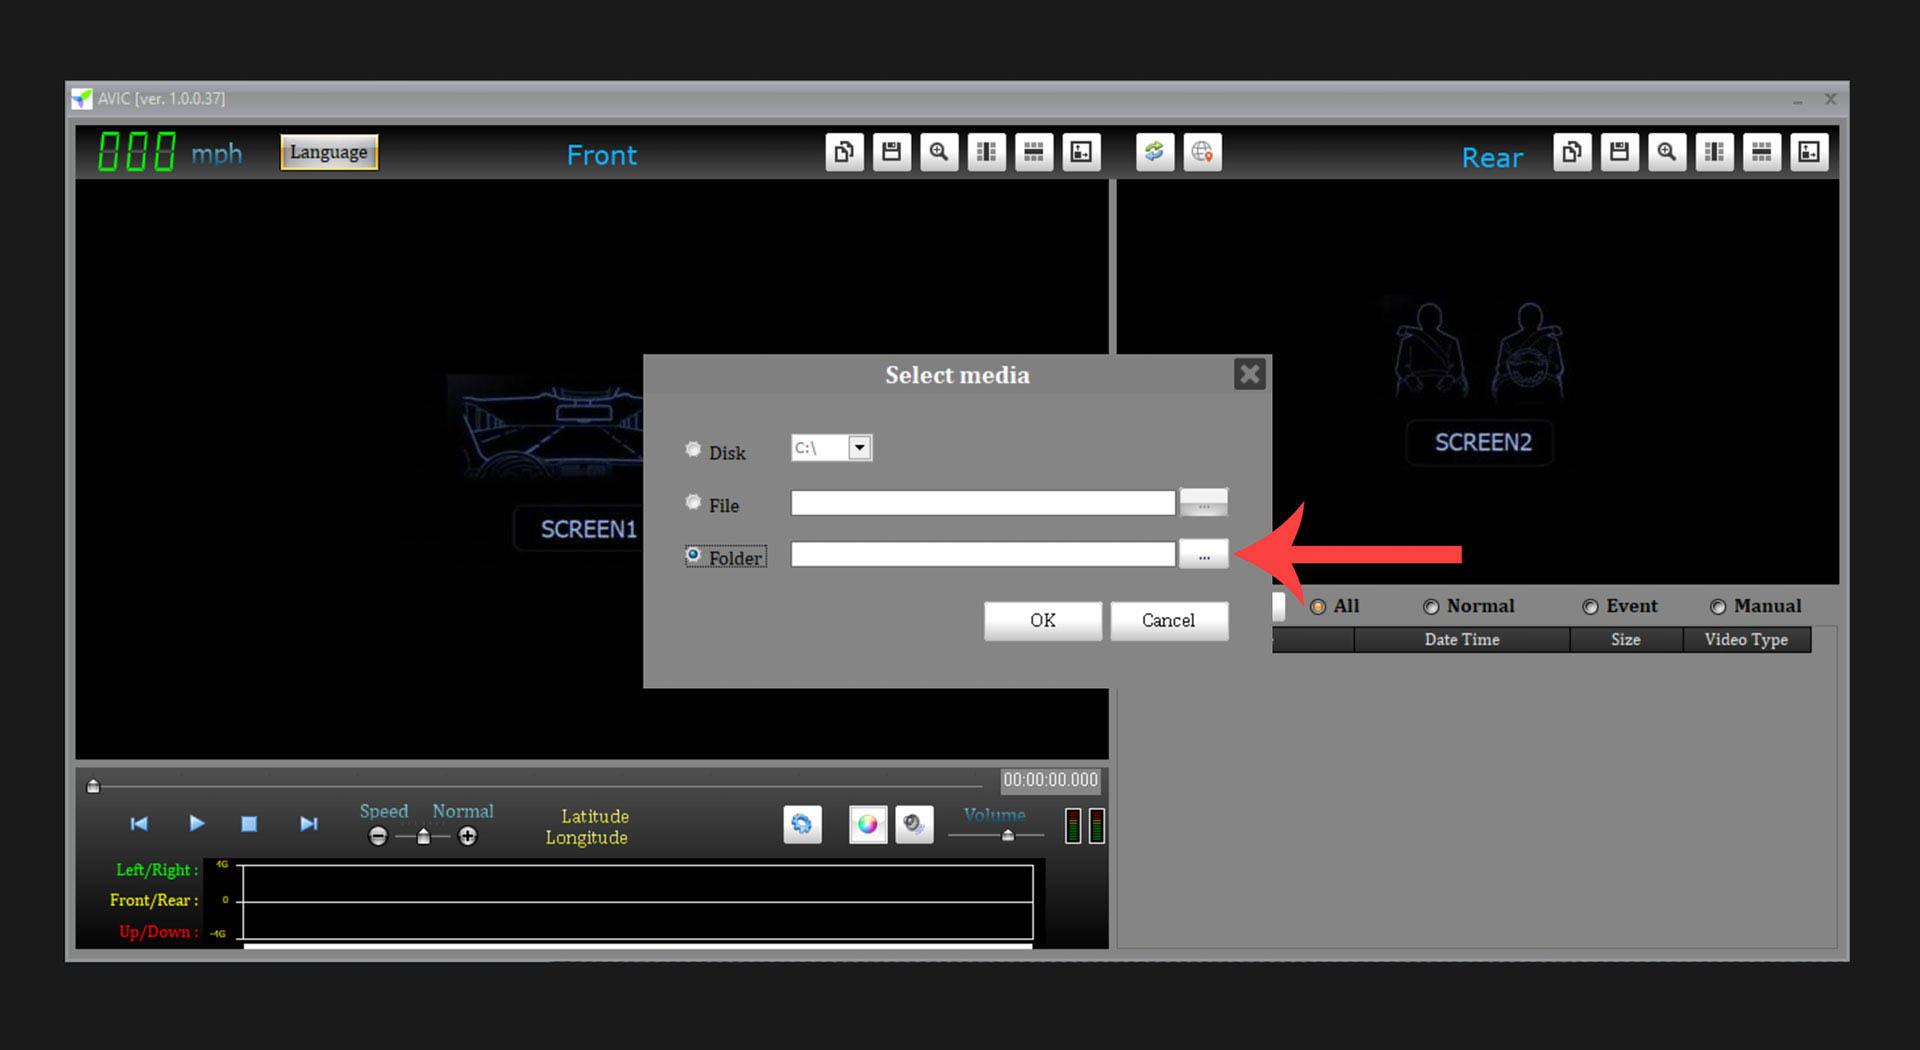
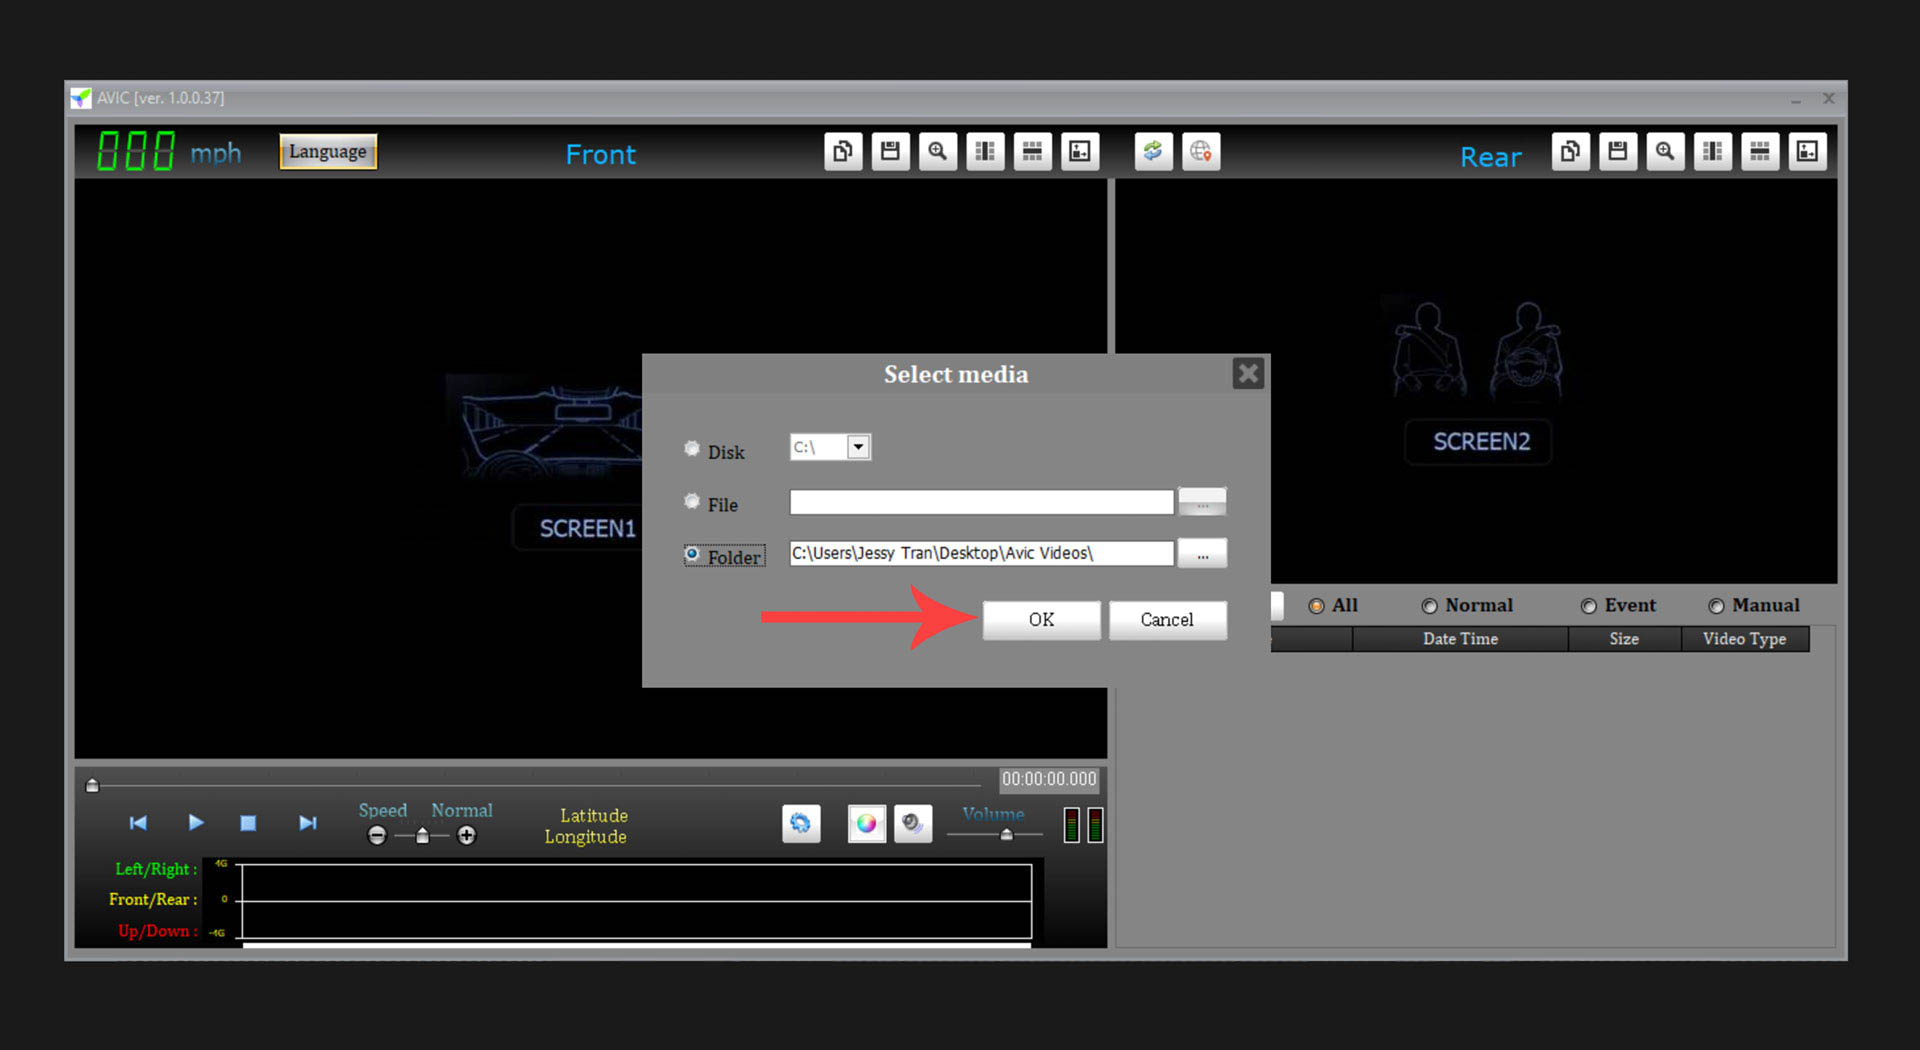
Here you’ll navigate to where you have your AVIC video files stored. Typically these will either still be on the memory card, or they'll be in a location that you copied AVIC videos to previously. For example, I’ve created a folder on my desktop which contains these files that were copied from an AVIC memory card previously. So, I’ll click on the “folder” option and then on the right-hand side in the same row where the “folder” option is, I’ll click on the ellipsis (“…”) to open my computer’s directory. This will allow me to navigate directly to the folder where I have my AVIC videos stored.
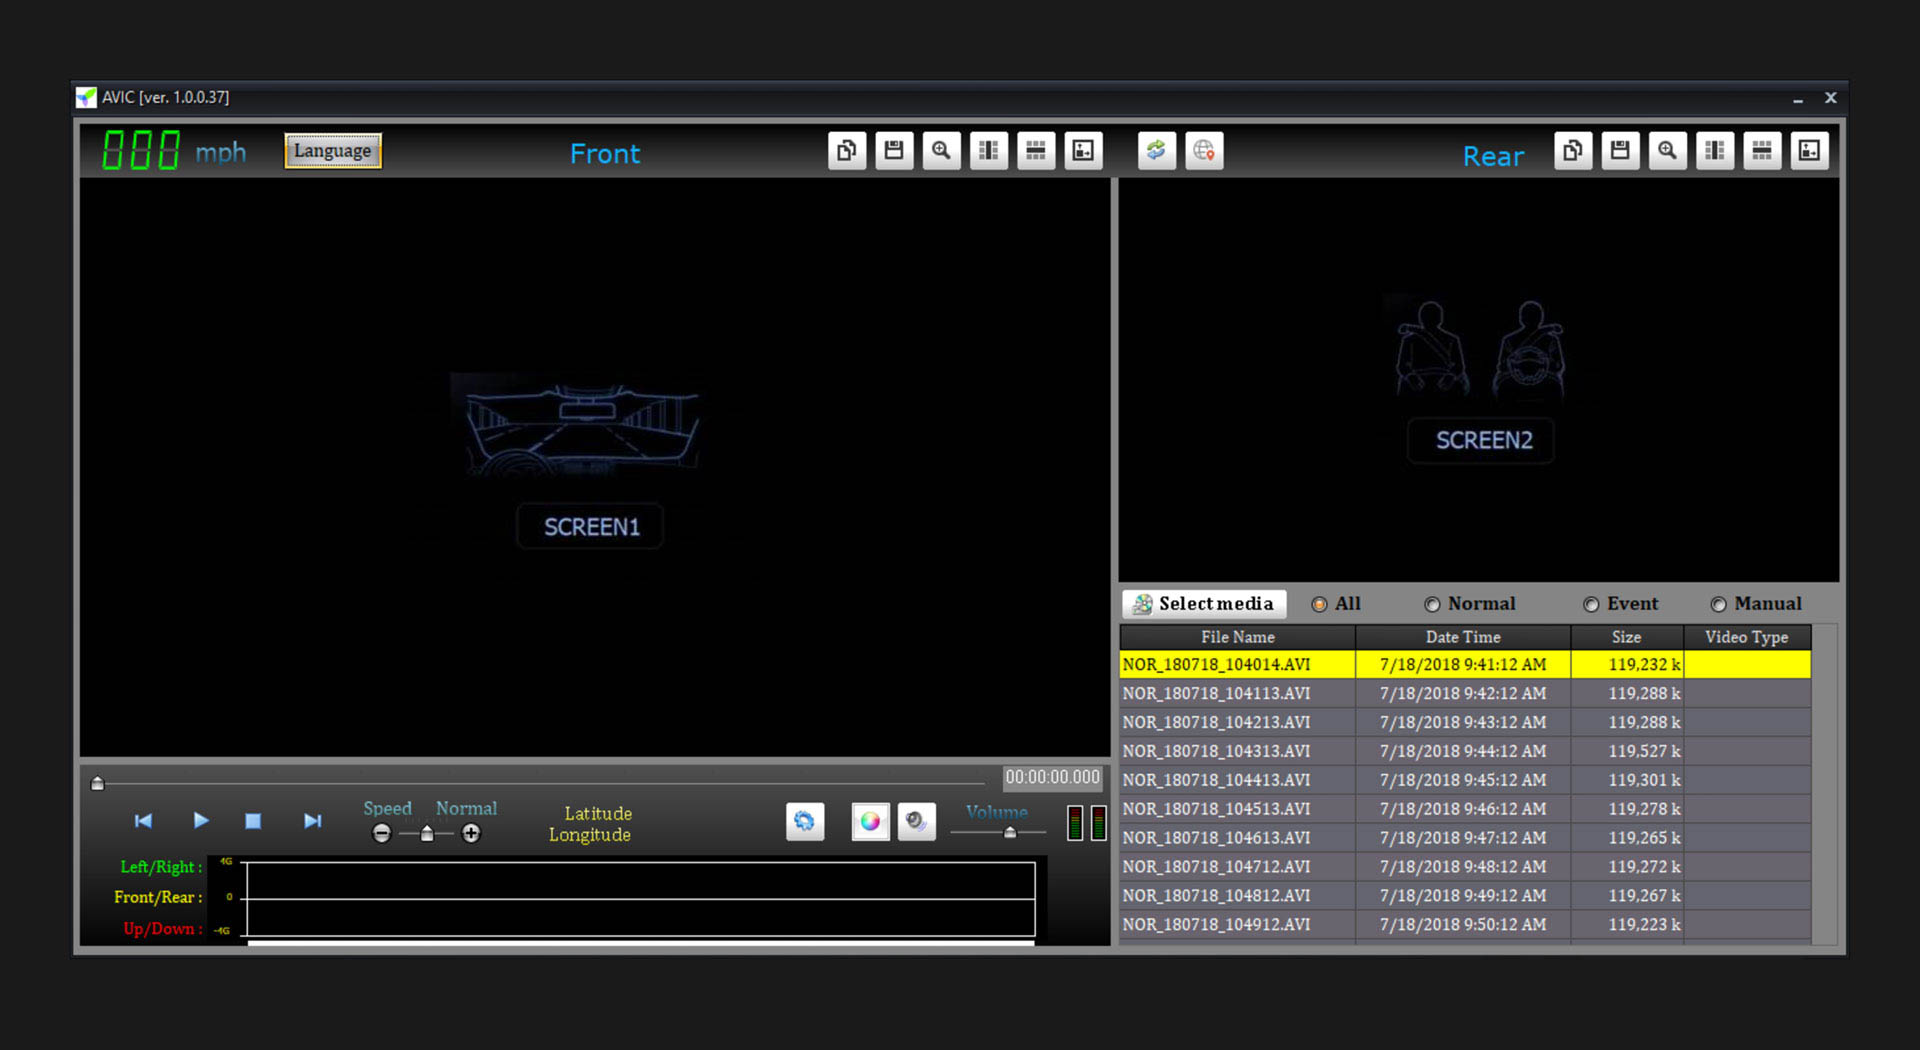
Once you’ve located the folder where your videos are stored; mouse over and click on the “Ok” button and then click on the “Ok” button again to import your footage into the AVIC Elite Viewer.
A. Selecting your AVIC video import directory:
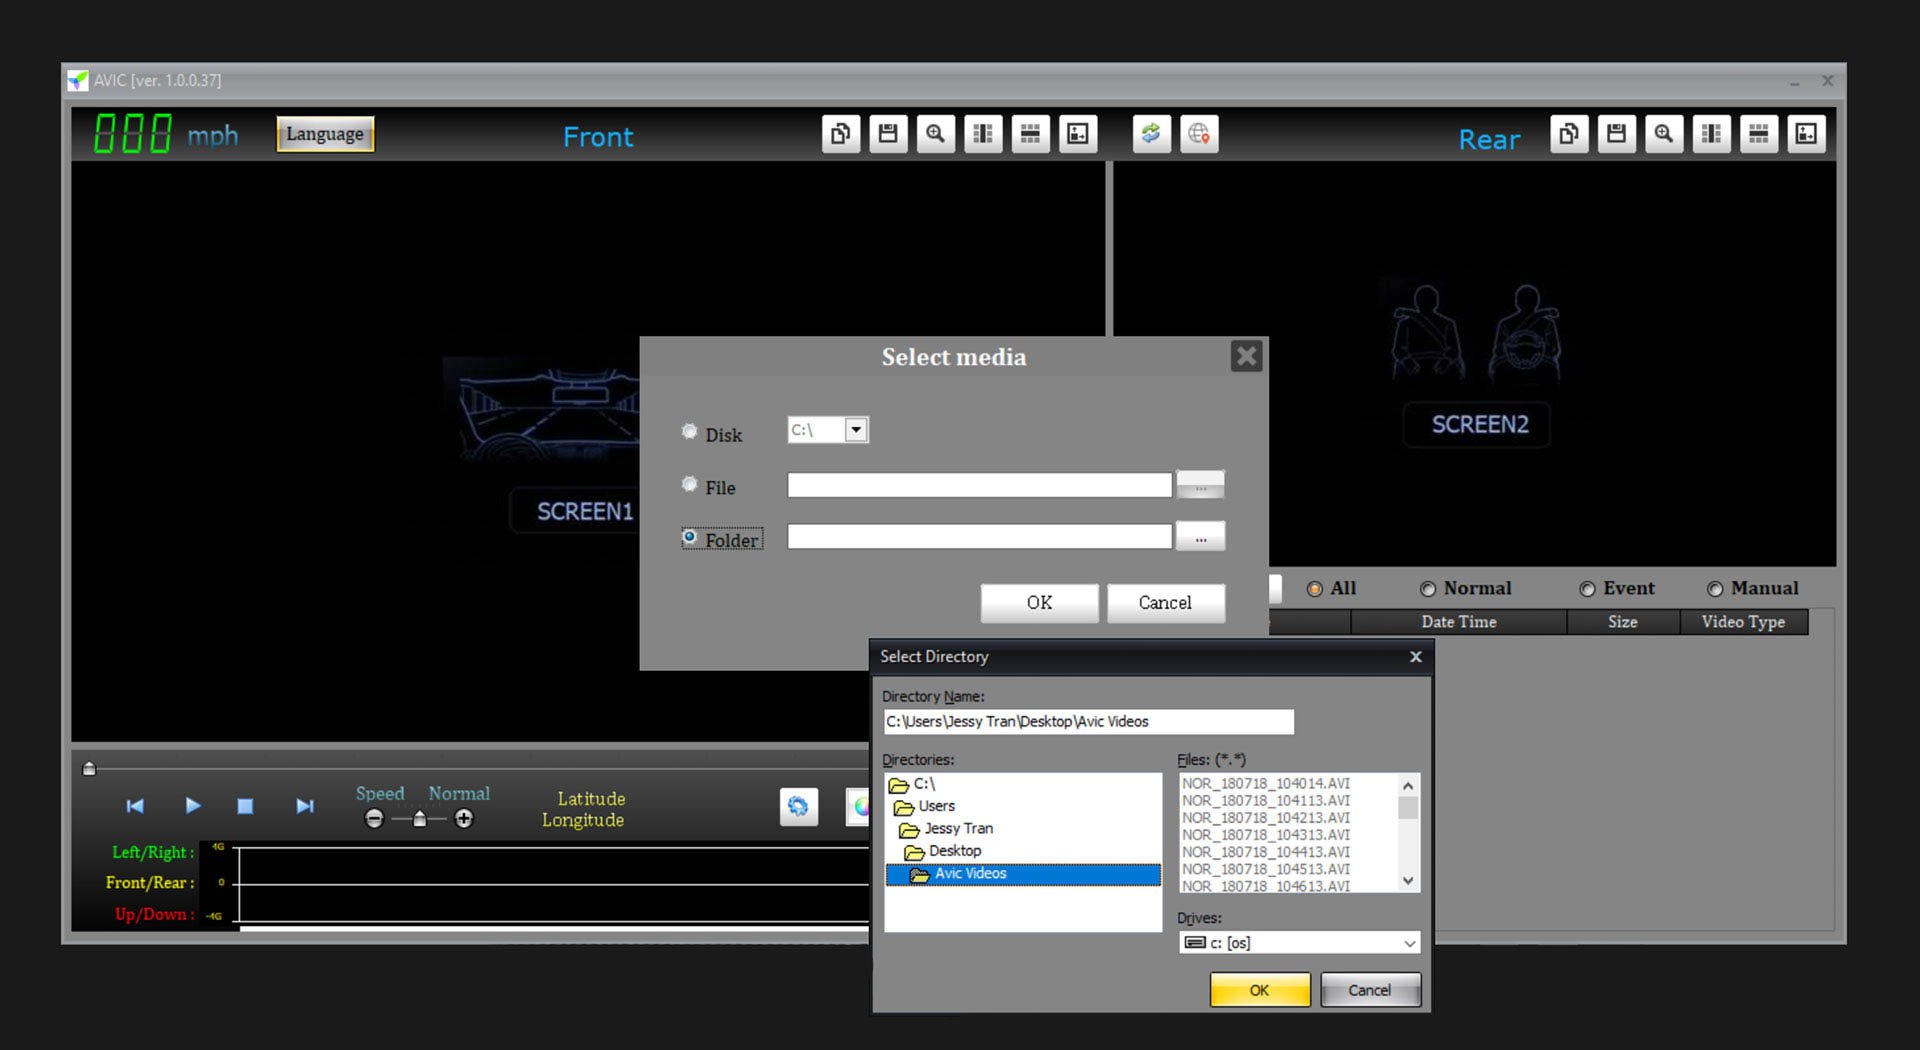
B. Confirming your AVIC video import directory:
Step 5 - Playing Back Your AVIC Video Files
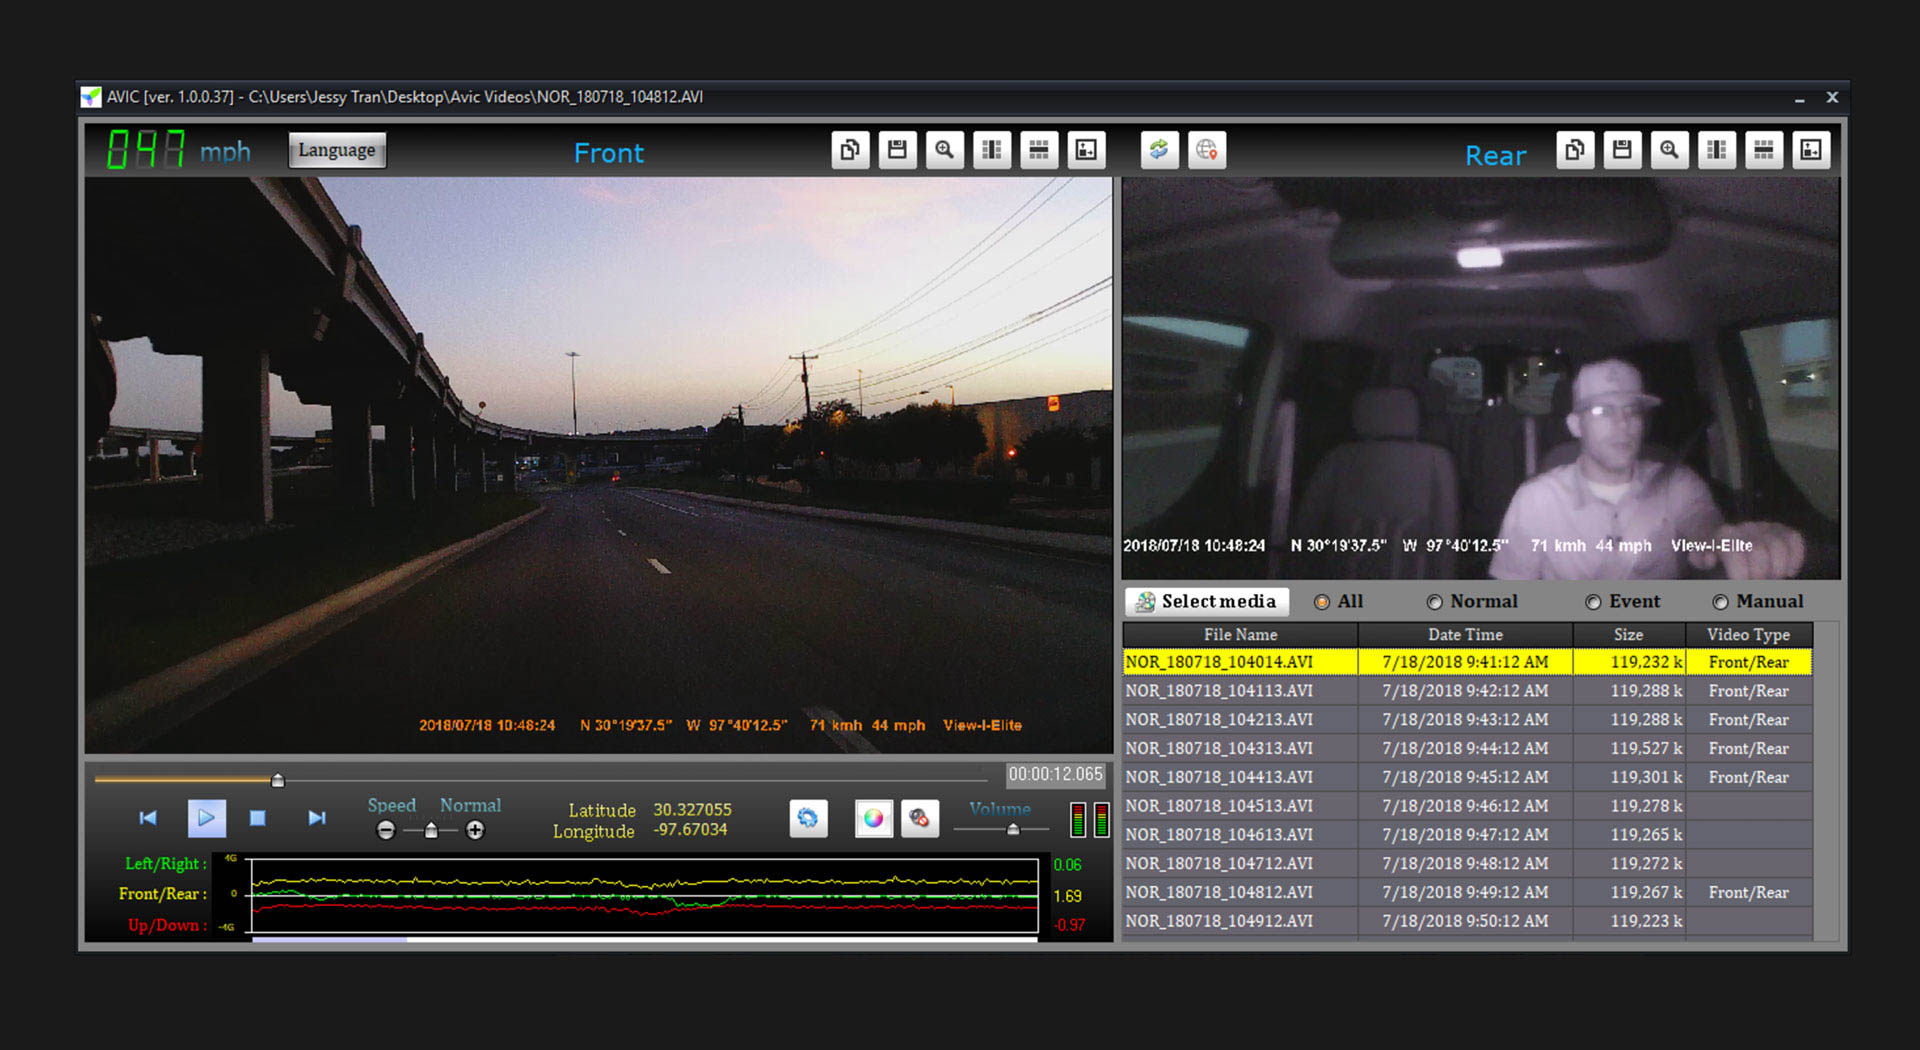
Now that our files are imported, double-click any file you want to view, and it will appear in the windows “Screen1” and “Screen2.” “Screen1” is designated for front facing dashcam footage and “Screen2” is designated for interior-facing dashcam footage (on the dual lens models). The AVIC Elite Viewer application will automatically recognize and differentiate between your front-facing camera footage and your interior camera footage; automatically placing them in their appropriate window panels.
A. After your footage is imported, all files will appear in the lower right side of the application:
B. Double clicking a file will play the clip:
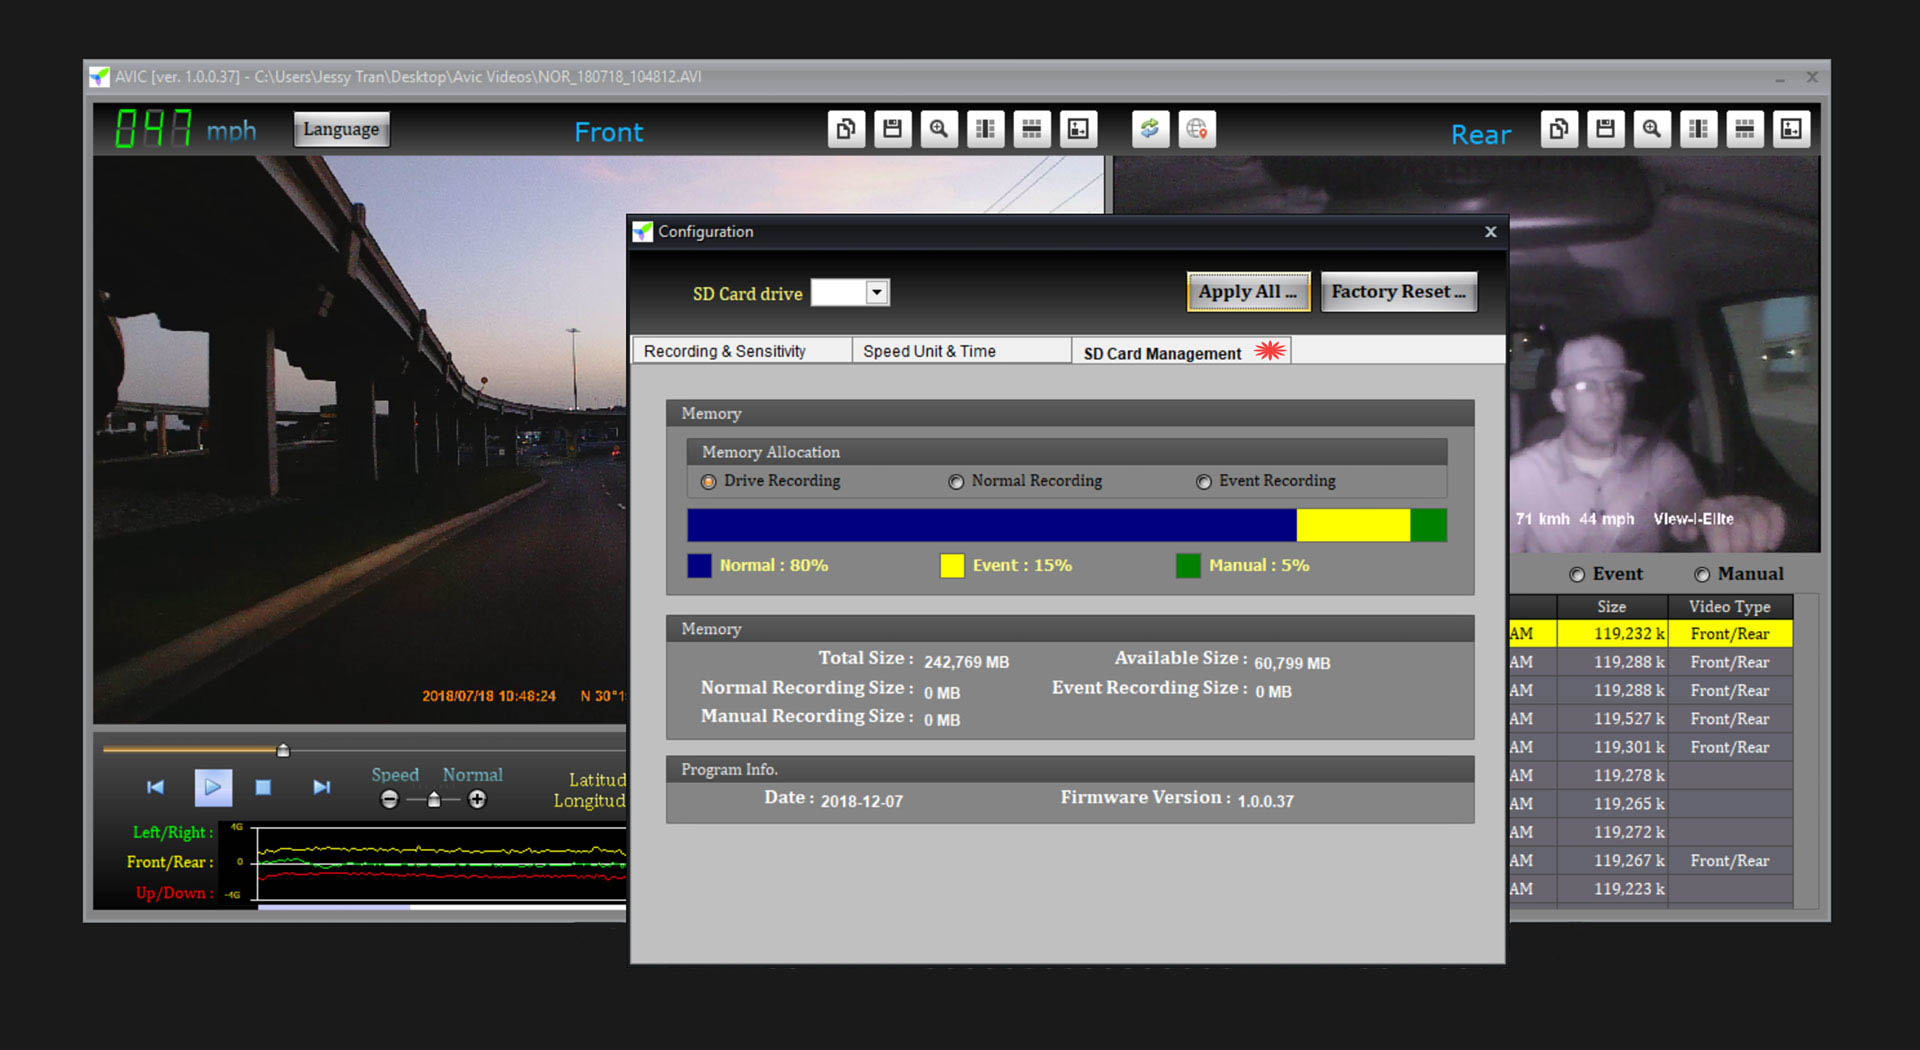
Step 6 - Configuring AVIC Dashcam Settings
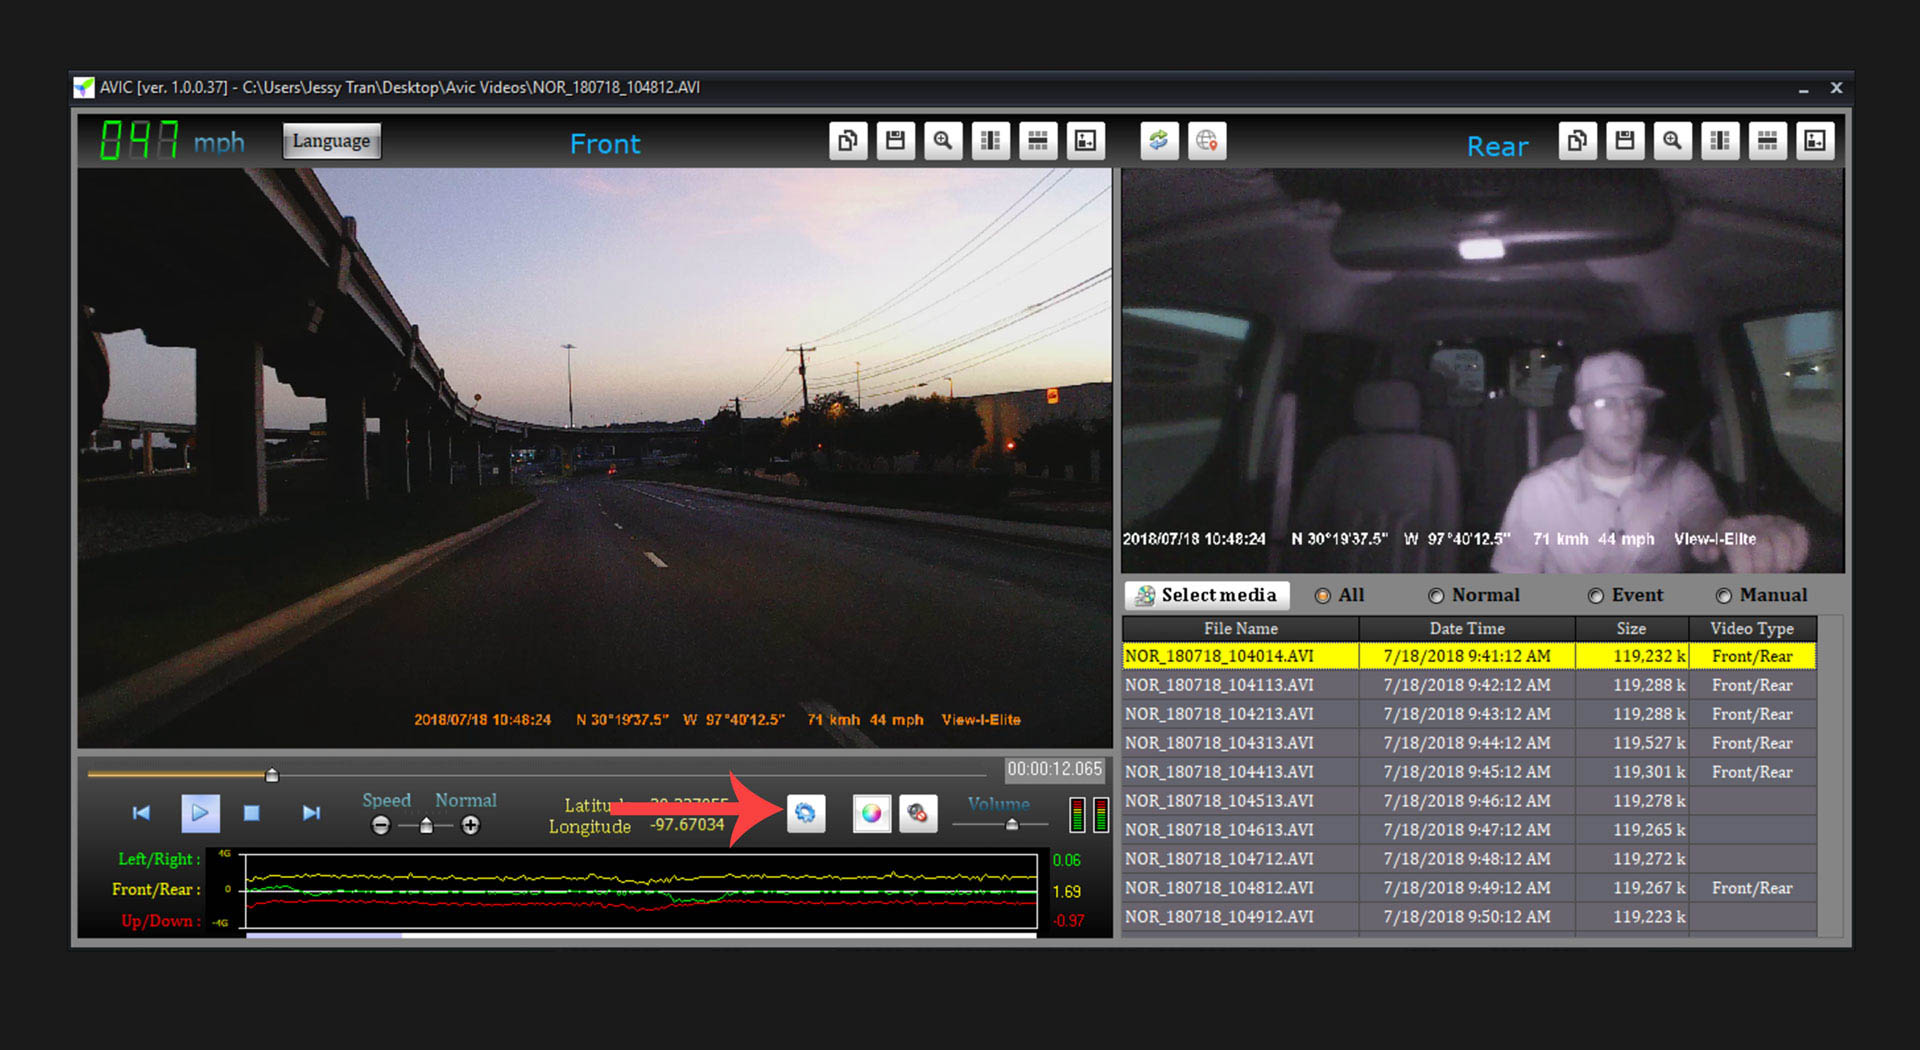
Now we can adjust the camera settings by clicking on the cogwheel icon for “Camera Settings.” A new window named “Configuration” will pop up and there will be three tabs where you’ll be able to adjust your camera’s settings.
In the “Recording & Sensitivity” tab you can adjust the settings of your camera’s:
- Video Resolution
- Video Quality (Bitrate)
- Video Clip Time
- Sensitivity Control
- Audio
- Microphone Volume

In the “Speed Unit & Time” tab you can adjust the settings of:
- Speed Units
- Speed Limit
- Time Zone (Date & Time)
- Time Zone (Daylight Savings)

In the “SD Card Management” tab you can adjust the settings of:
- Memory Card Priority Allocation
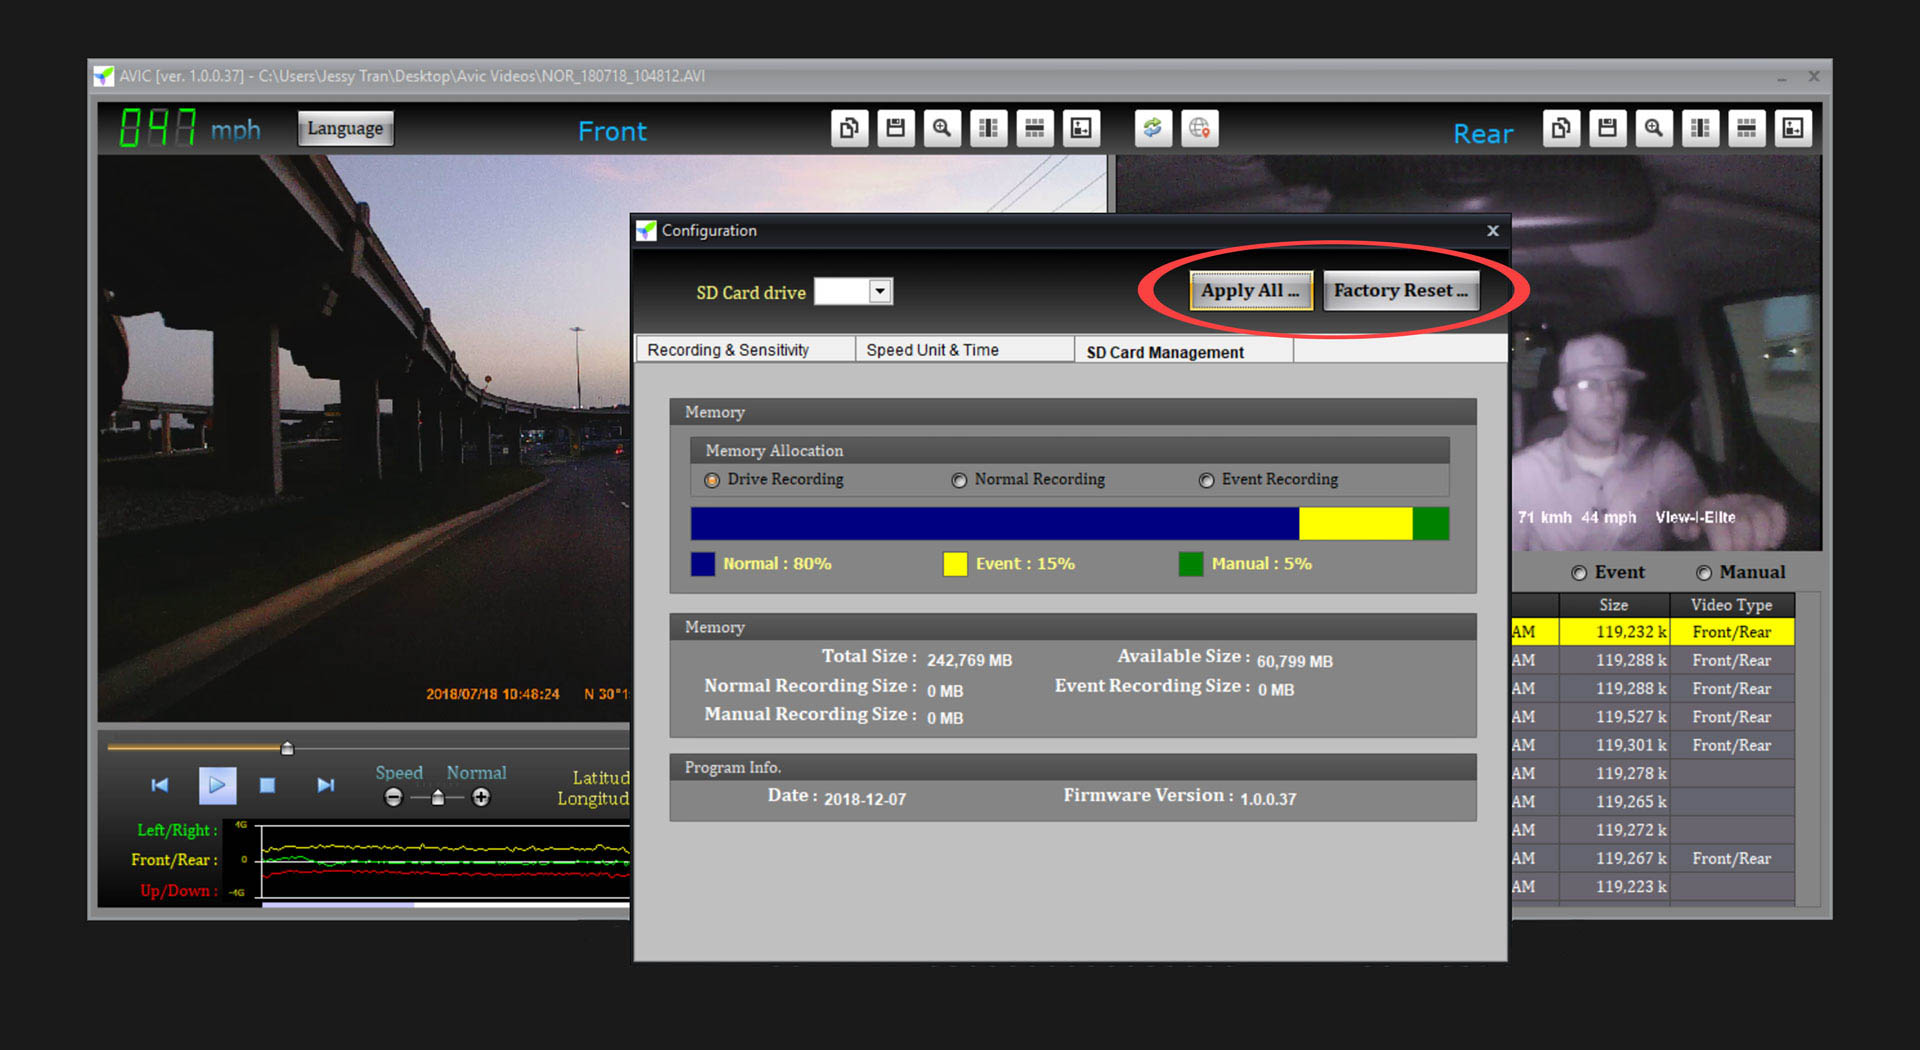
When you’re finished adjusting your camera settings navigate over to the “Apply All” button to save your changes and return to the main window of the AVIC Elite Viewer application. Or, if you changed a setting and you’re not happy with it, you can navigate over to the “Factory Reset” button to reset your camera settings to their default factory settings. Either option will minimize the “configuration panel” and return you to the main window of the AVIC Elite Viewer application.
Now that you know how to install and use the AVIC Elite Viewer software, you can begin the installation process of the cameras themselves.
For further information and instructions regarding the use of the AVIC dashcams and/or the Elite software, please refer to the user manuals below:
For a video overview and demonstration of the AVIC Elite PC Viewer software, please see below:
As always, drive safe!
To request additional information, please don't hesitate to contact us. We give our best effort to respond to all inquiries within 1 business day.