How To Edit Dashcam Footage on Windows 7 Using Free Software
Posted by The Dashcam Store on Sep 04, 2018
Click on any image below to view a larger version.
How To Remove Audio from a Dashcam Video Clip
Begin by opening the “Windows Movie Maker” application, found in your start menu. You can search through your individual program files or you can type “Movie Maker” in the search programs and files bar.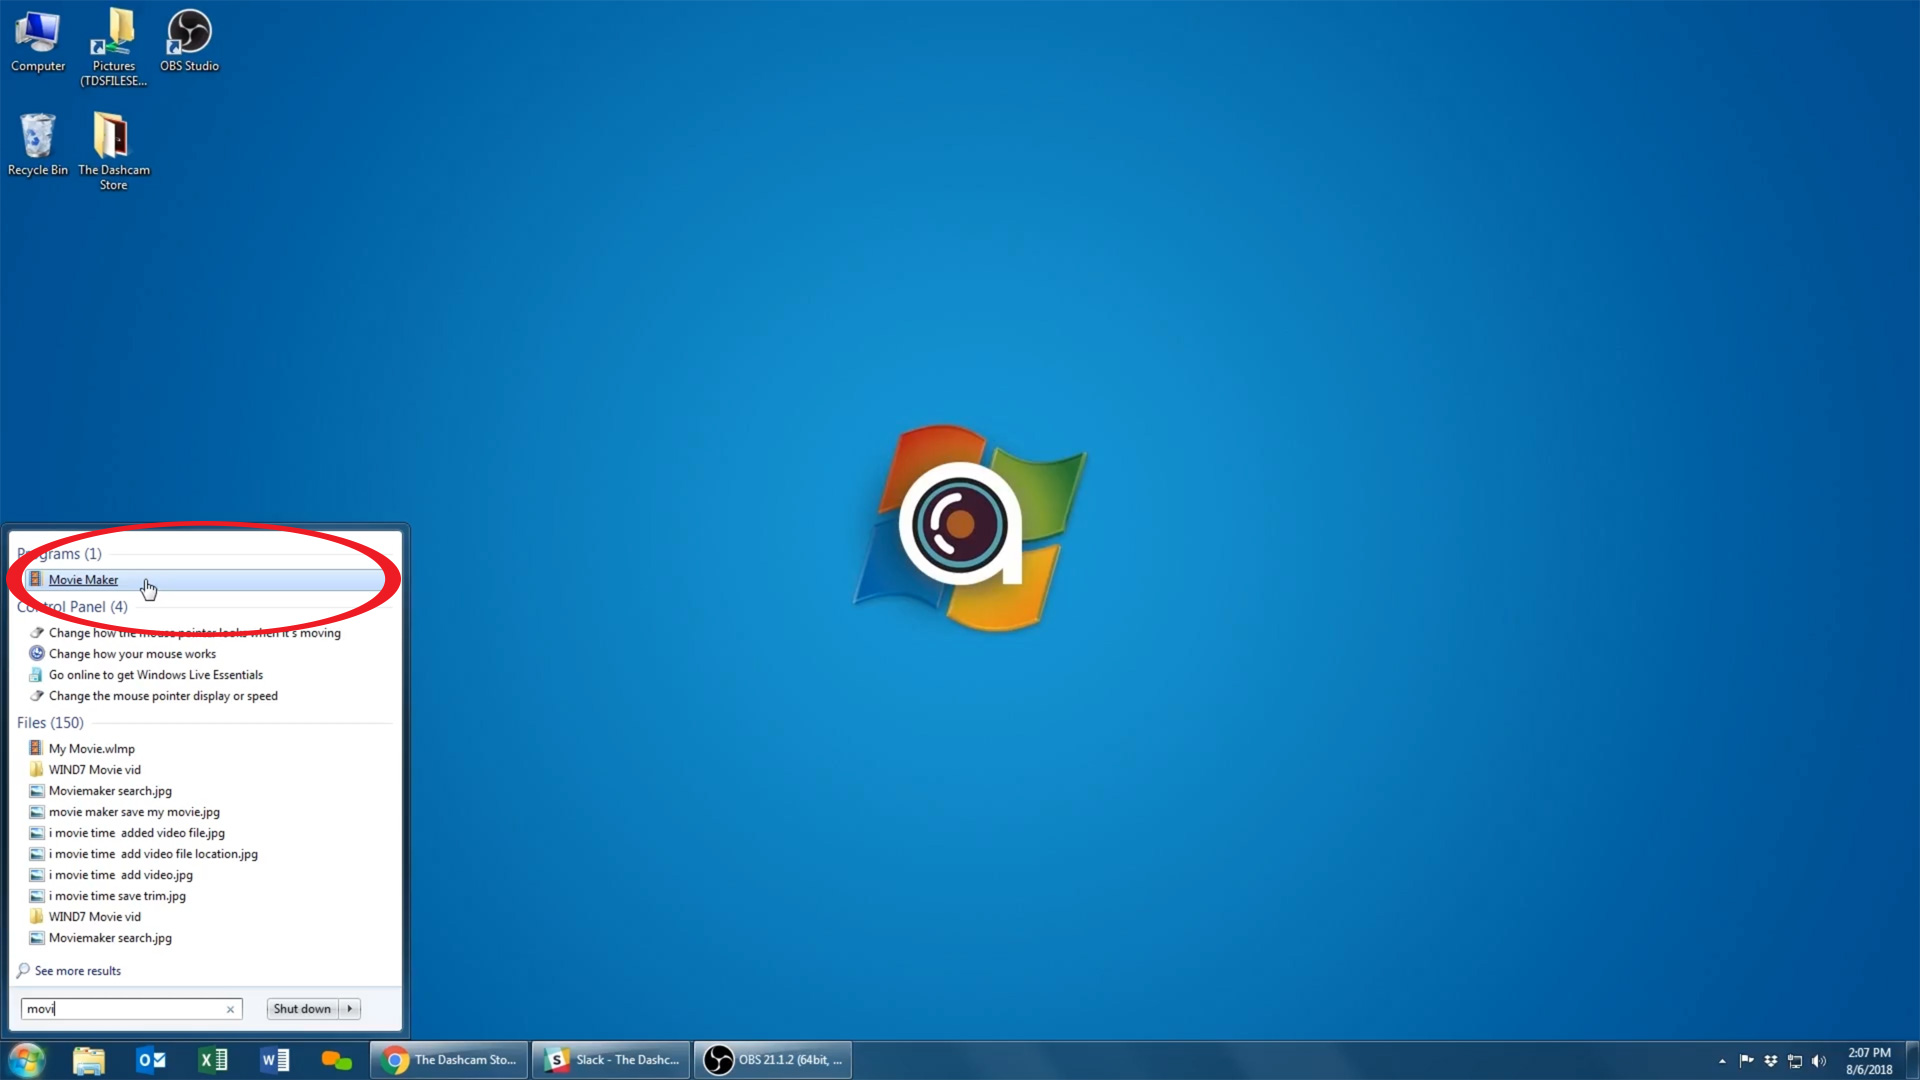
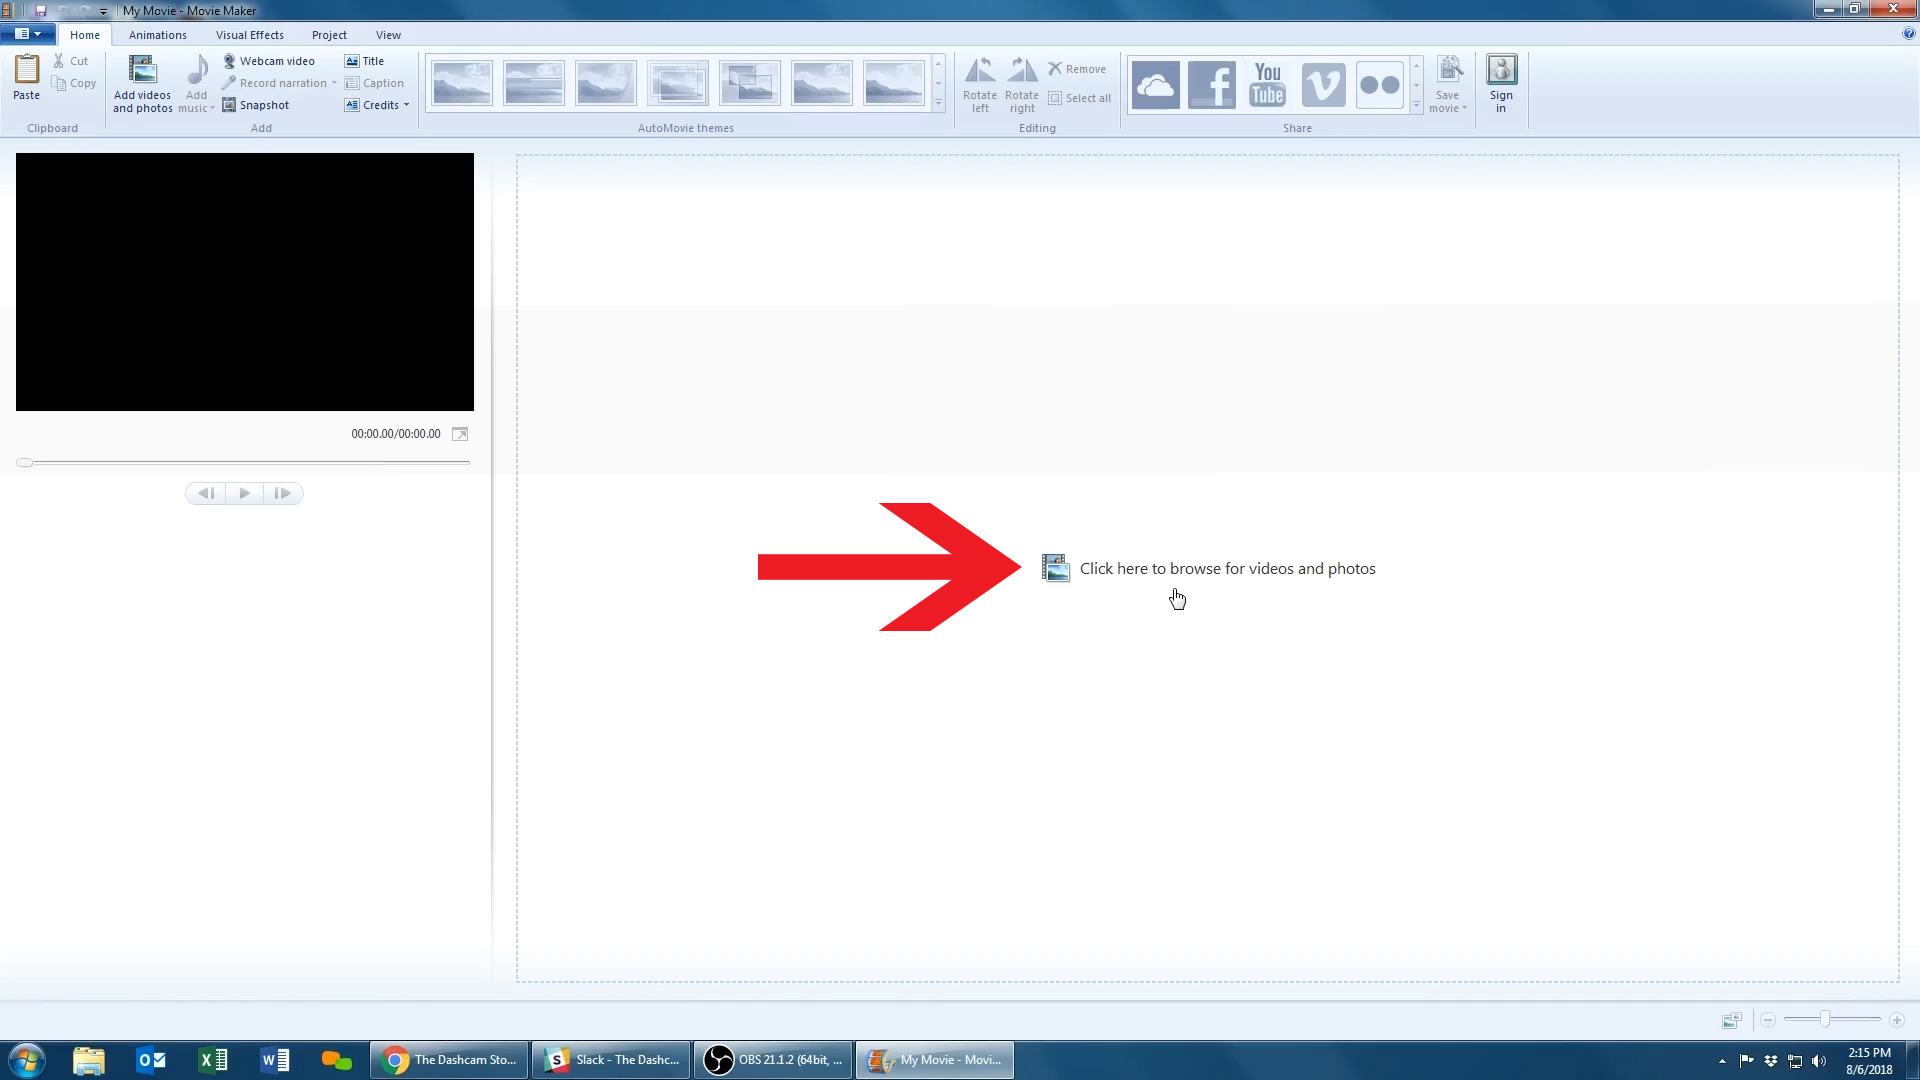
Click on the "Click here to browse for videos and photos" text to begin removing audio.
![How-to: Edit dashcam footage on Windows 7]()

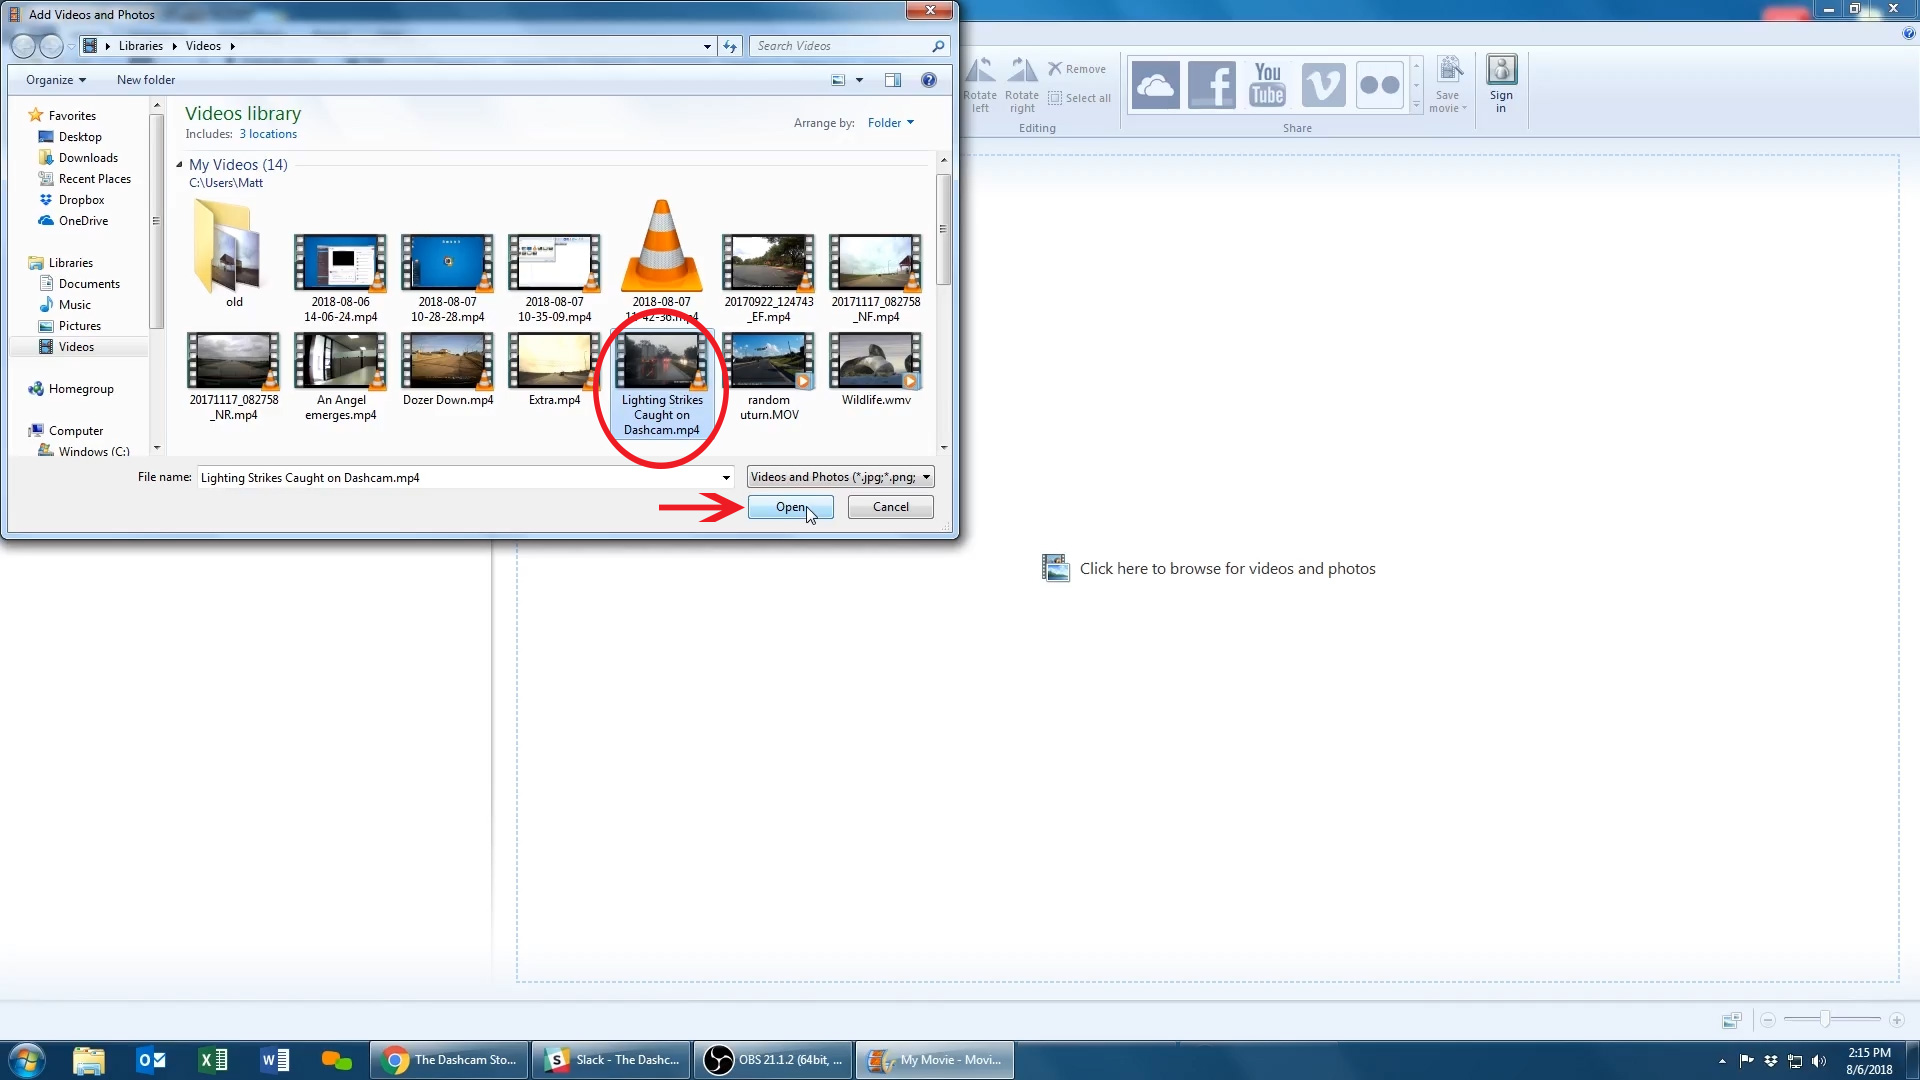
After clicking on "Click here to browse for videos and photos" you’ll be able to import the video file
that you want to remove audio from.
![How-to: Edit dashcam footage on Windows 7]()
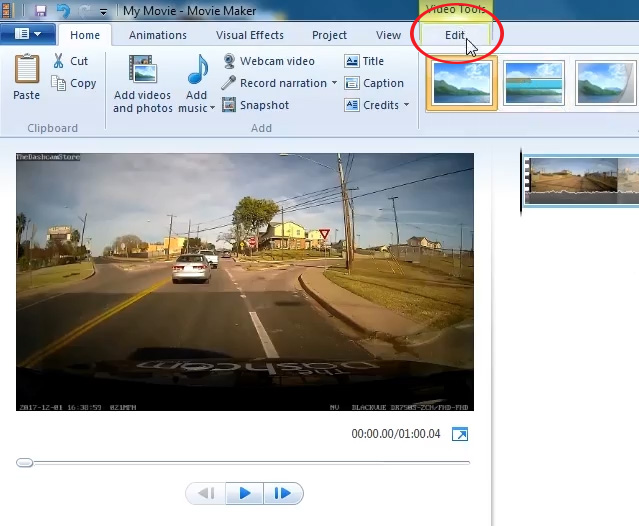
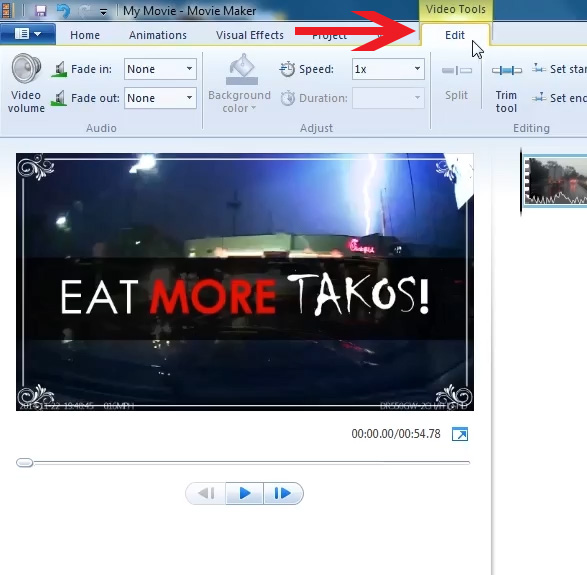
Now that your clip is imported we can begin the process of disabling the audio track, just mouse over to the
"Edit" tab.
![How-to: Edit dashcam footage on Windows 7]()
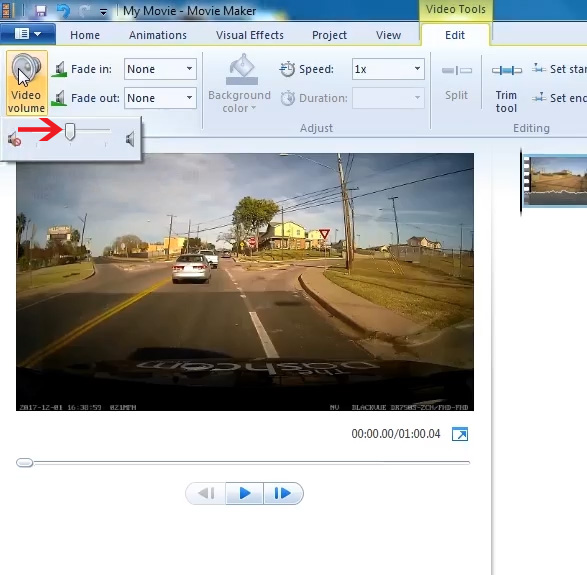
After selecting the "Edit" tab mouse over and click on "Video volume" to toggle your video’s audio
options. The marker displayed below controls your video clip’s audio.
![How-to: Edit dashcam footage on Windows 7]()
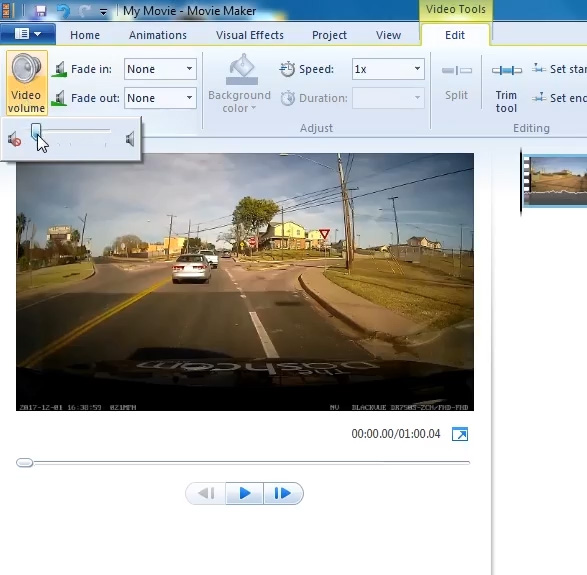
Now drag the marker all the way to the left to completely remove your video’s sound.
![How-to: Edit dashcam footage on Windows 7]()
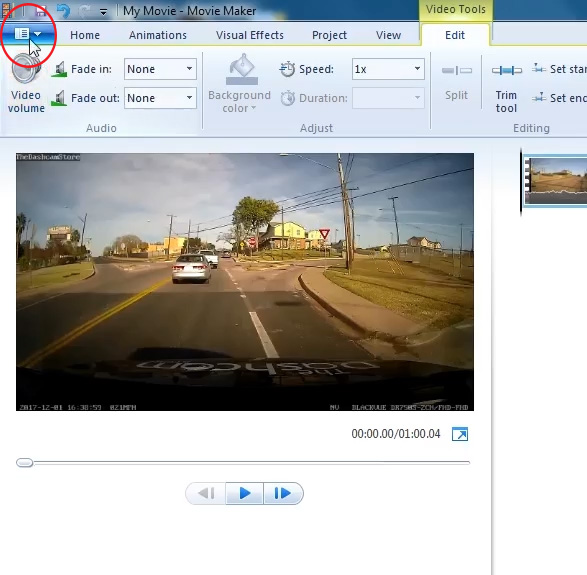
After you’ve finished editing your audio, let’s save your video clip. Navigate over to the blue folder in the
top left-hand of "Movie Maker" application.
![How-to: Edit dashcam footage on Windows 7]()
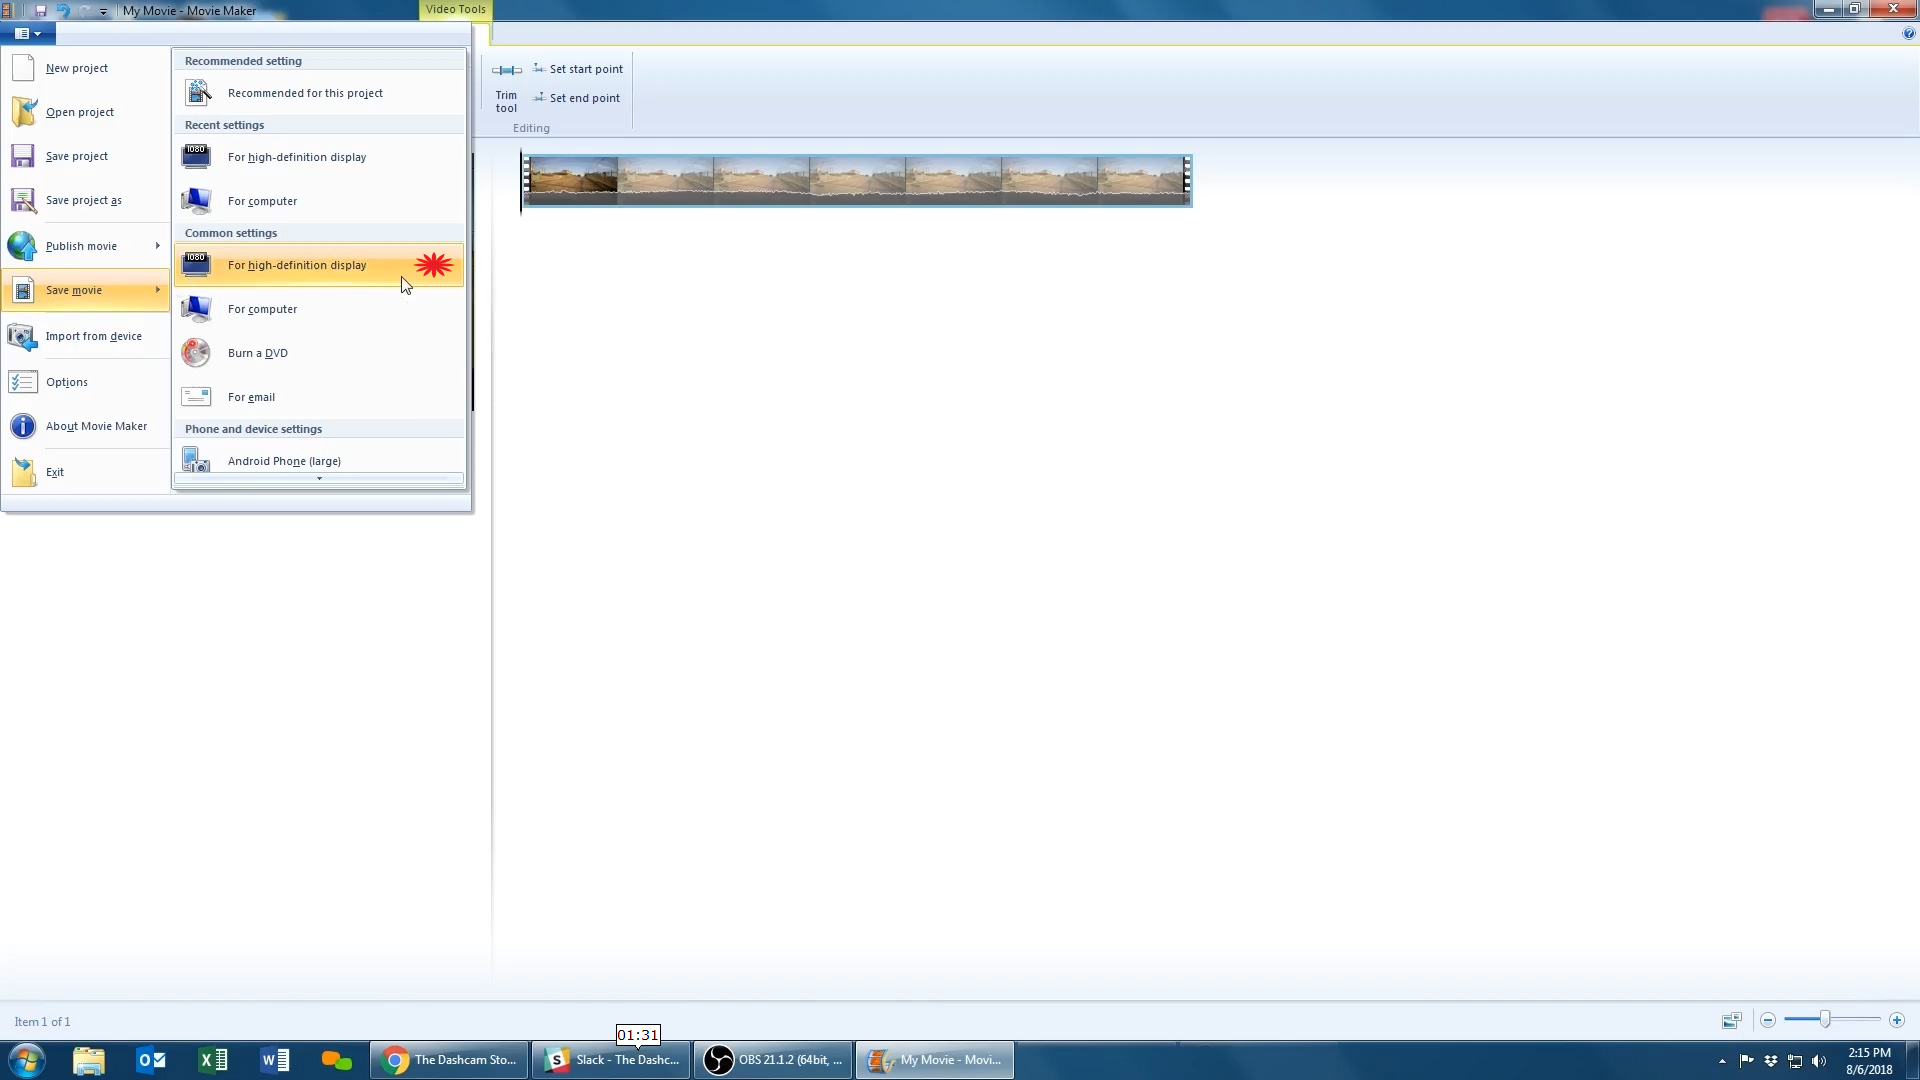
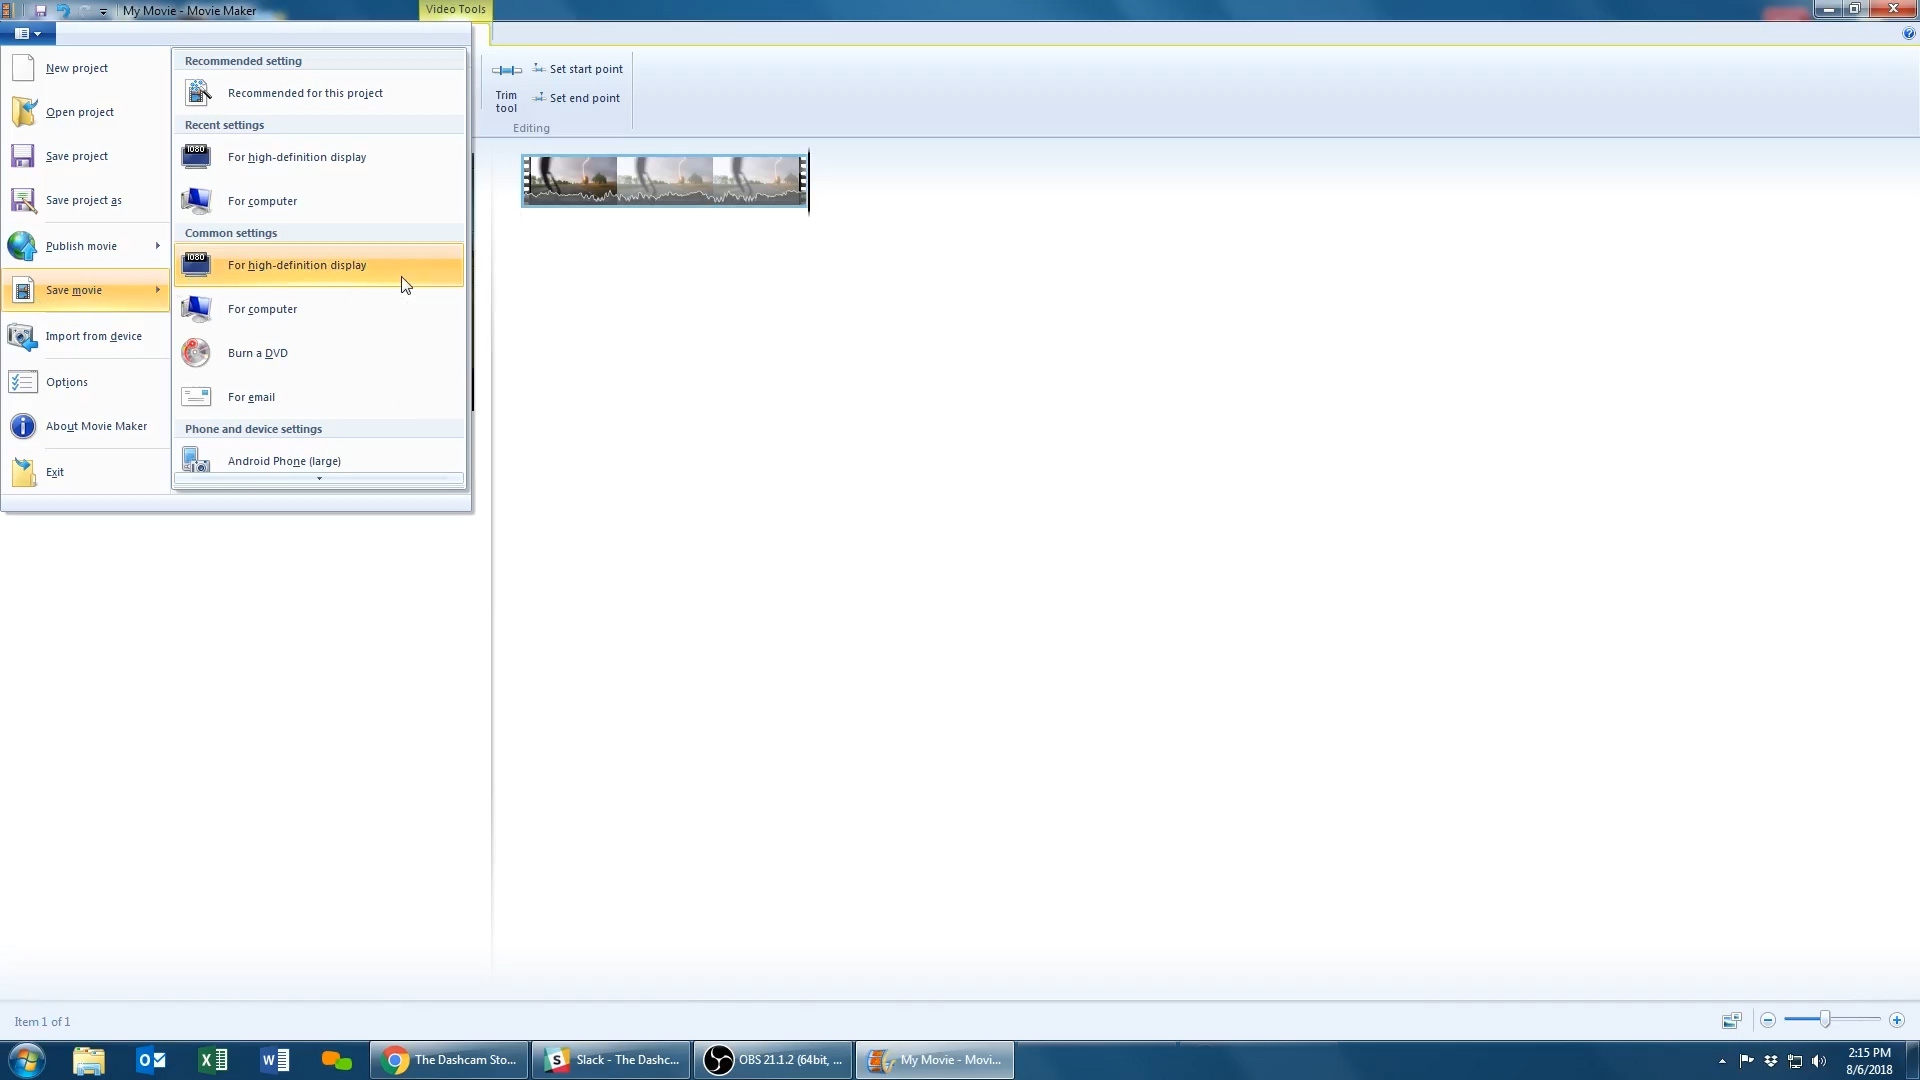
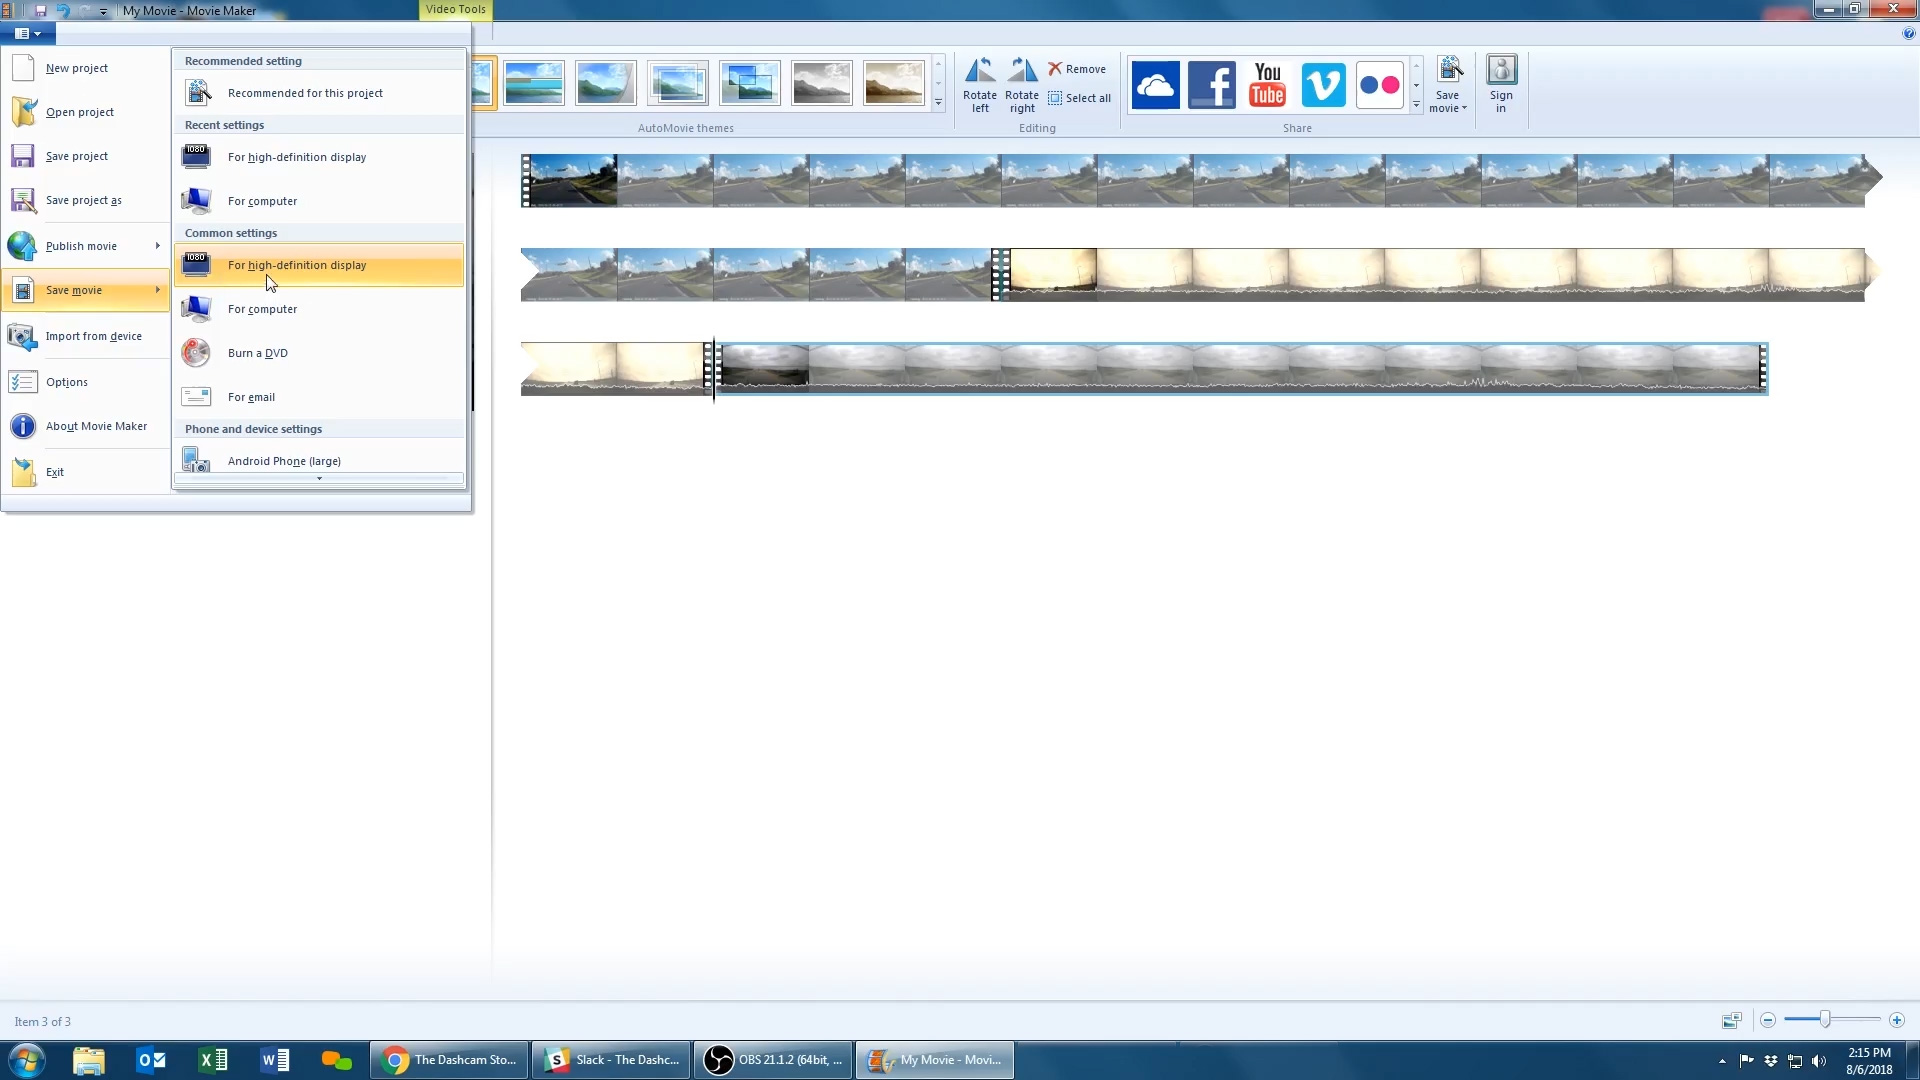
Once you’ve located the blue folder click on the blue folder and you’ll be presented with saving options. Scroll
down to "Save Movie" to save your video. Today we will be proceeding with the save "For
high-definition display" option to retain the video’s HD resolution.
![How-to: Edit dashcam footage on Windows 7]()
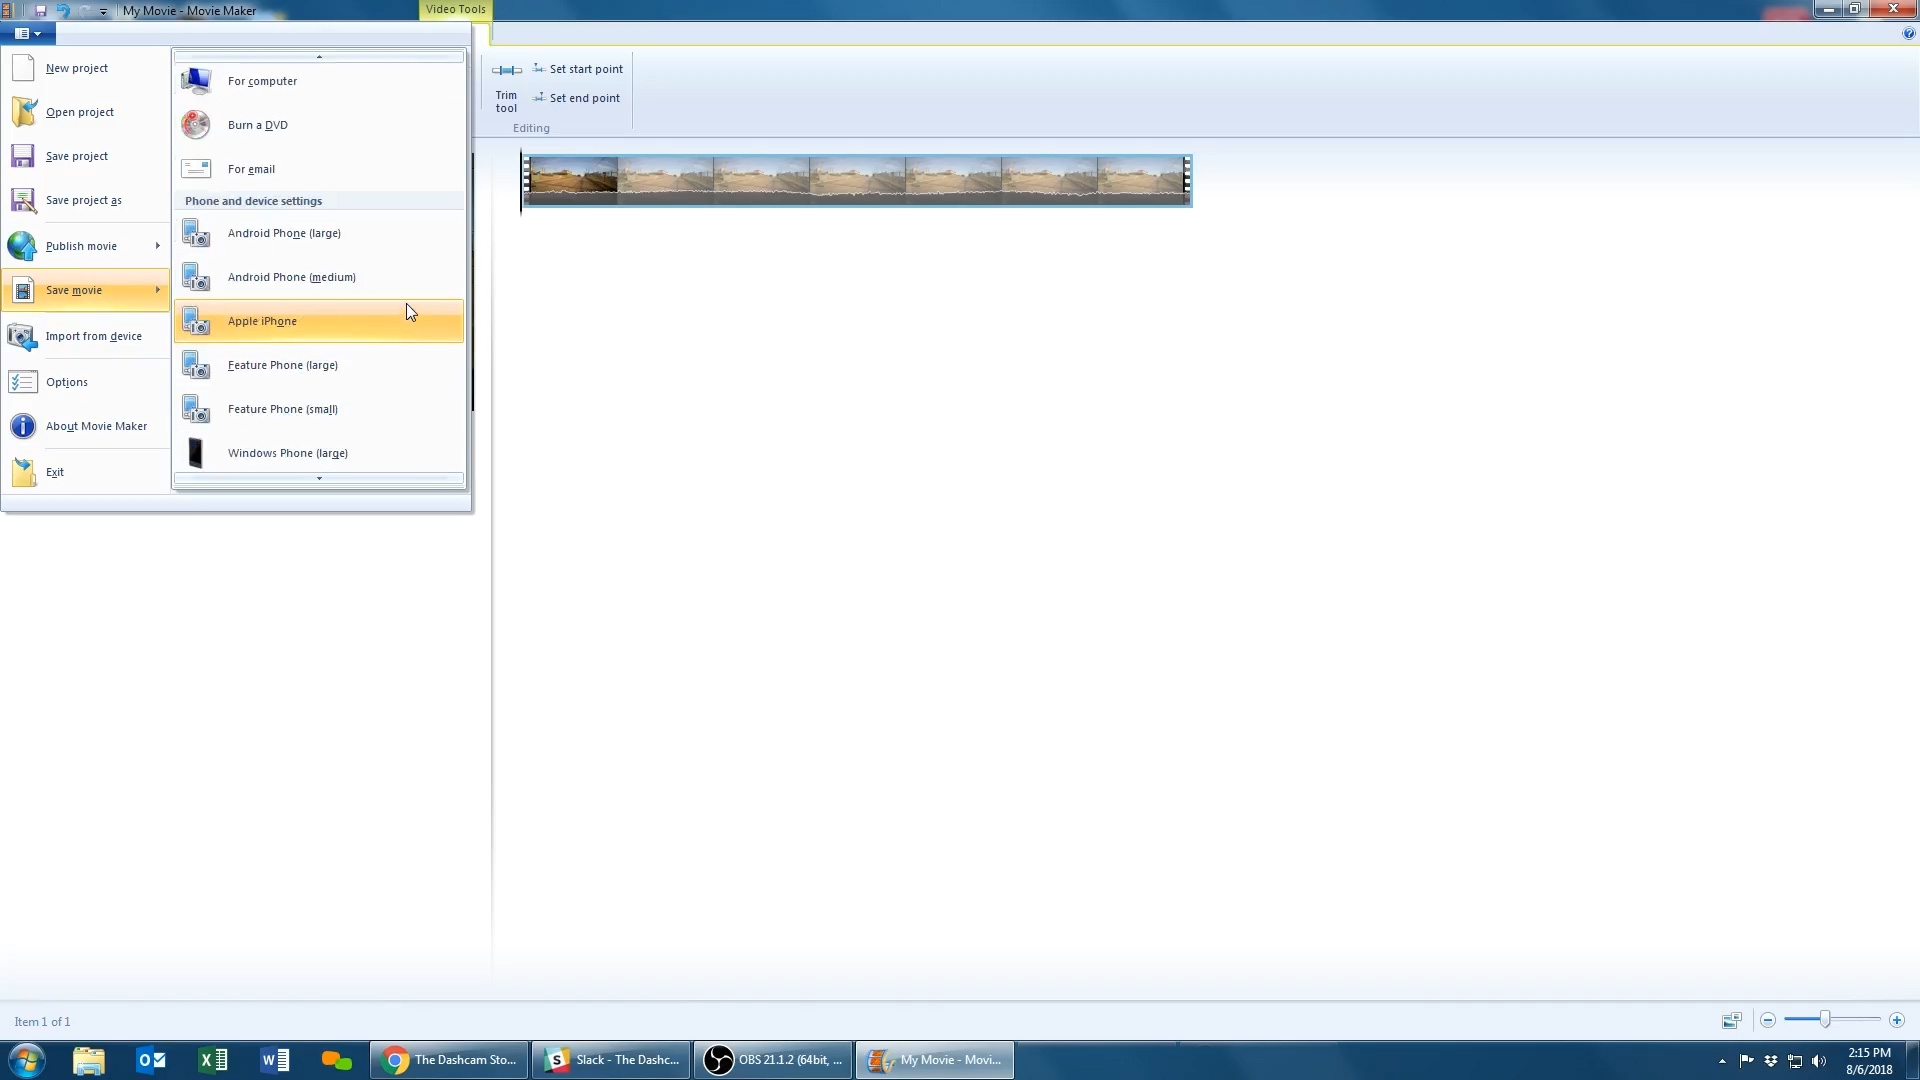
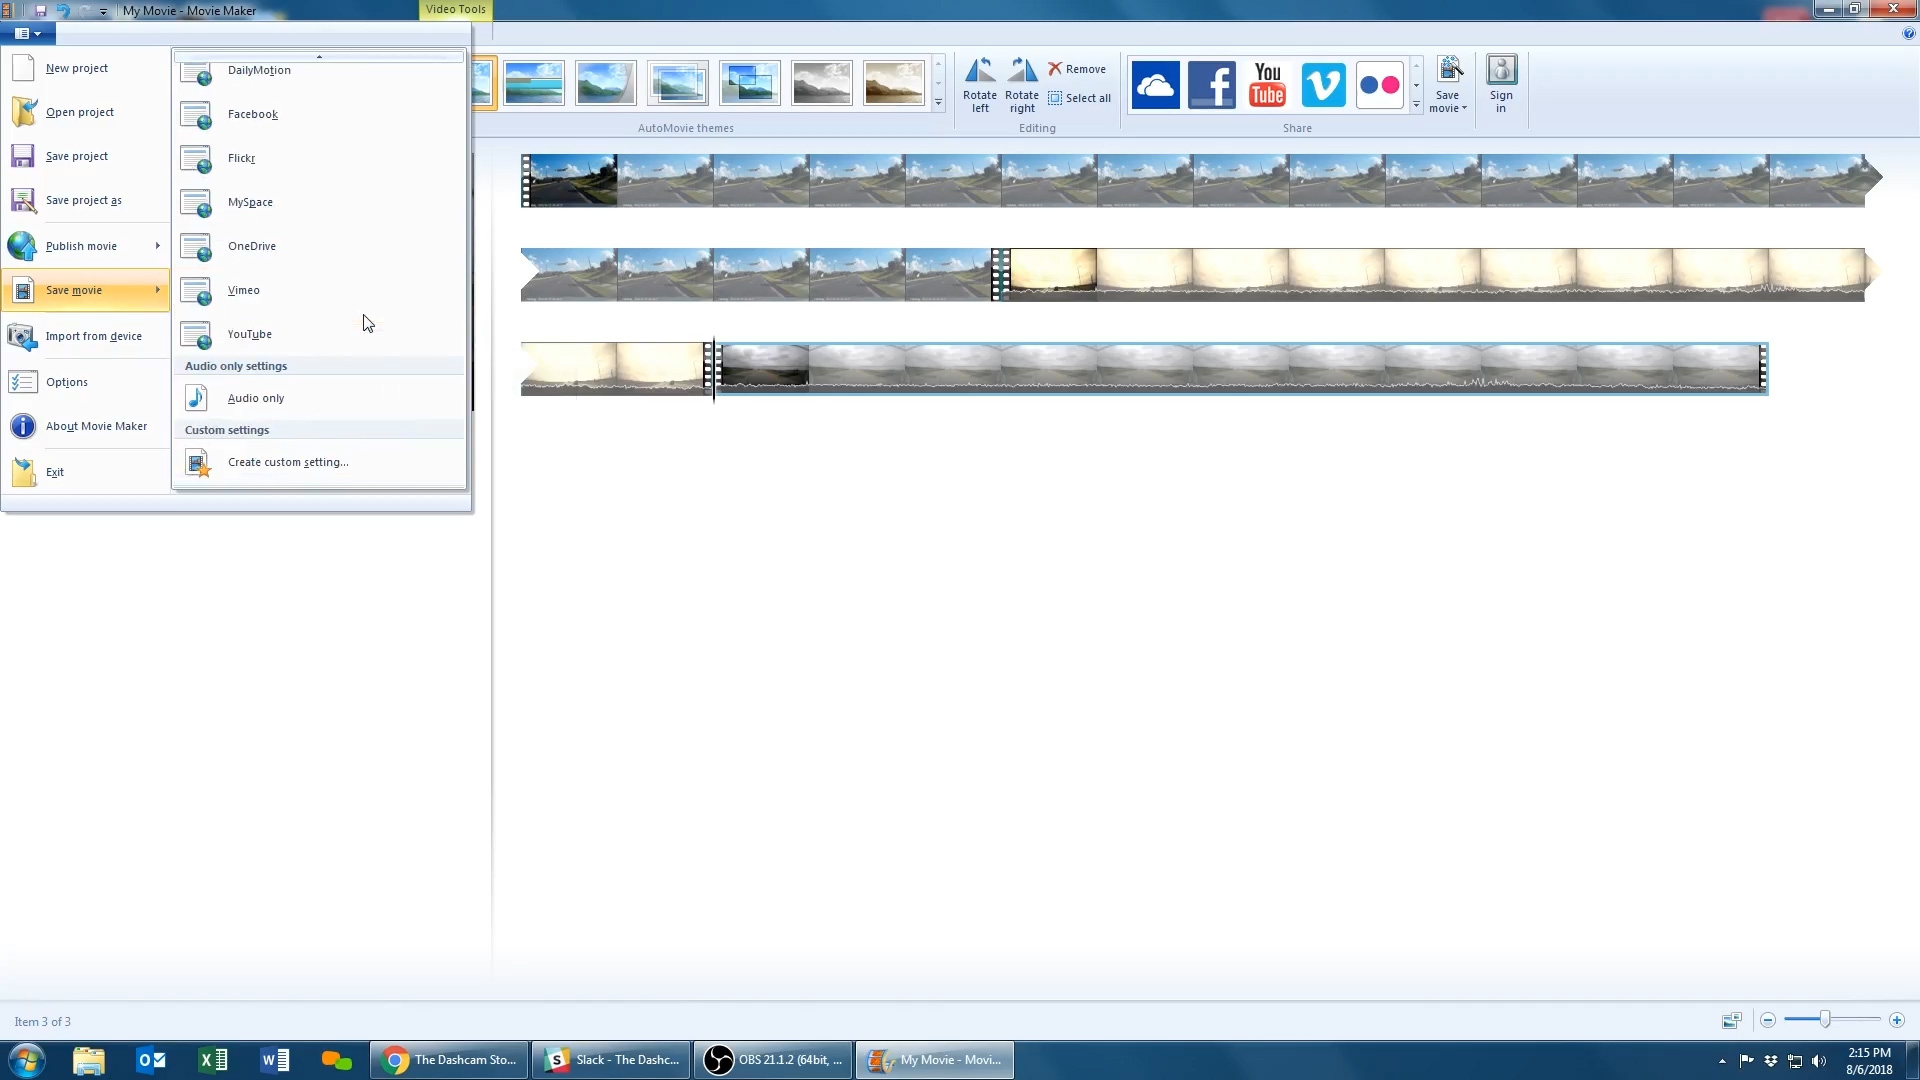
Though we are choosing to save our video with "For high-definition display" there are several other save
formats you can choose from for your specific needs. Just scroll down in the save options to reveal all the
other save options.
![How-to: Edit dashcam footage on Windows 7]()
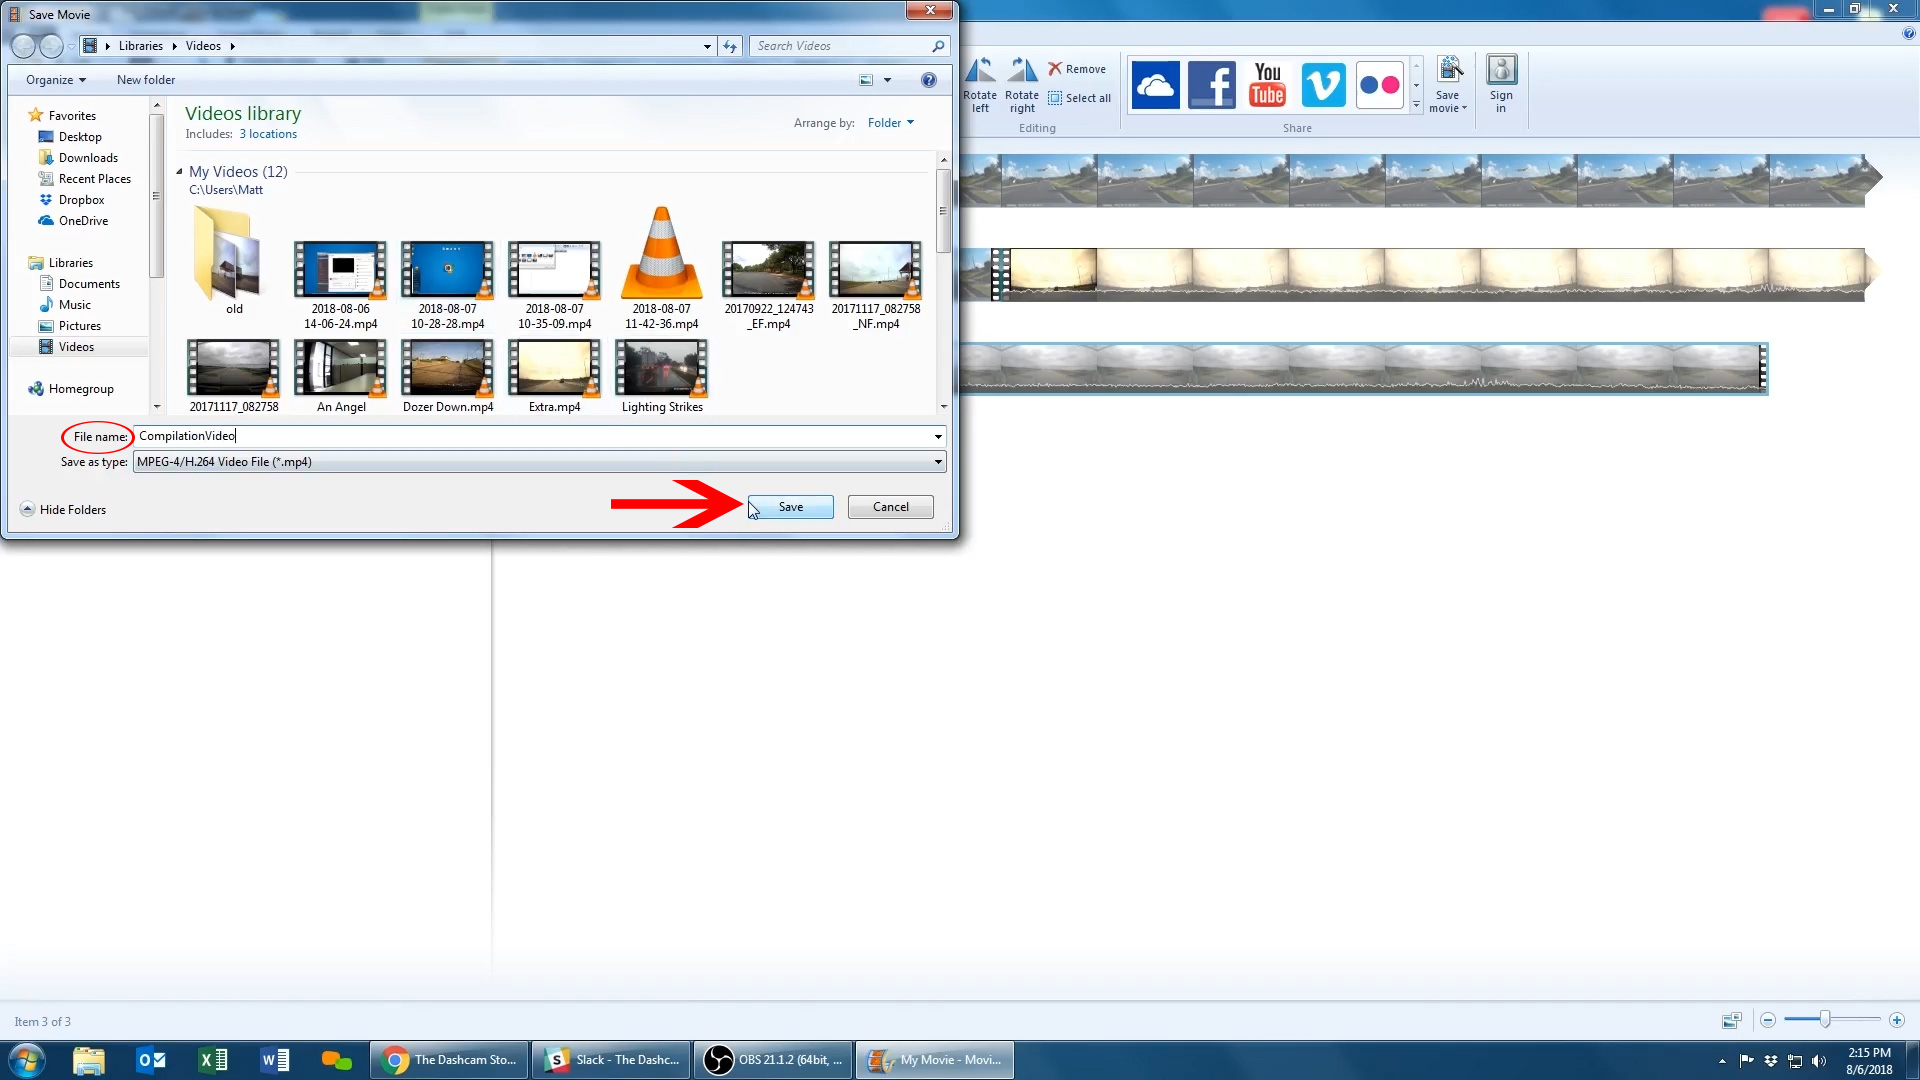
After you’ve selected the save option that best fits your needs, name your new audio removed footage and click
the "Save" button to save your video clip.
![How-to: Edit dashcam footage on Windows 7]()
Back to the Top
Click on the "Click here to browse for videos and photos" text, to begin trimming your clip.
![How-to: Edit dashcam footage on Windows 7]()
After clicking on "Click here to browse for videos and photos" you’ll be able to import the video file
that you want to trim.
![How-to: Edit dashcam footage on Windows 7]()
To begin editing, mouse over and select the "Edit" tab.
![How-to: Edit dashcam footage on Windows 7]()
After selecting the "Edit" tab, click on the "Trim Tool" to begin trimming your video
![How-to: Edit dashcam footage on Windows 7]()
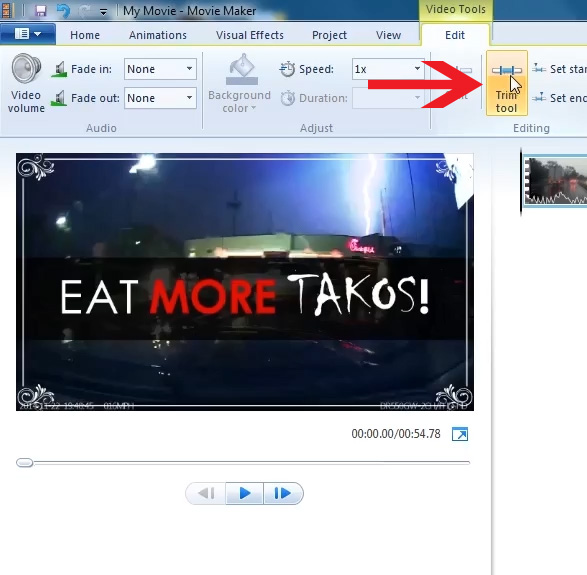
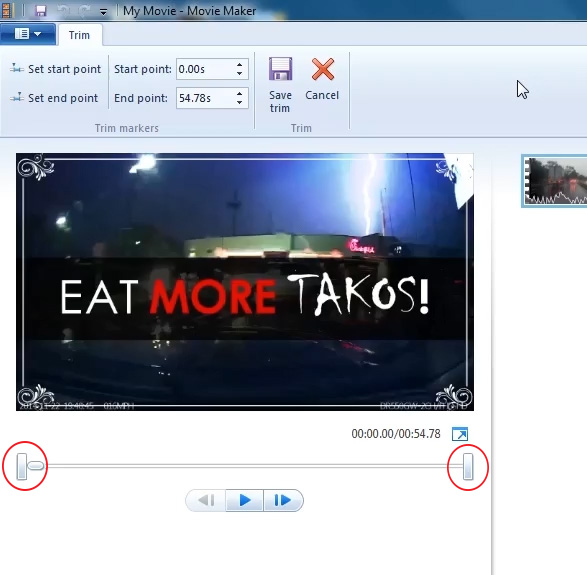
As displayed below, after clicking on the "Trim Tool" you can adjust the markers on both ends of the
video sequence to cut out footage you don’t want or simply trim the video duration.
![How-to: Edit dashcam footage on Windows 7]()
Trim Example: I want to trim idle footage of me parked at a red light, before my dashcam records an
electrical junction box exploding right in front of me!
![How-to: Edit dashcam footage on Windows 7]()
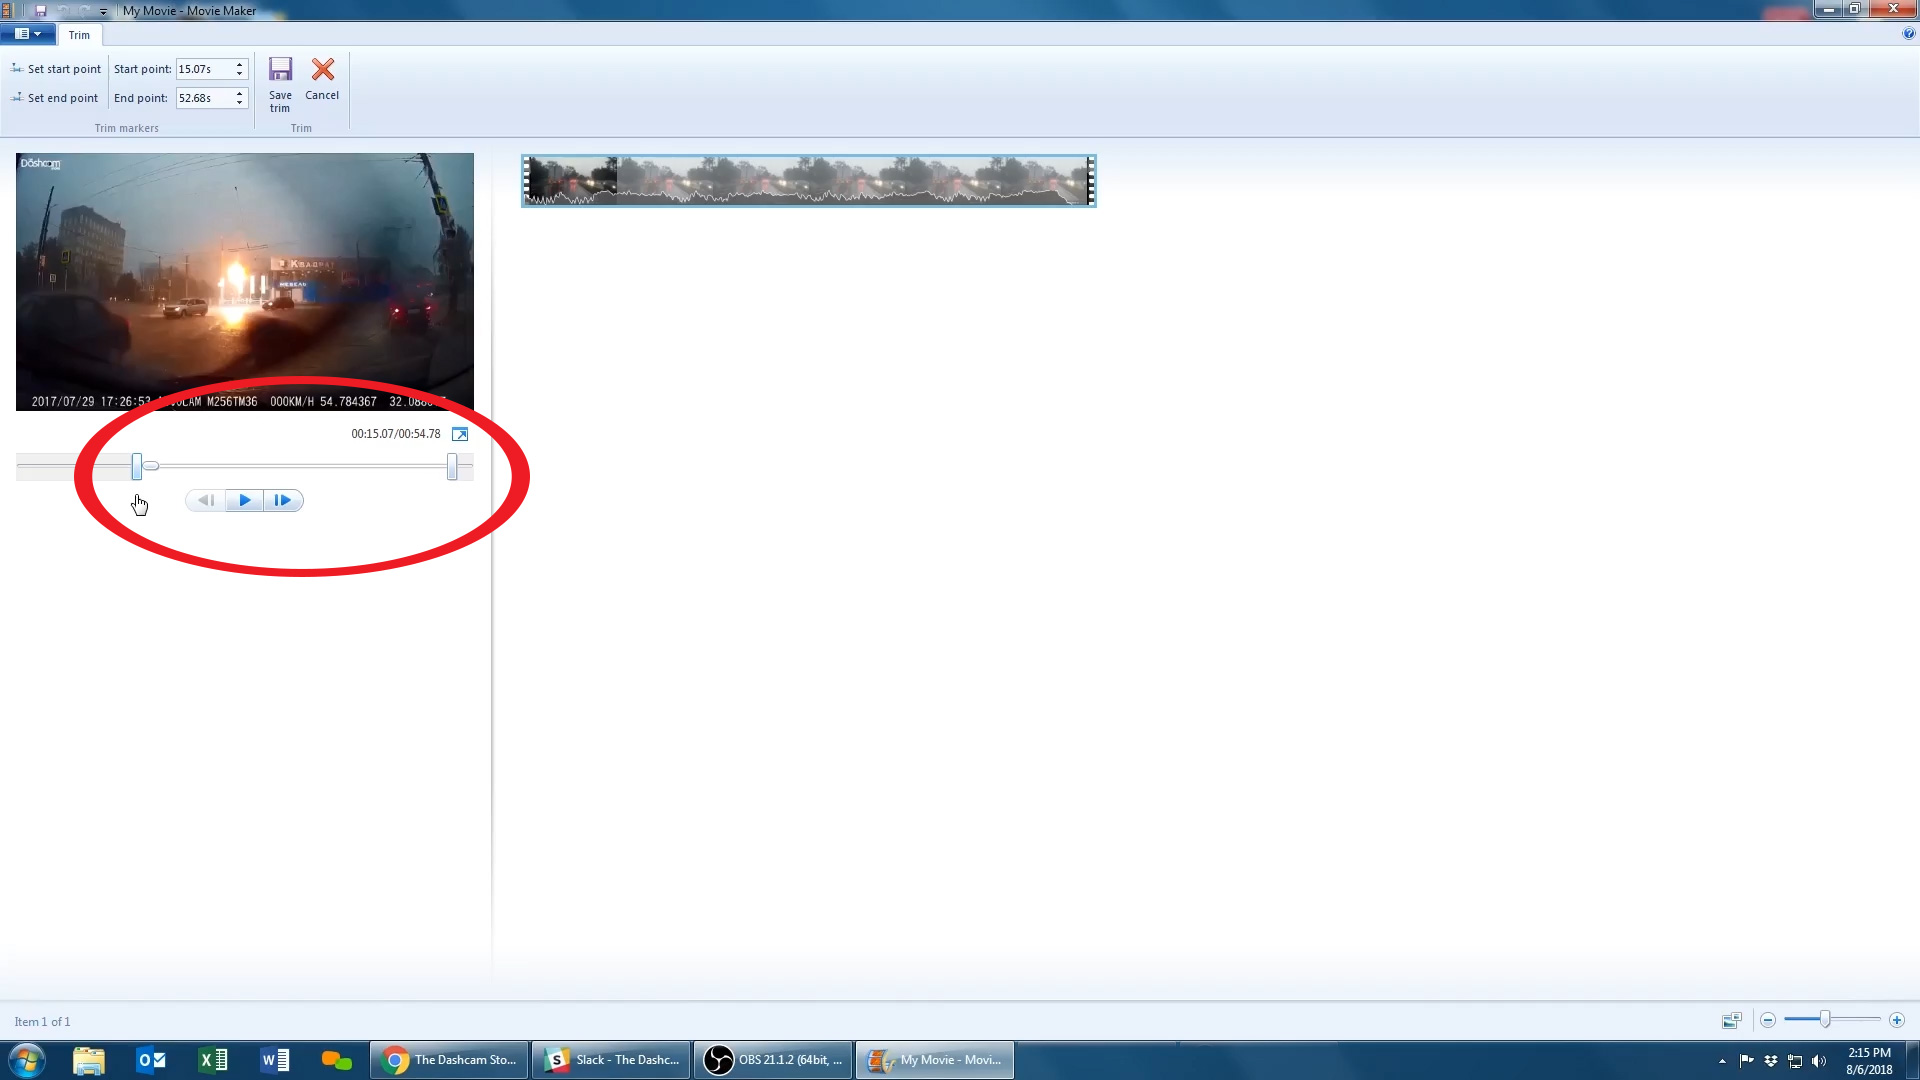
You can also trim your video by adjusting the time codes located above your clip by typing in your desired start
point and end point.
![How-to: Edit dashcam footage on Windows 7]()

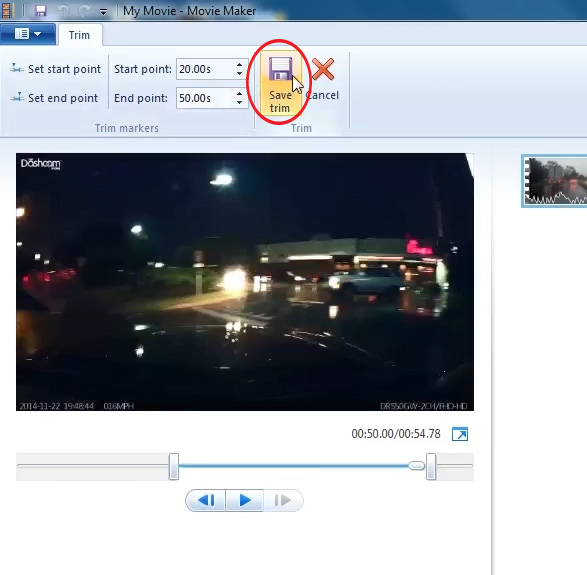
After you’ve edited your video, don’t forget to save your trim! Mouse over to the "Save Trim" icon to
finalize your adjustments.
![How-to: Edit dashcam footage on Windows 7]()
Now that your video is trimmed to your liking, let’s save. Once again mouse over and click on theblue folder
once again. Then scroll down to "Save Movie", again we will be proceeding with the "For
high-definition display" option to retain HD visual acuity.
![How-to: Edit dashcam footage on Windows 7]()
After selecting the save option that best fits you, name your newly trimmed video file and click the
"Save" button to save your footage.
![How-to: Edit dashcam footage on Windows 7]()
Back to the Top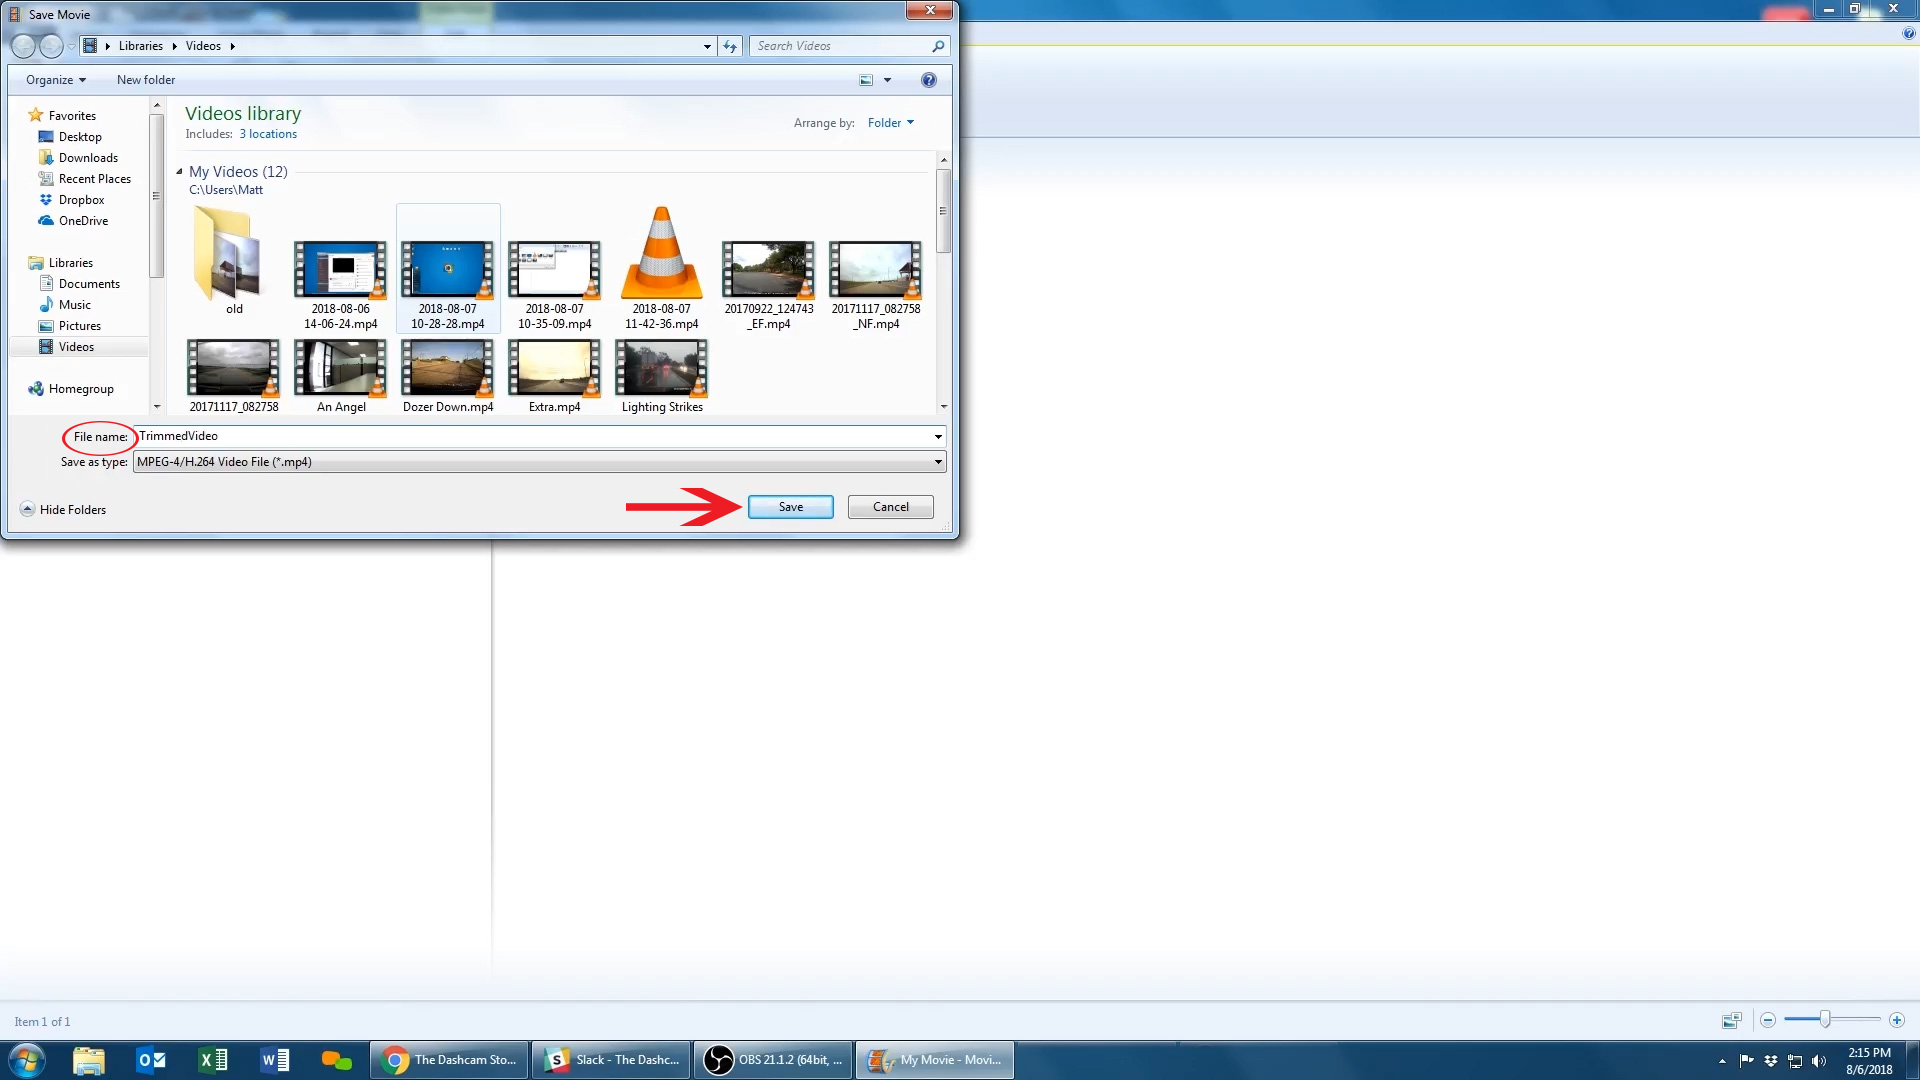
Click on the "Click here to browse for videos and photos" text and you’ll be able to import all the video
files that you want merge into one video file.
![How-to: Edit dashcam footage on Windows 7]()

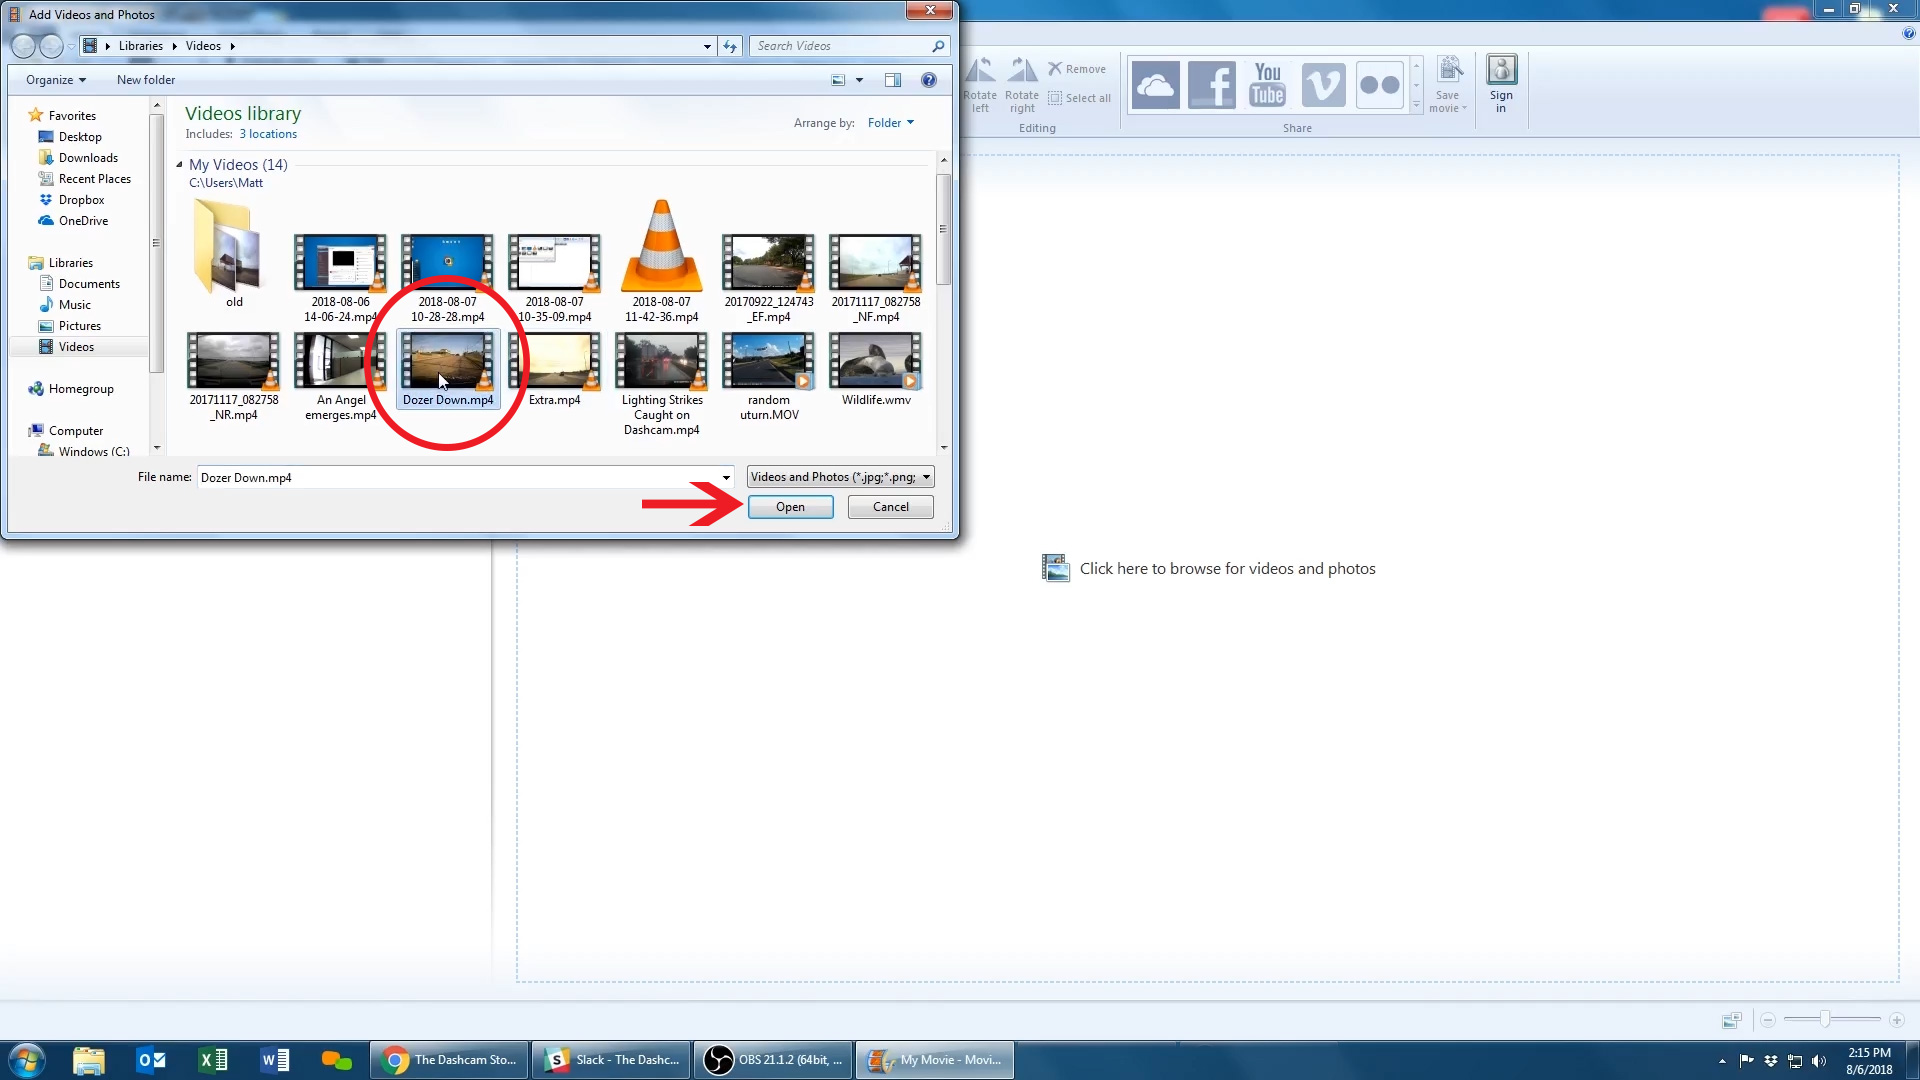
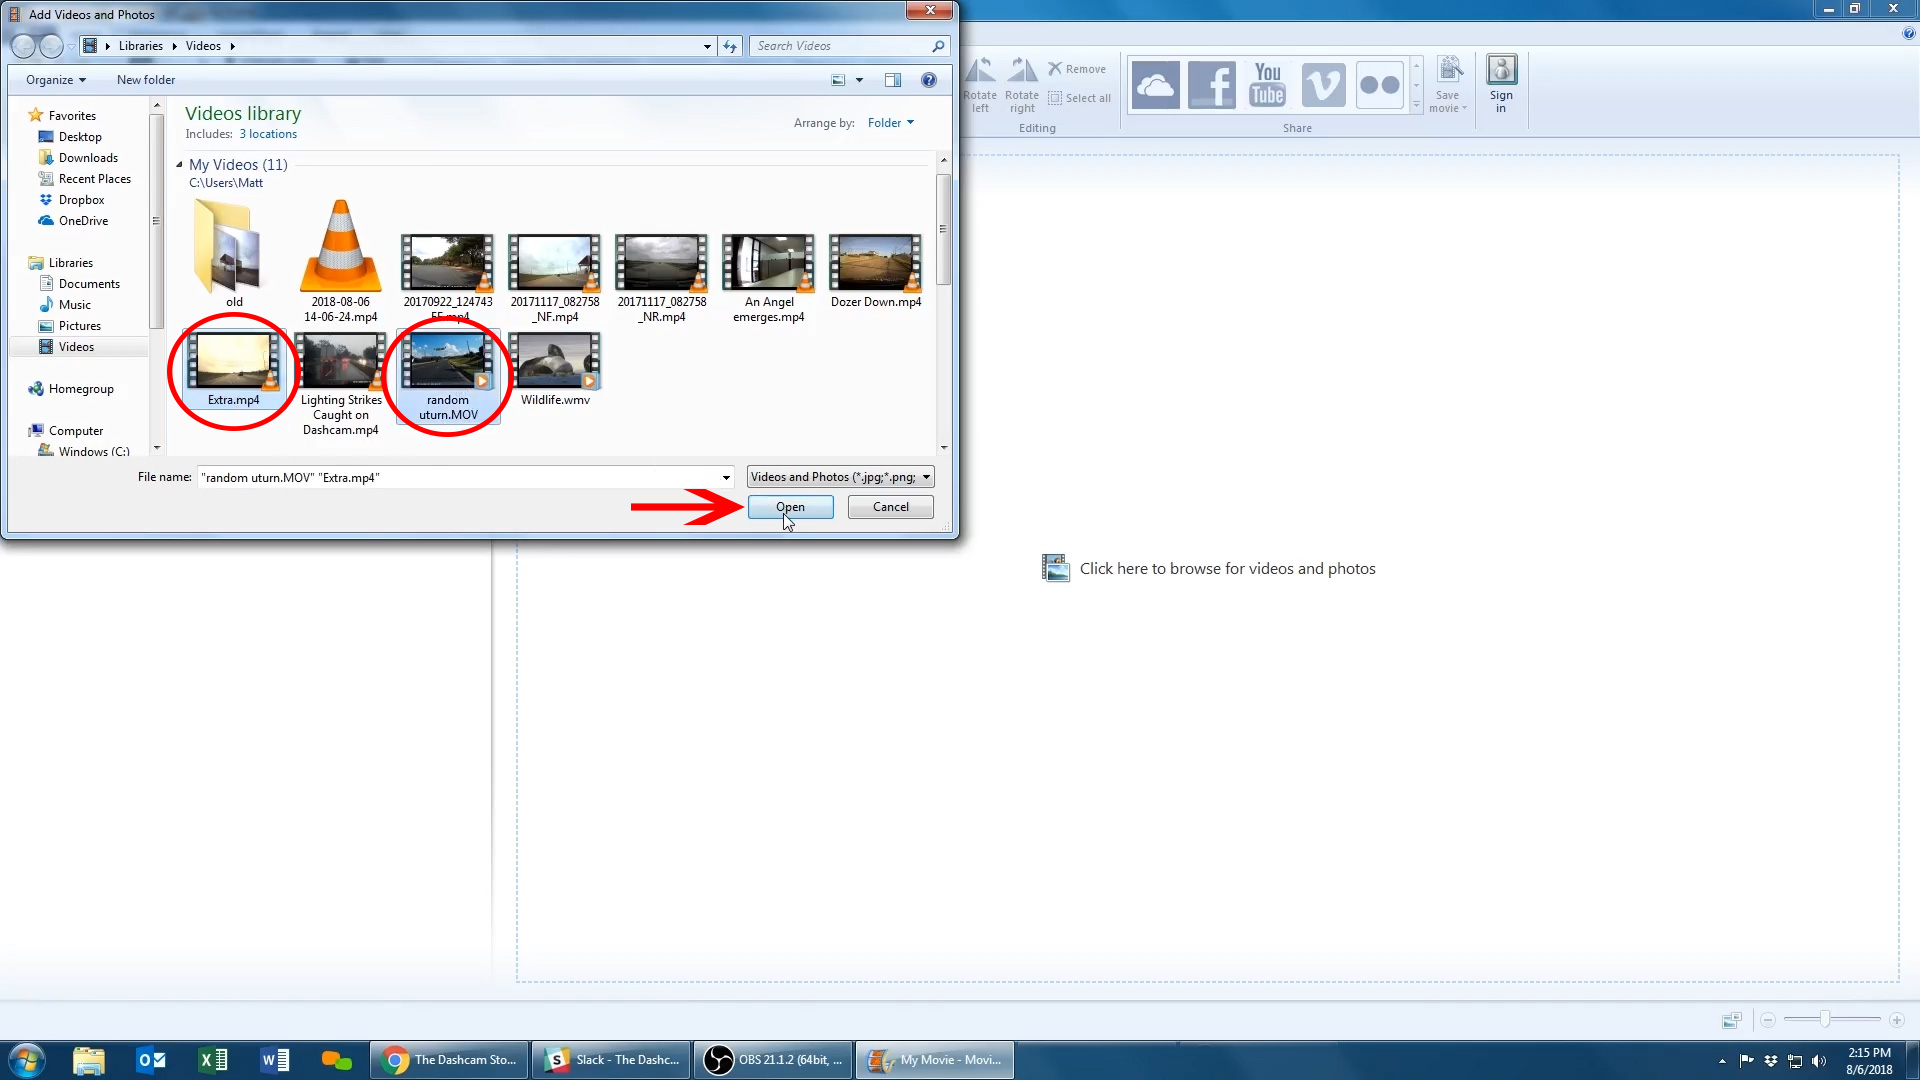
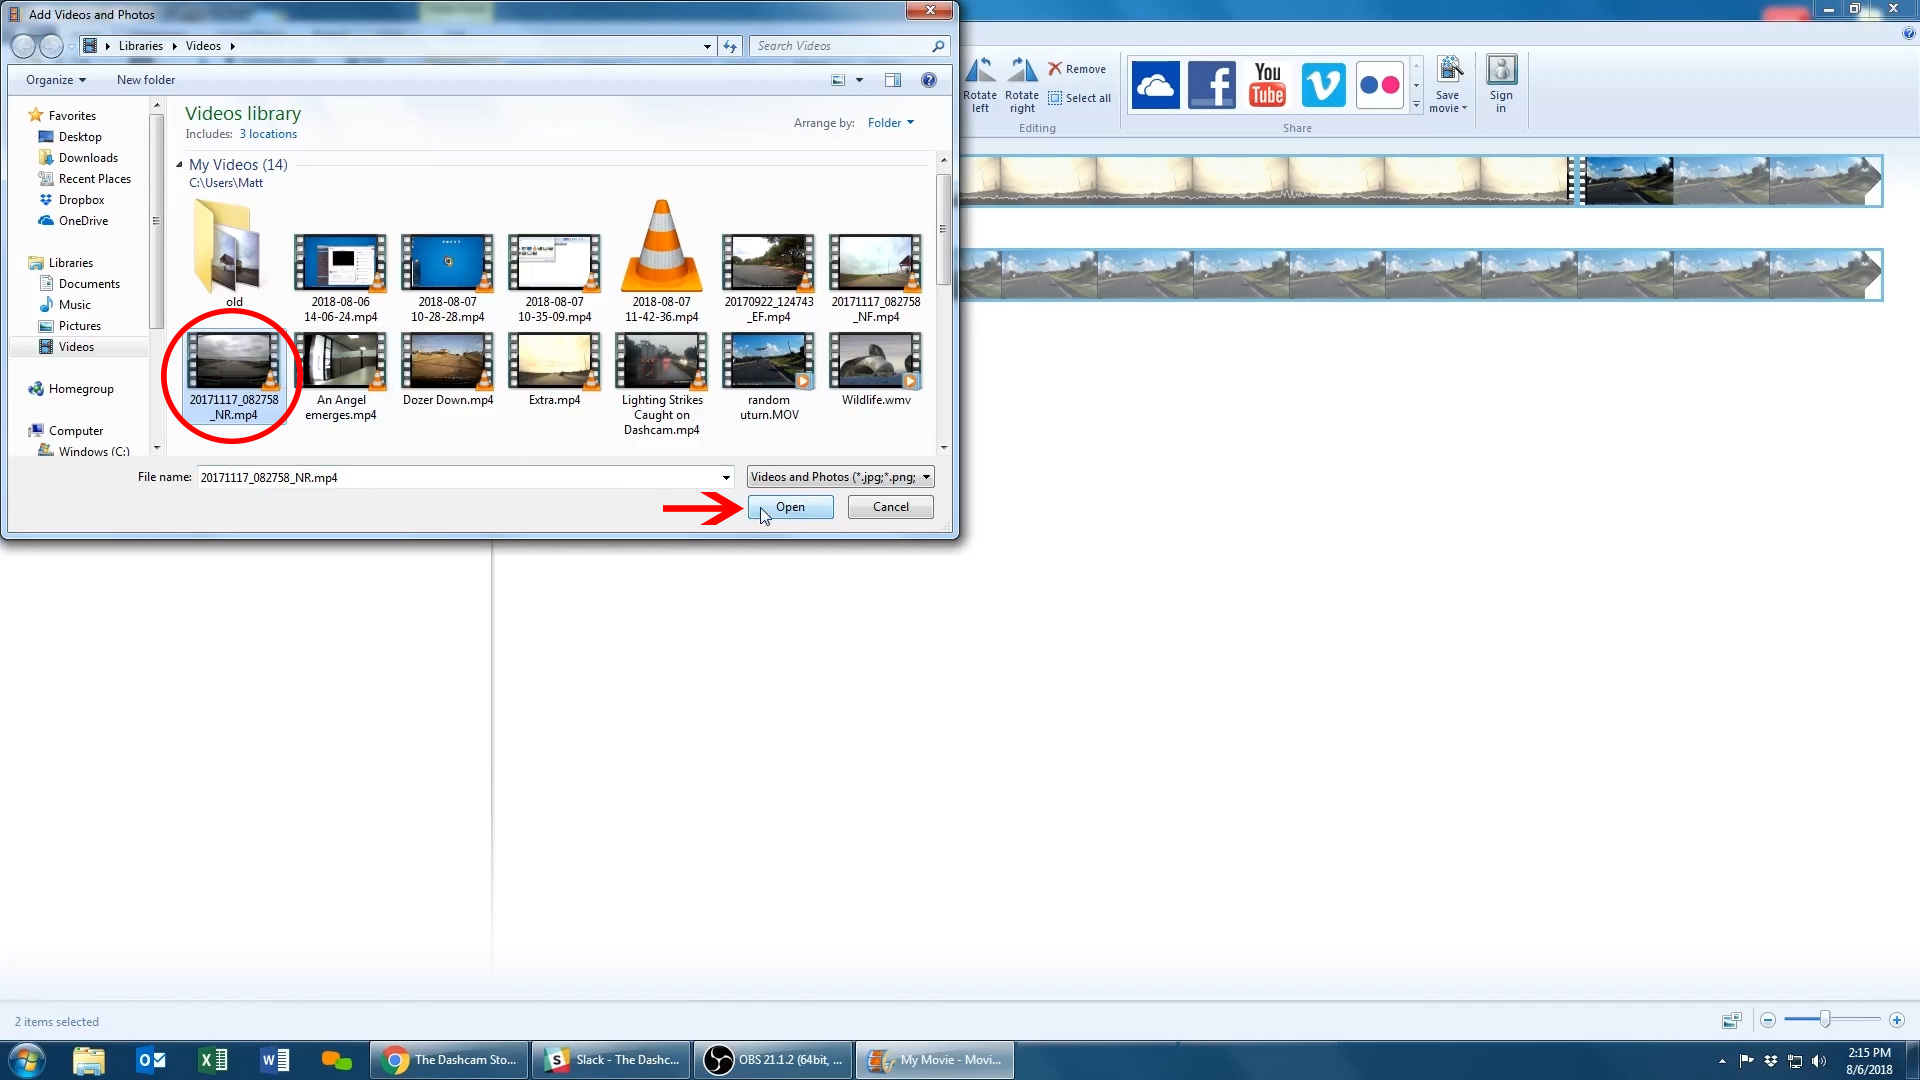
After clicking on "Click here to browse for videos and photos" you can hold down (CTRL) and select
multiple clips that you want imported.
![How-to: Edit dashcam footage on Windows 7]()
You can continue adding clips by clicking on the "Home" tab.
![How-to: Edit dashcam footage on Windows 7]()

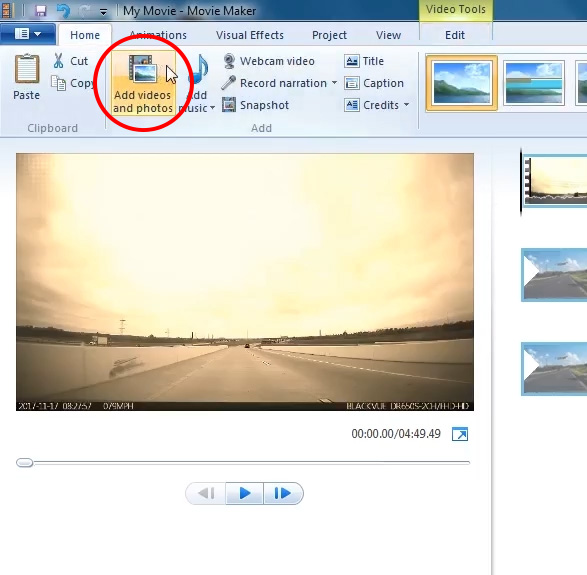
Once the "Home" tab is selected, click on the "Add Videos & Photos" tab to import more media
files.
![How-to: Edit dashcam footage on Windows 7]()
Select another clip you want merged with your initially selected files.
![How-to: Edit dashcam footage on Windows 7]()
Now that you’ve finished importing your footage, there are several files on a single timeline.
![How-to: Edit dashcam footage on Windows 7]()
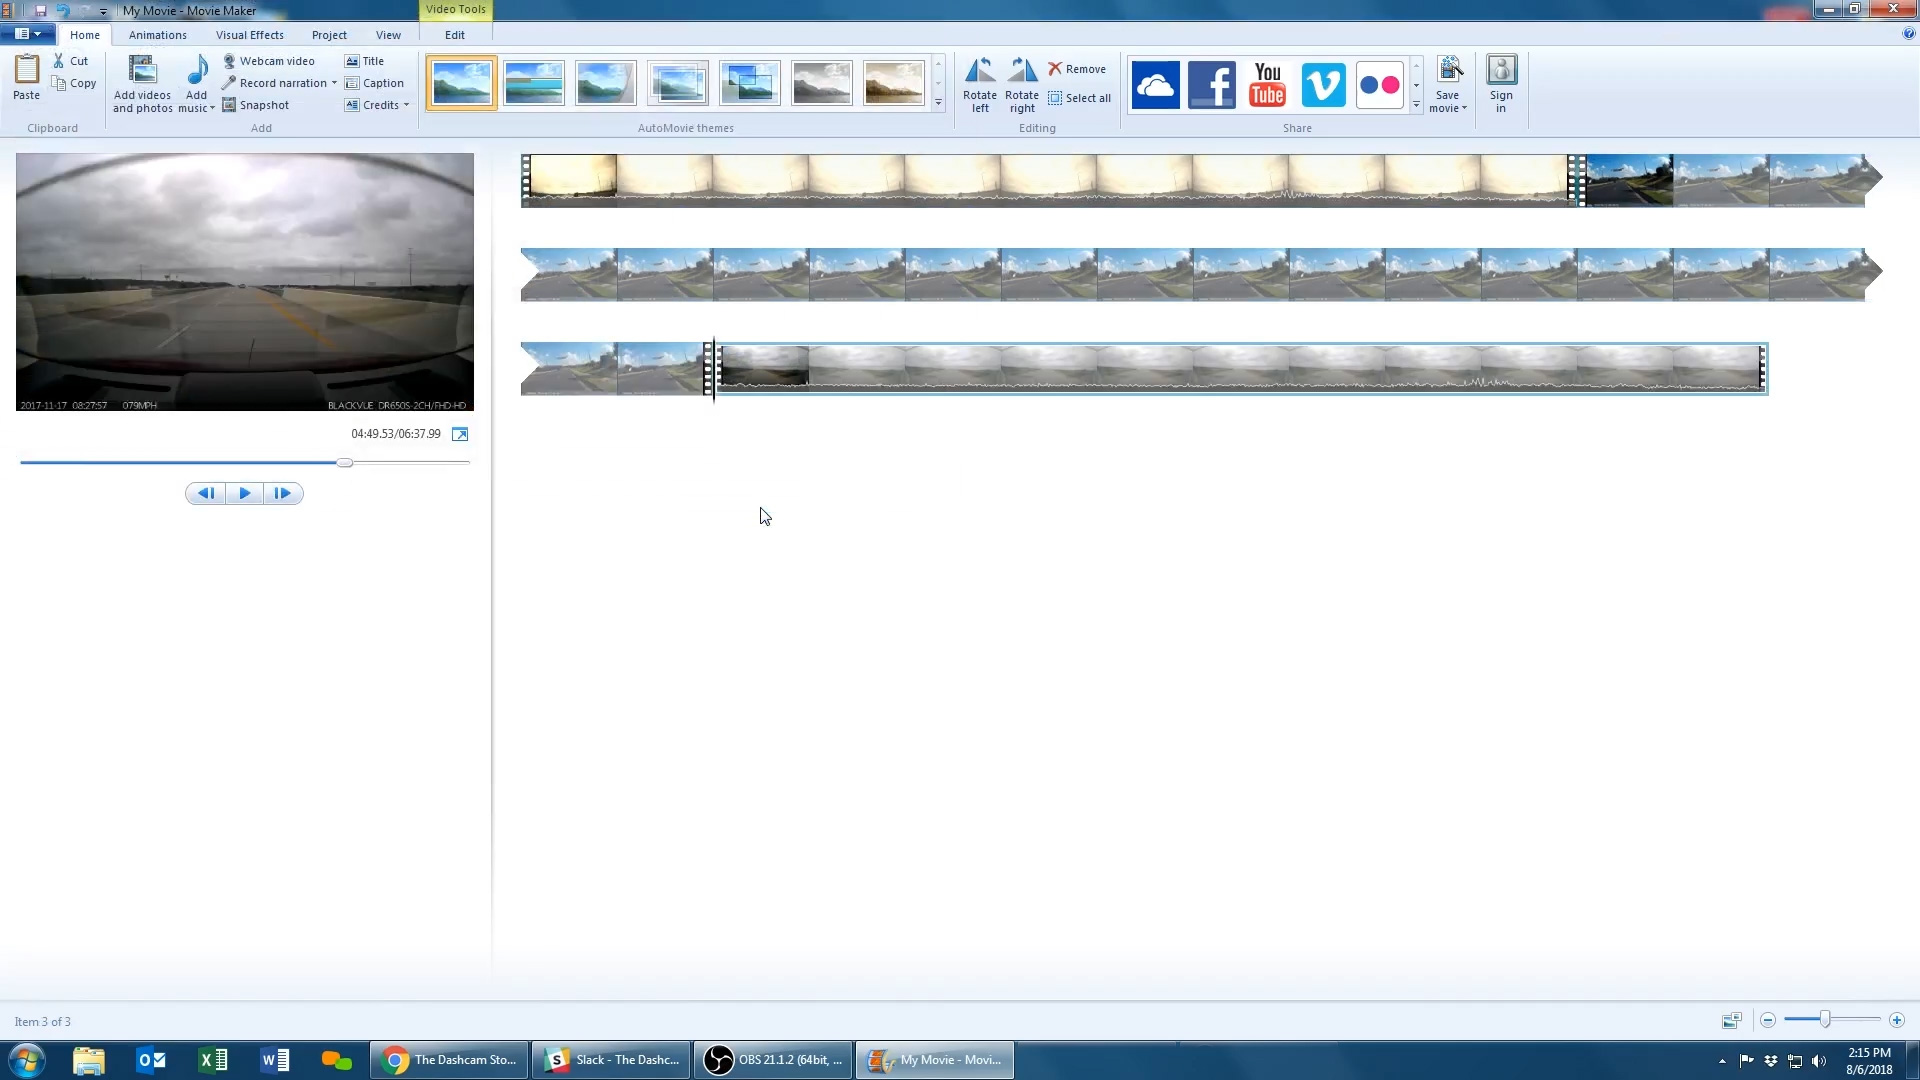
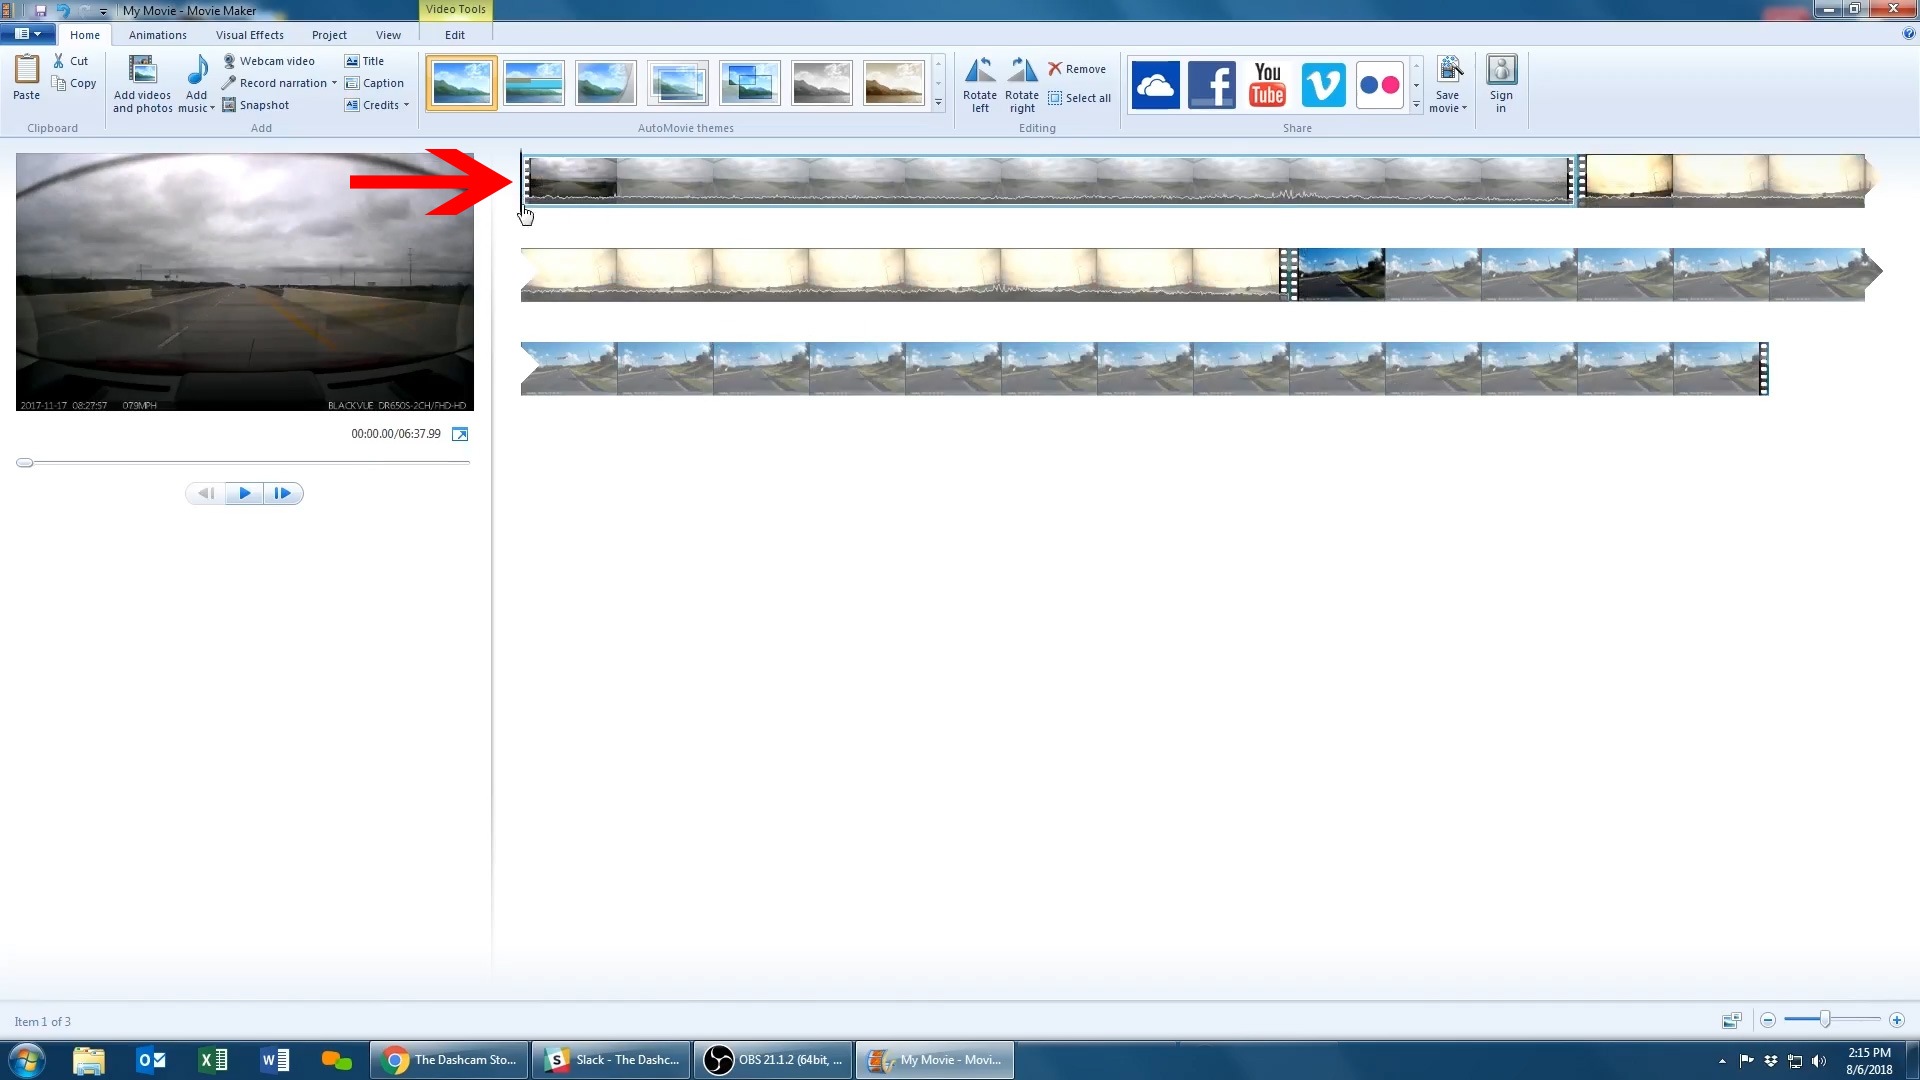
You can rearrange your videos’ position by clicking and dragging on the individual clips.
Below are three examples of the rearrangements of clips on a single timeline.
![How-to: Edit dashcam footage on Windows 7]()
![How-to: Edit dashcam footage on Windows 7]()
![How-to: Edit dashcam footage on Windows 7]()
Below are three examples of the rearrangements of clips on a single timeline.

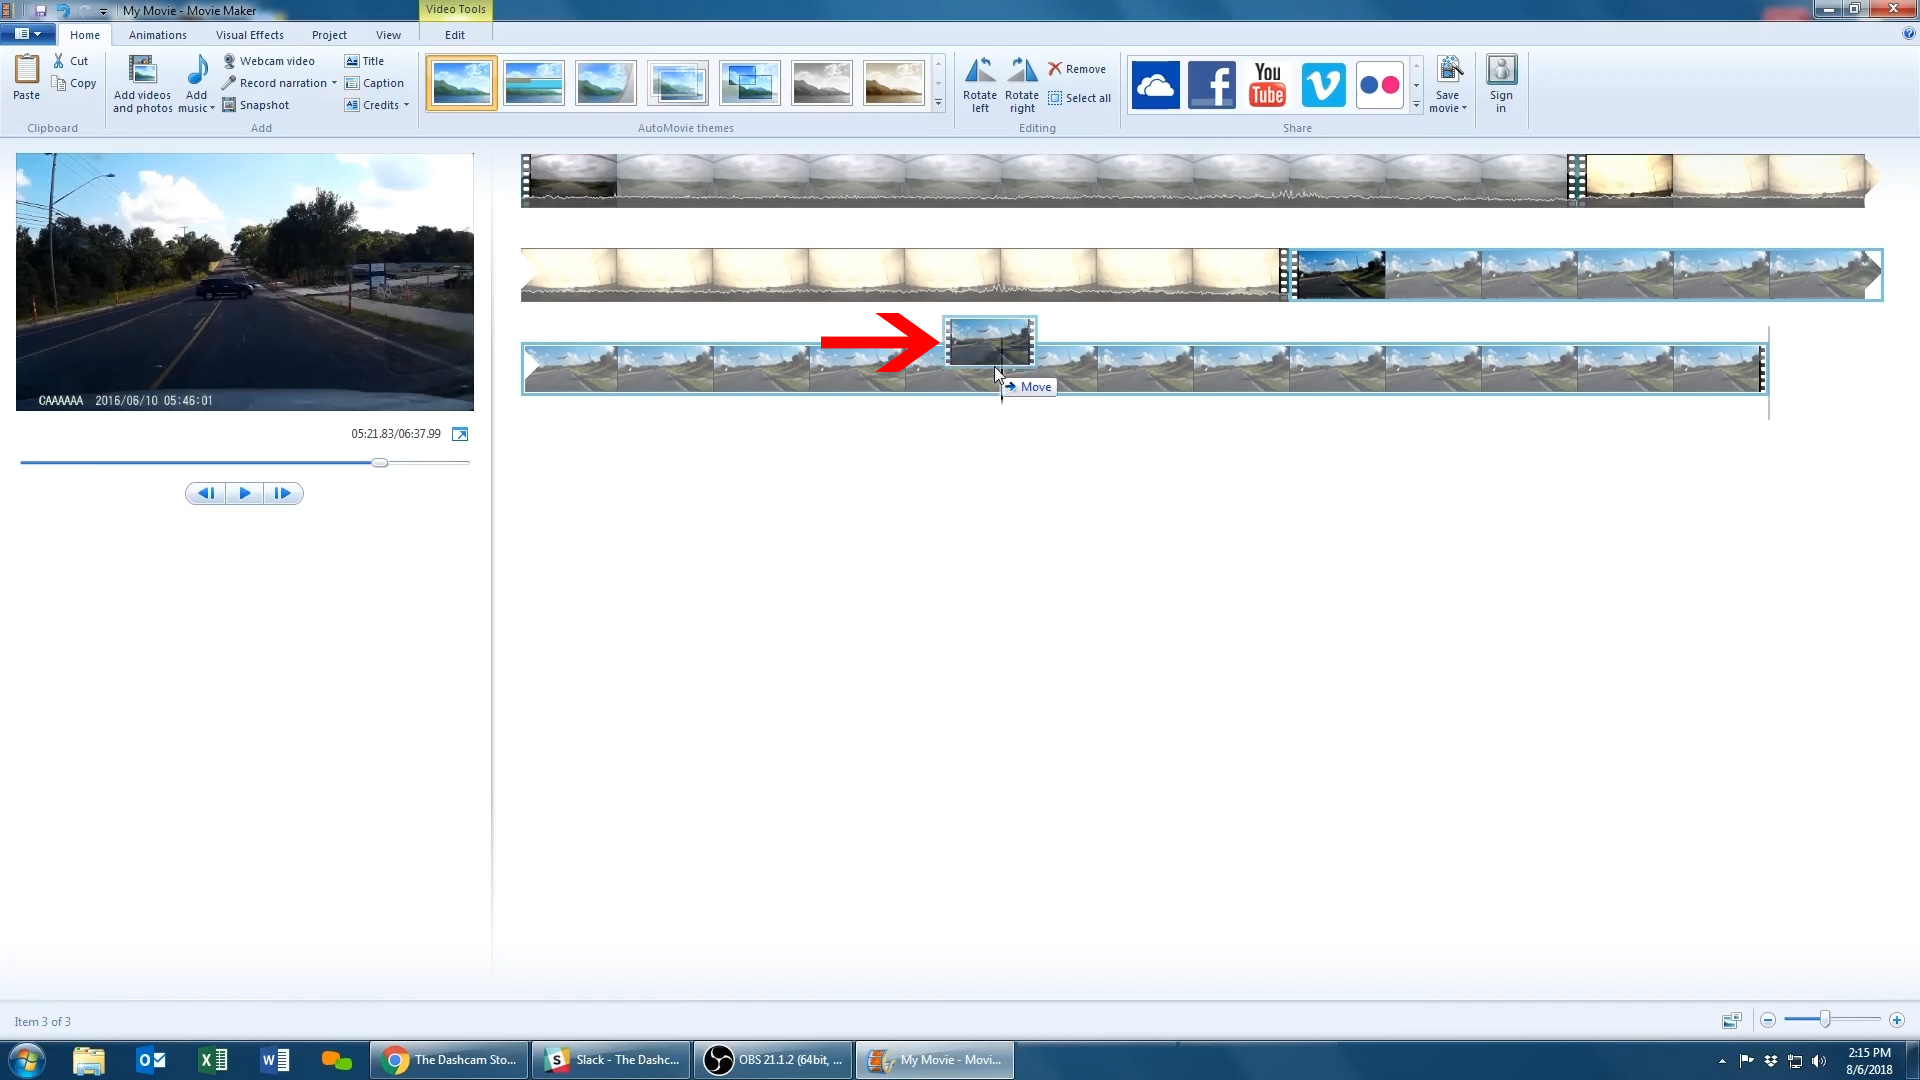
Now your clips have been rearranged and still remain on the same timeline.
![How-to: Edit dashcam footage on Windows 7]()

Once again, mouse over and click the blue folder, then scroll down to “Save movie”. Today we’ll be
proceeding with the "For high-definition display" option to maintain our videos’ HD resolution.
![How-to: Edit dashcam footage on Windows 7]()
Though we are proceeding with the "For high-definition display" save option to retain our video’s visual
quality, you can scroll down and reveal several other save formats.
![How-to: Edit dashcam footage on Windows 7]()
Once you’ve selected the save option that best fit you needs, name your new video and click the "Save"
button to save your footage
![How-to: Edit dashcam footage on Windows 7]()
Back to the Top