How To Edit Dashcam Footage on Windows 10 Using Free Software
Posted by The Dashcam Store on Sep 10, 2018
Click on any image below to view a larger version.
How To Remove Audio from a Dashcam Video Clip
Begin by opening the "Photos" application, found in your start menu. You can search through your individual program files or narrow your search by typing "Photos" in the search programs and files bar.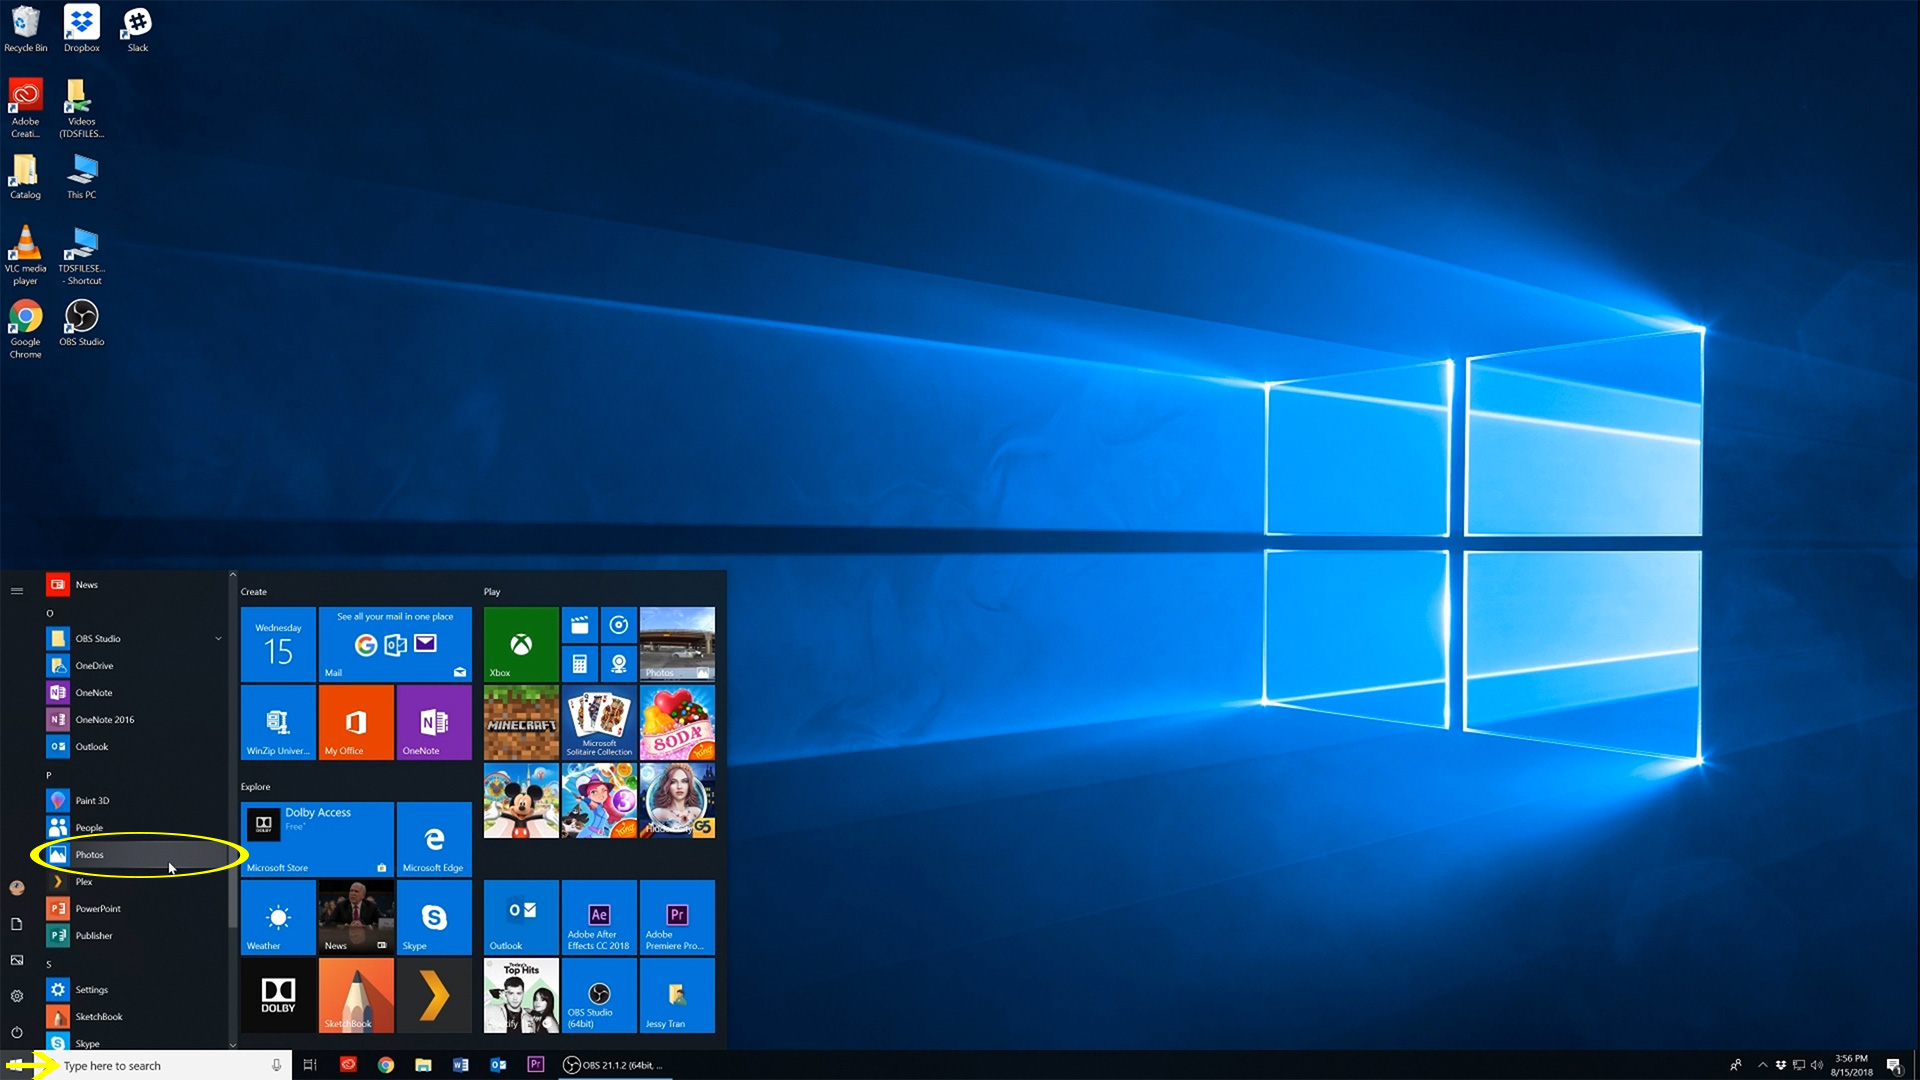
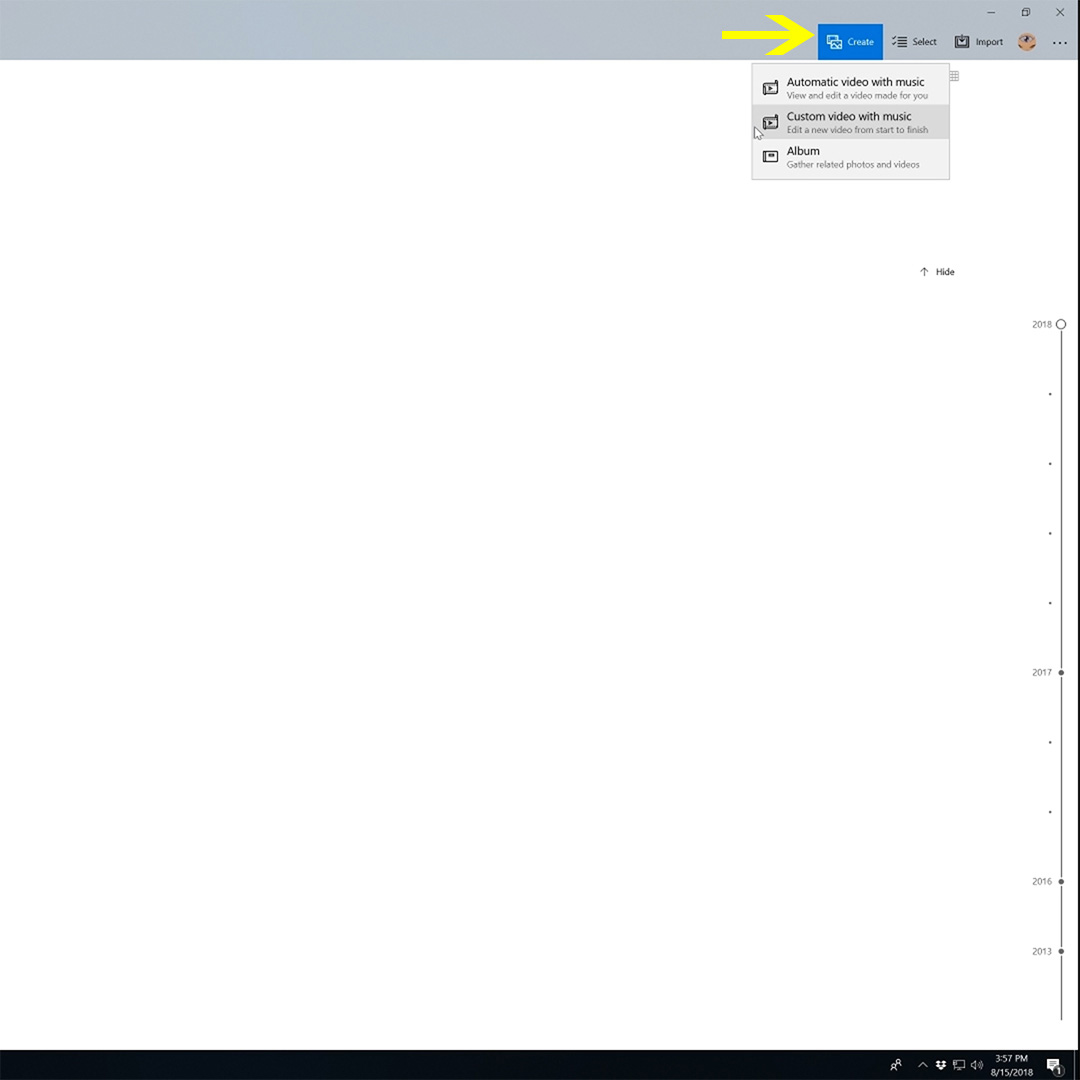
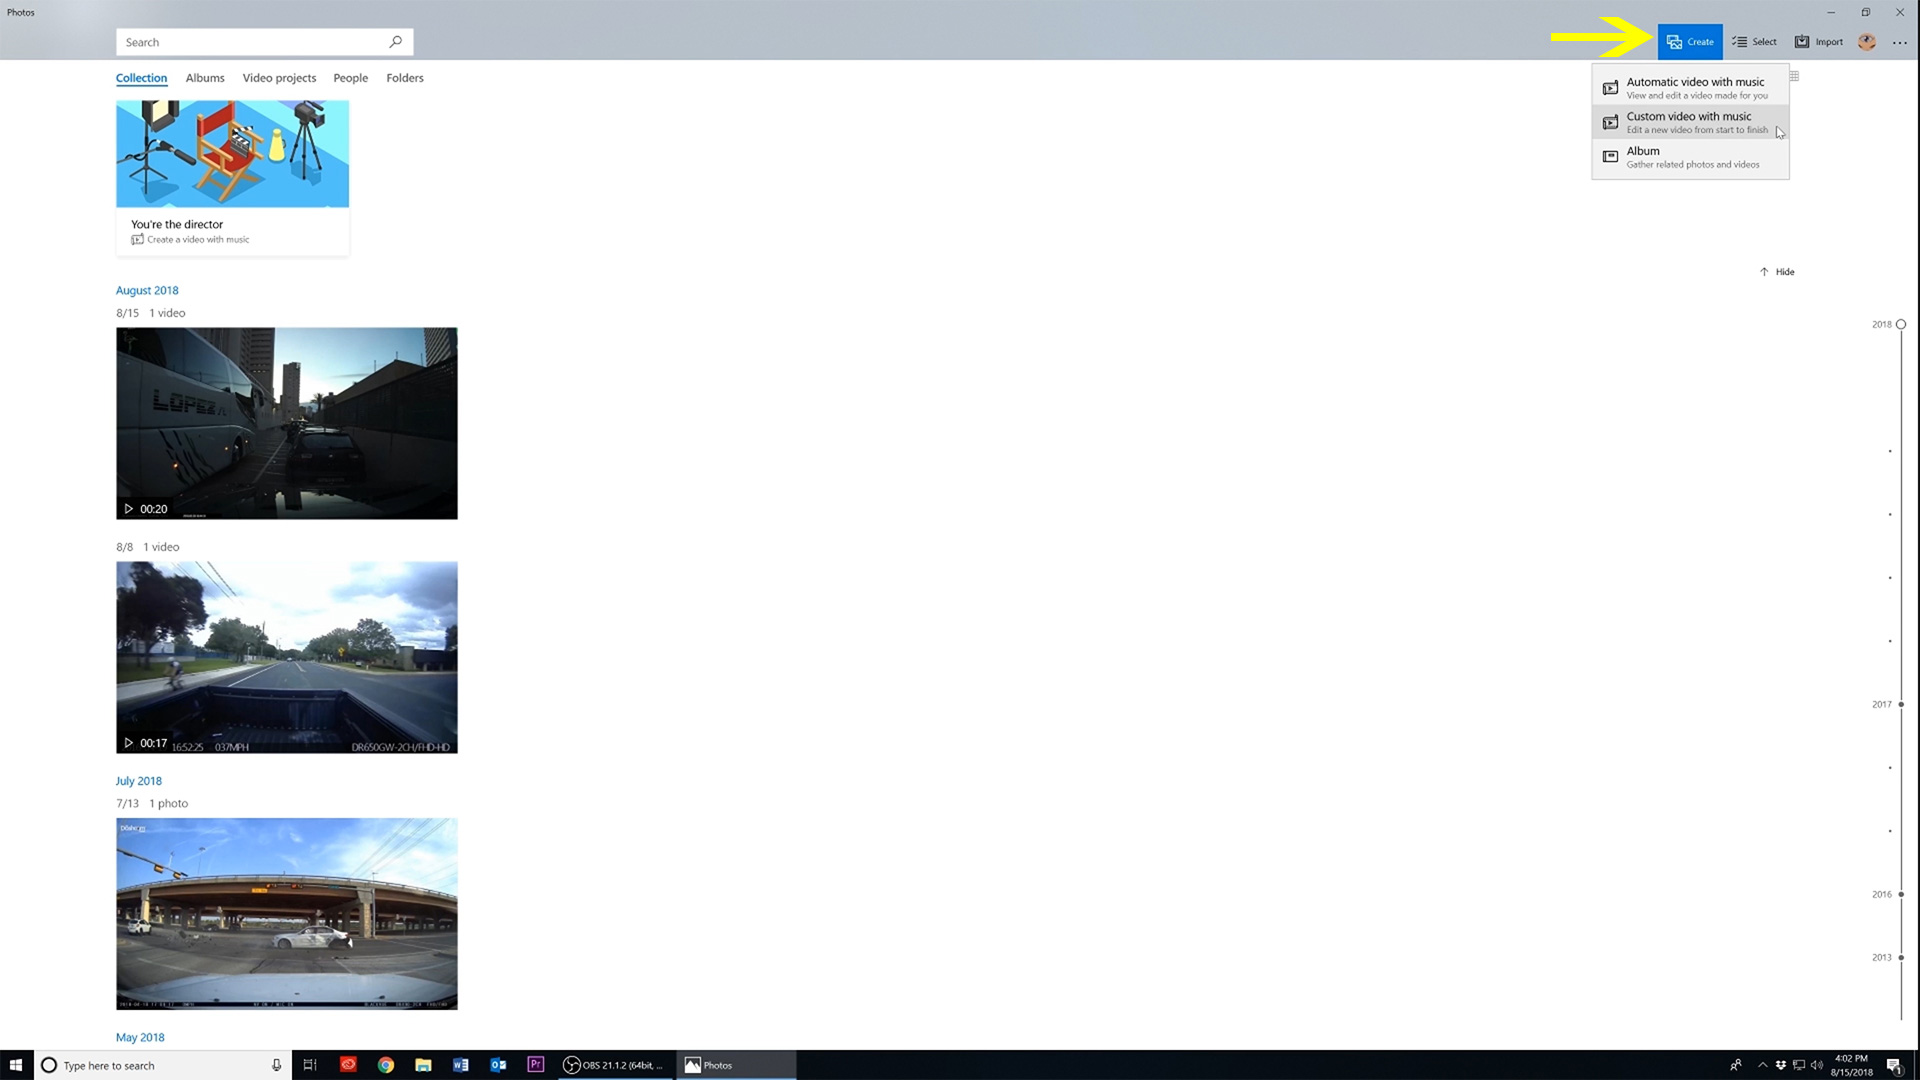
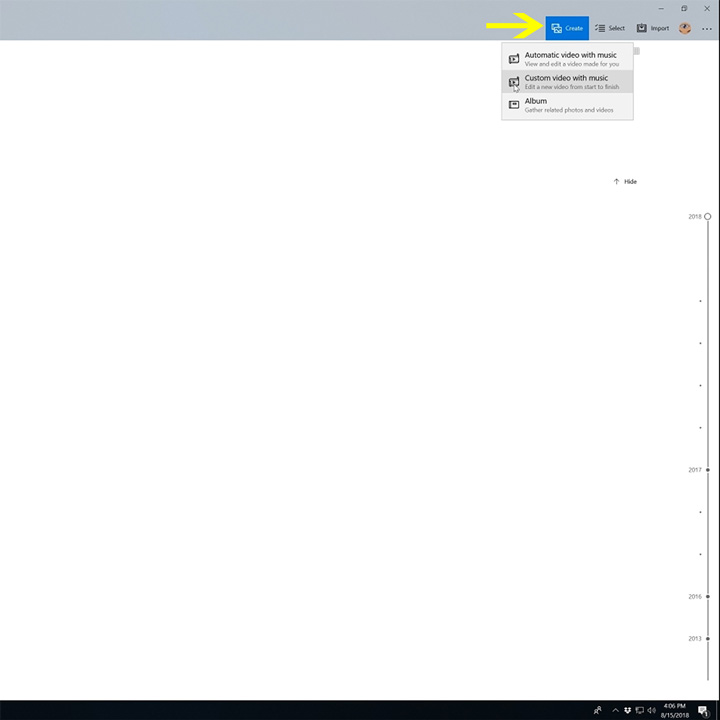
After opening the application, navigate over to the right-hand corner of “Photos” and click on “Create.” You’ll
then be presented three options.
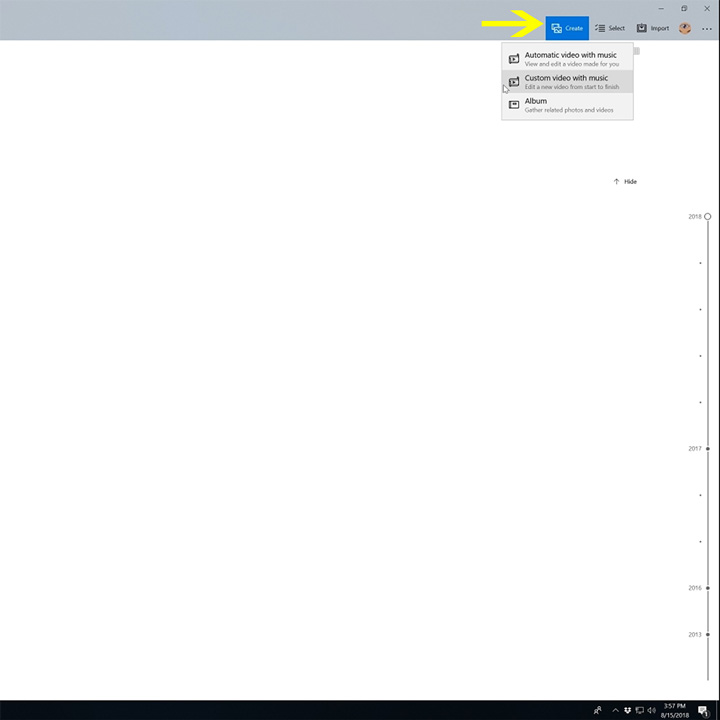
- "Automatic video with music" which will be a video created from a template of your liking, automatically put together by Windows "Photos"
- "Custom video with music" allows users 100% control over their footage, letting you cut, trim, and combine several videos together.
- "Album" which allows for the gathering and organizing of your videos and photos.
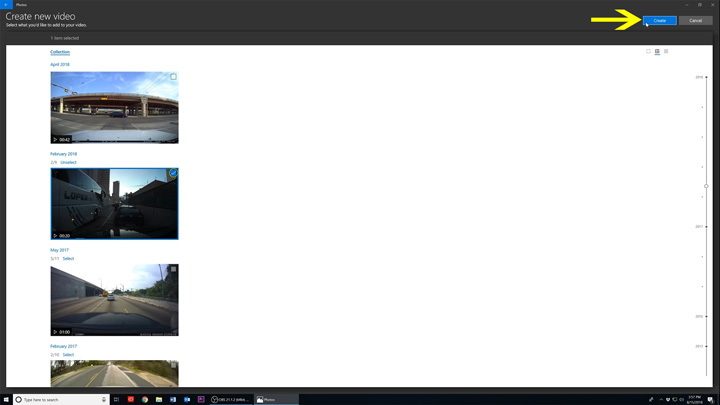
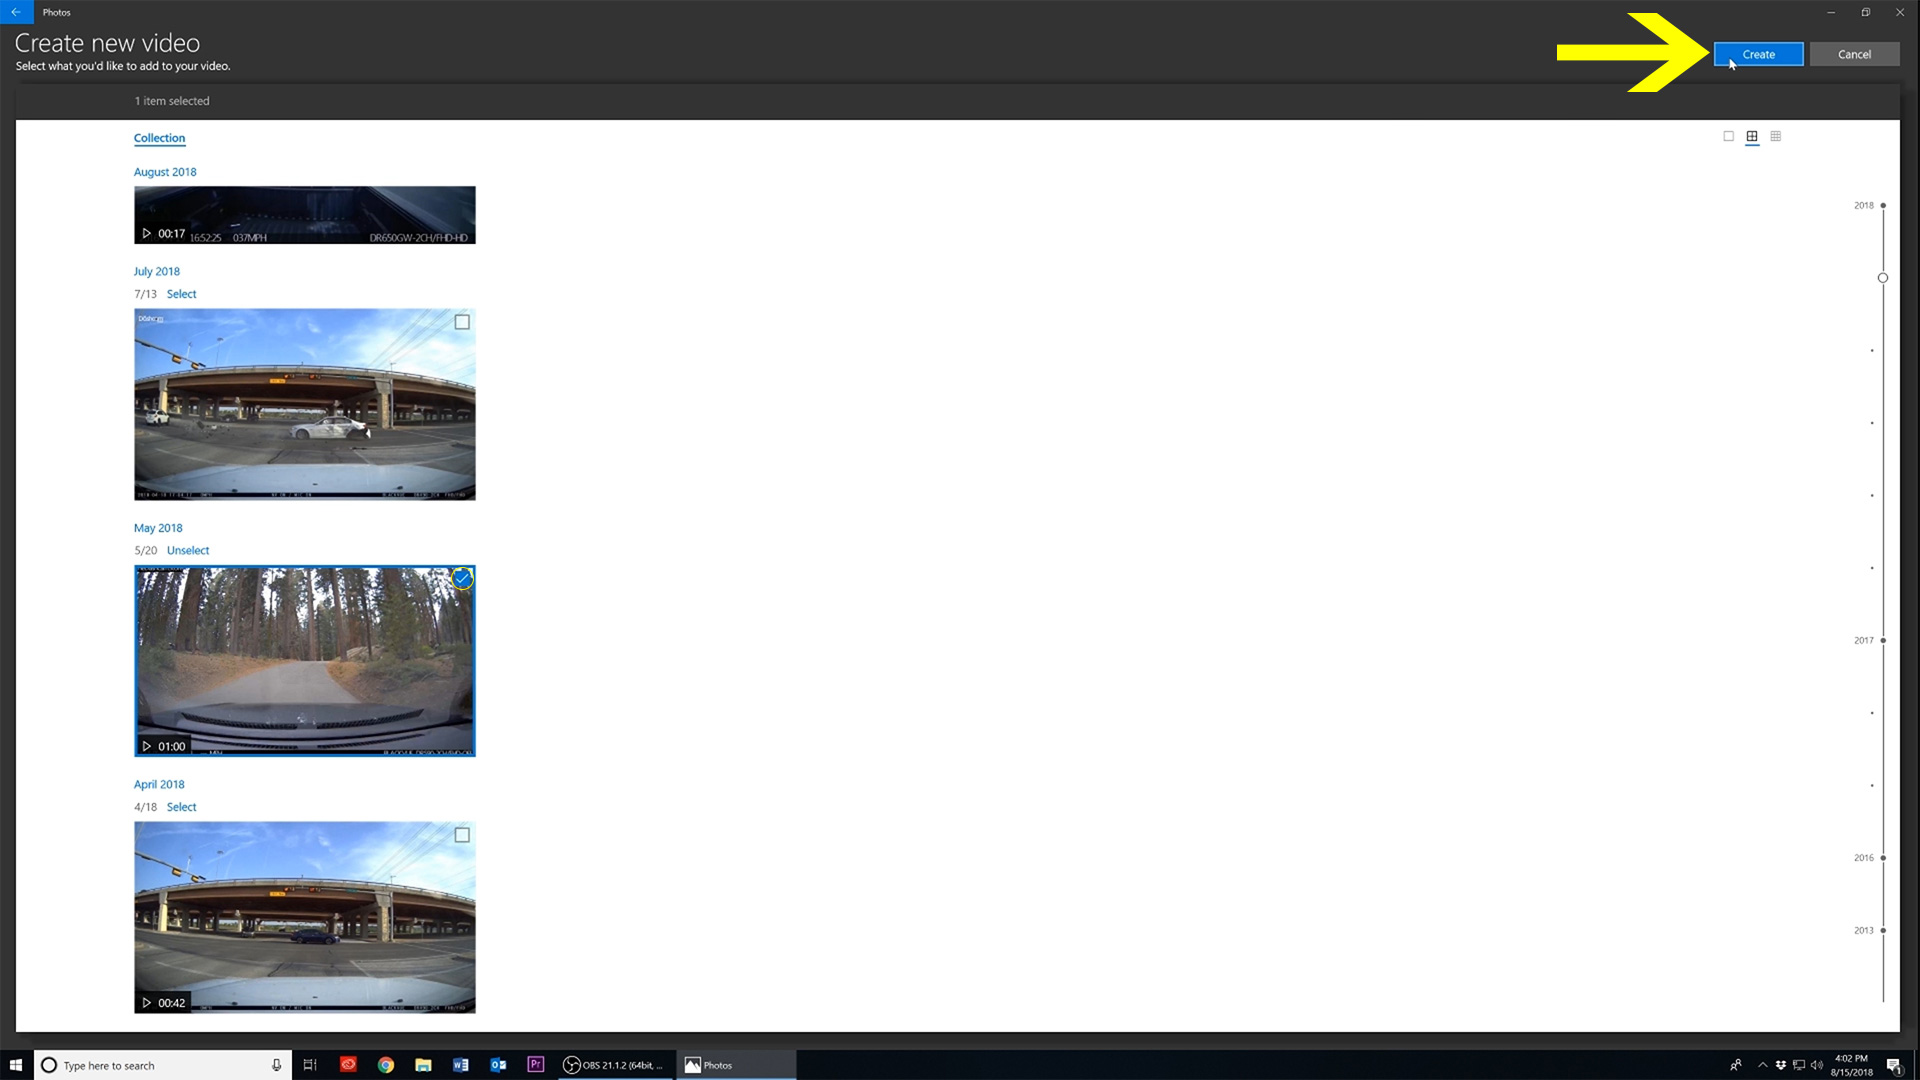
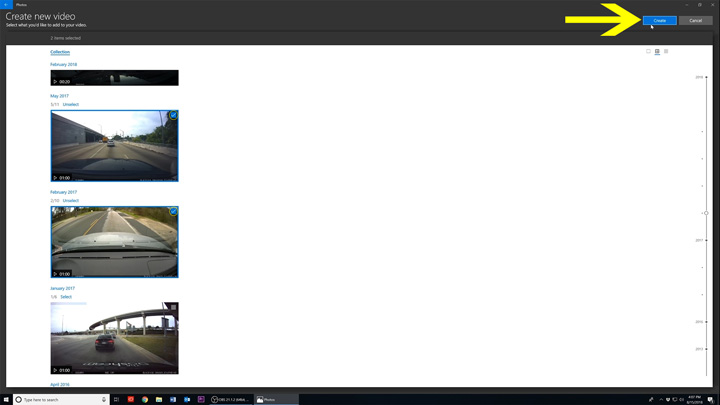
Mouse over and navigate through your catalog of footage to find the video you want audio to be removed, then
click on it. Selected videos will be indicated by the check mark in the top right corner of the video clip. Then
scroll back up to the right-hand corner of the application and click on "Create" to begin editing your
clip.

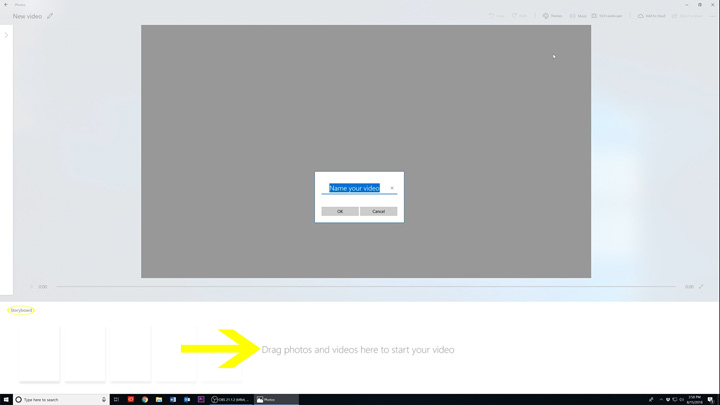
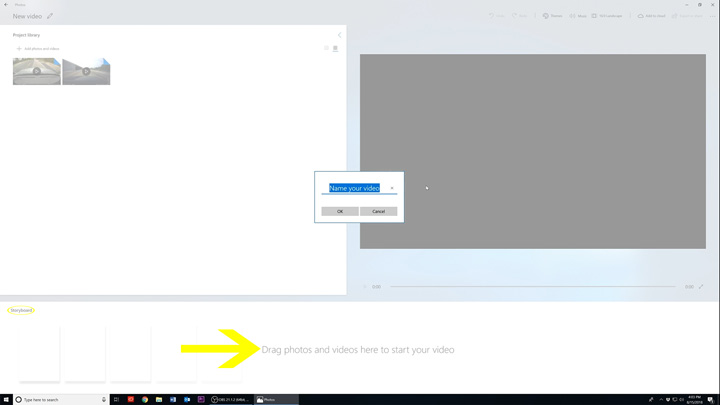
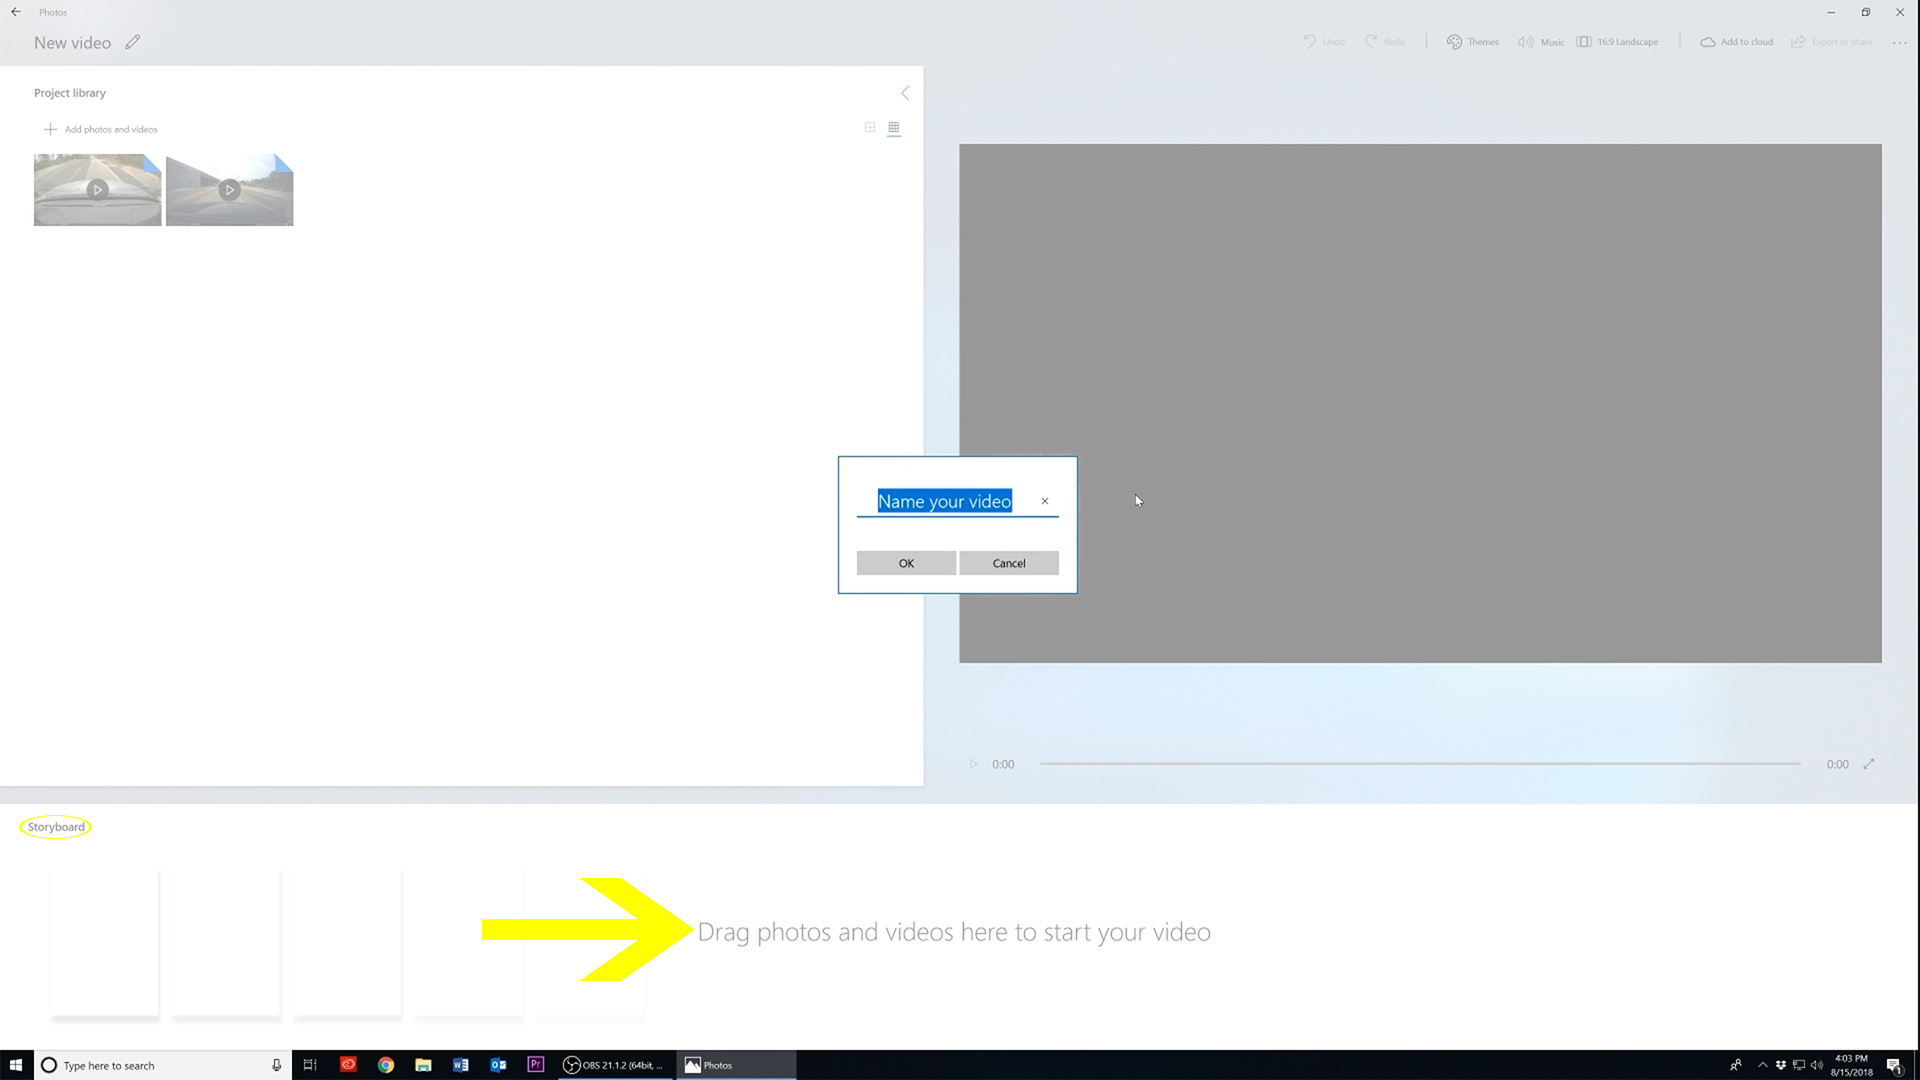
Now give your project a name and take notice of the text "Drag photos and videos here to start your
video" at the bottom of the screen. All videos will have to be dragged into the project timeline or
"Storyboard" to begin editing.

All added videos will appear in your "Project library." After dragging your video from "Project
library." in the top left-hand side of the photos application into the storyboard timeline we can begin
removing audio from your video.
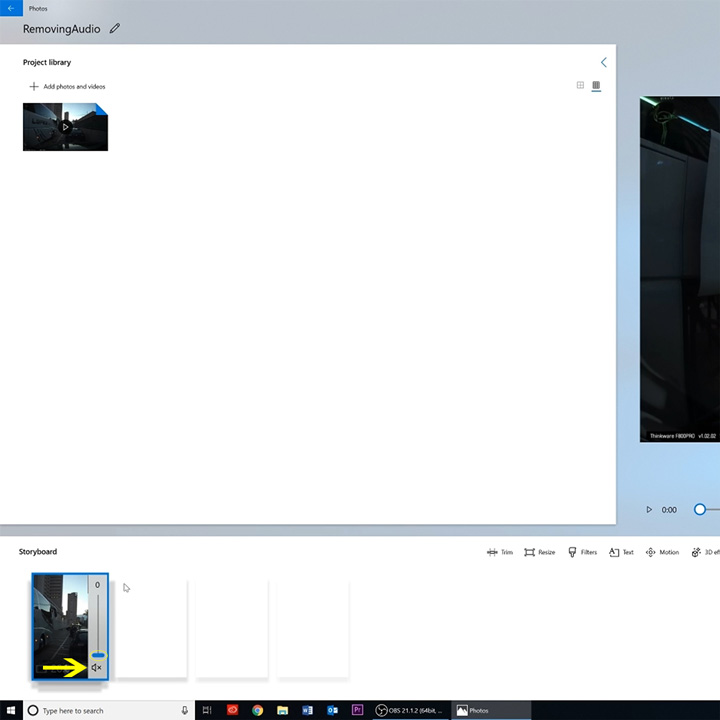
- Double click on the speaker icon to remove your audio or drag the volume marker to "0".
- Either path will remove audio from your video, muted audio will be indicated by an "X" on the speaker icon.

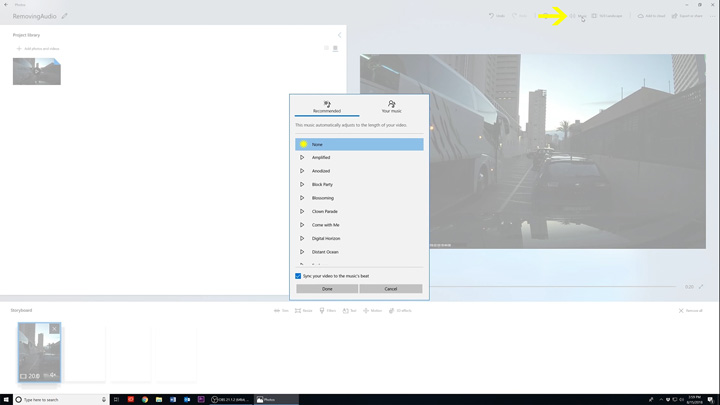
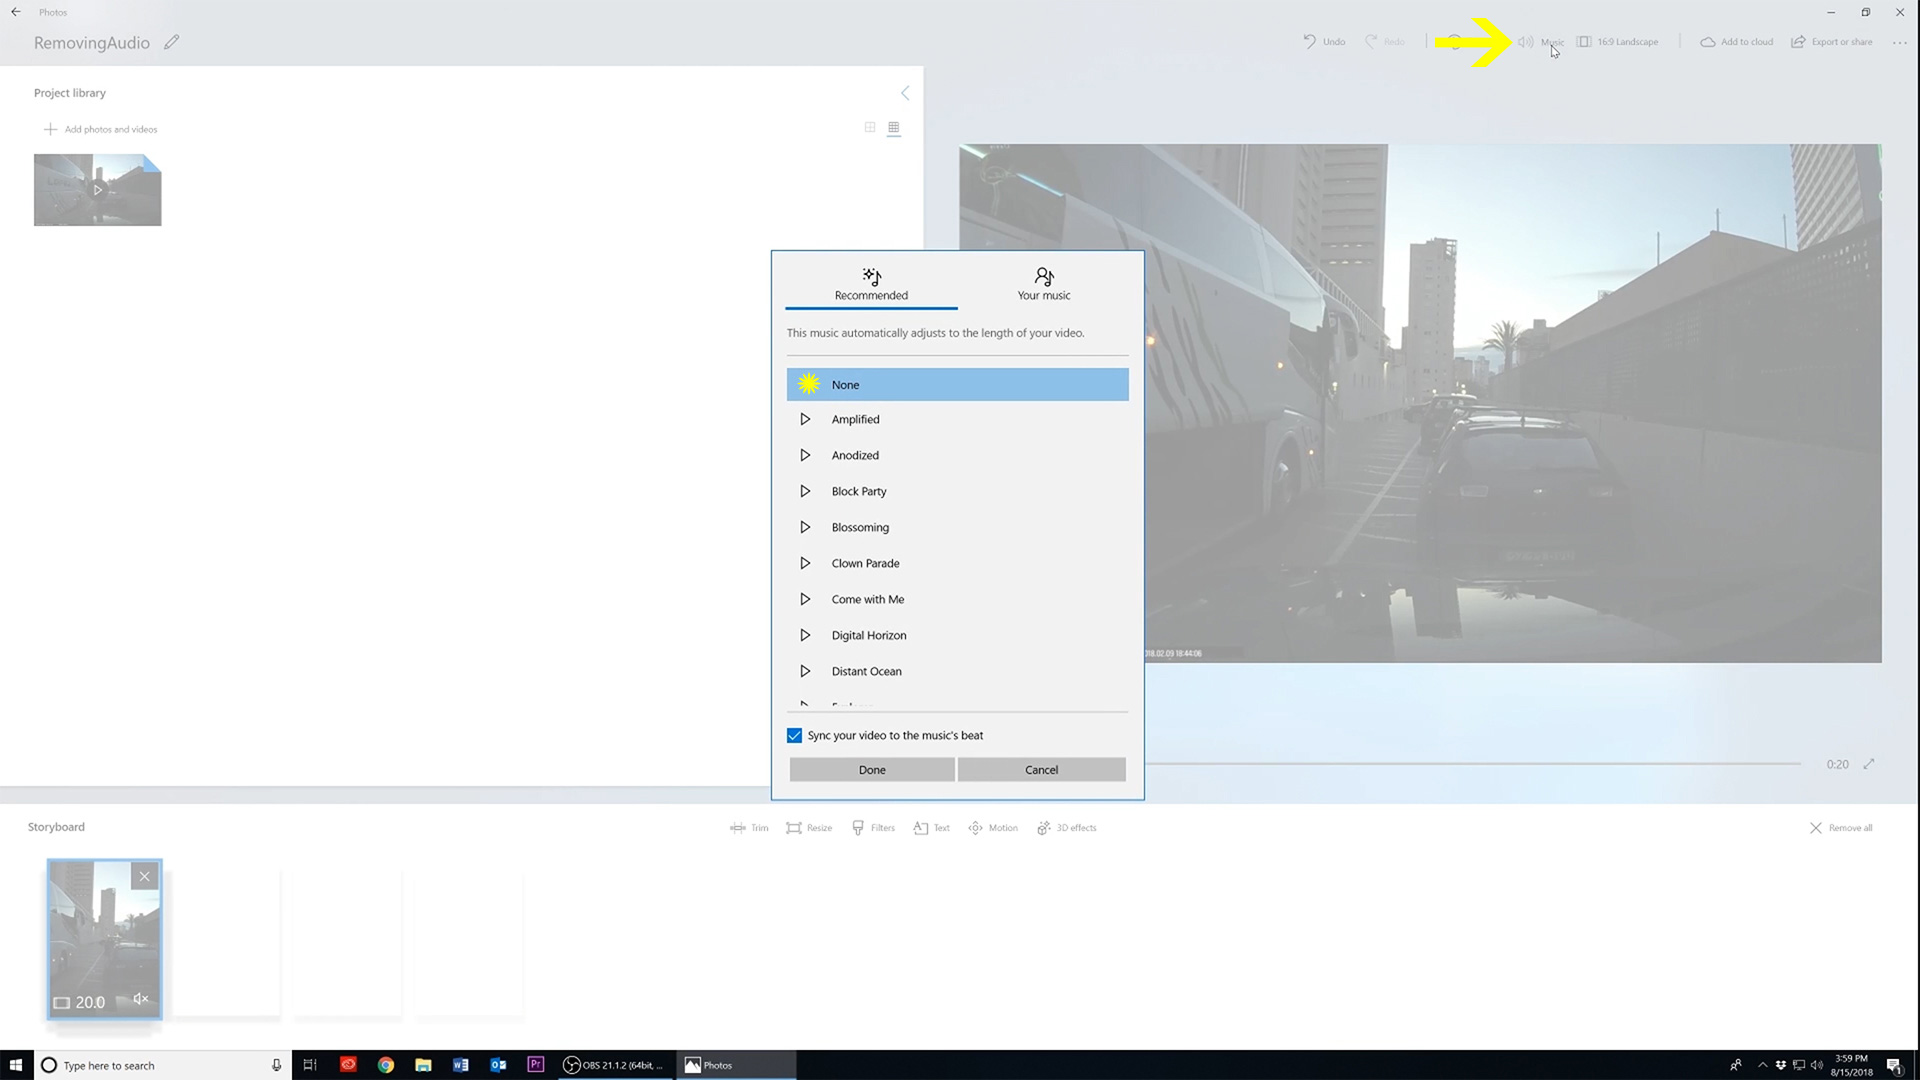
By default, all videos imported into the "Photos" application will have music attached to it. To remove
this music, click on the "Music" button at the top right-hand side of the application. Then select the
option "None" and the default music will be completely removed.
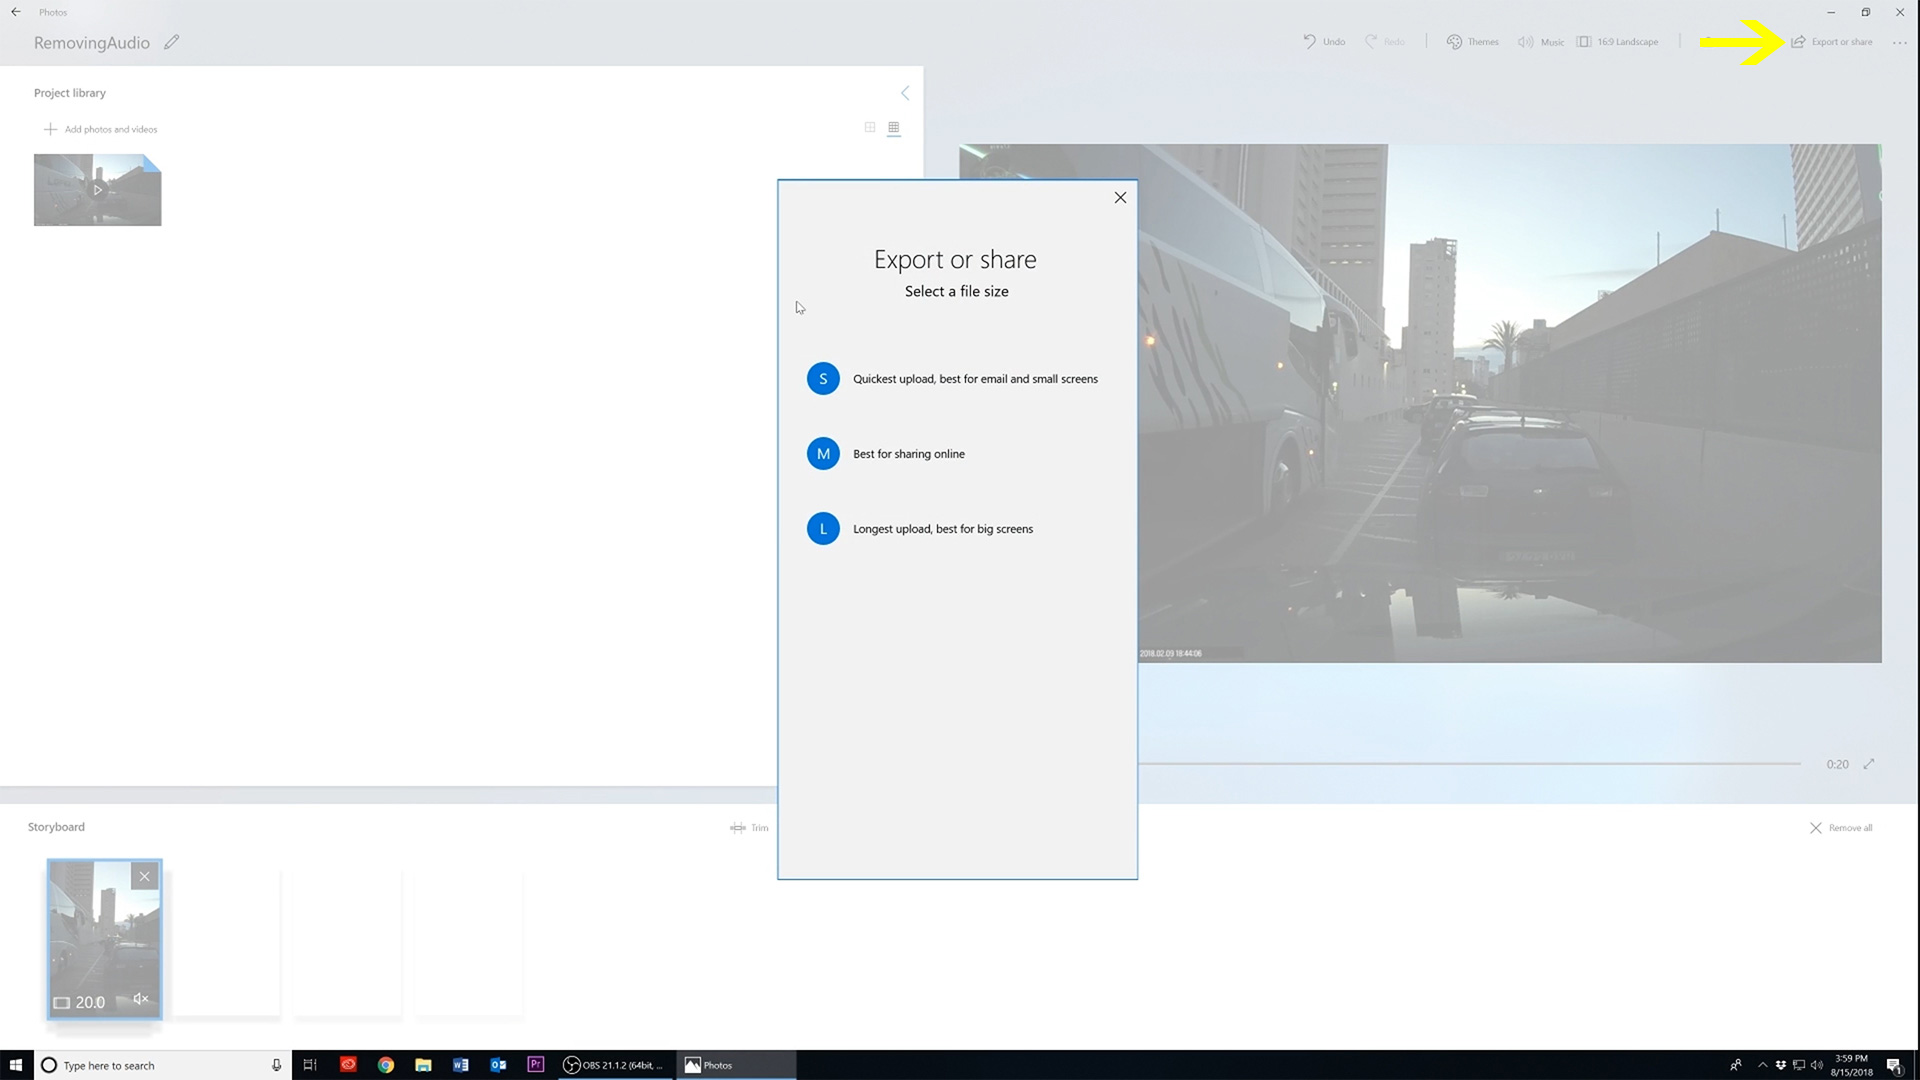
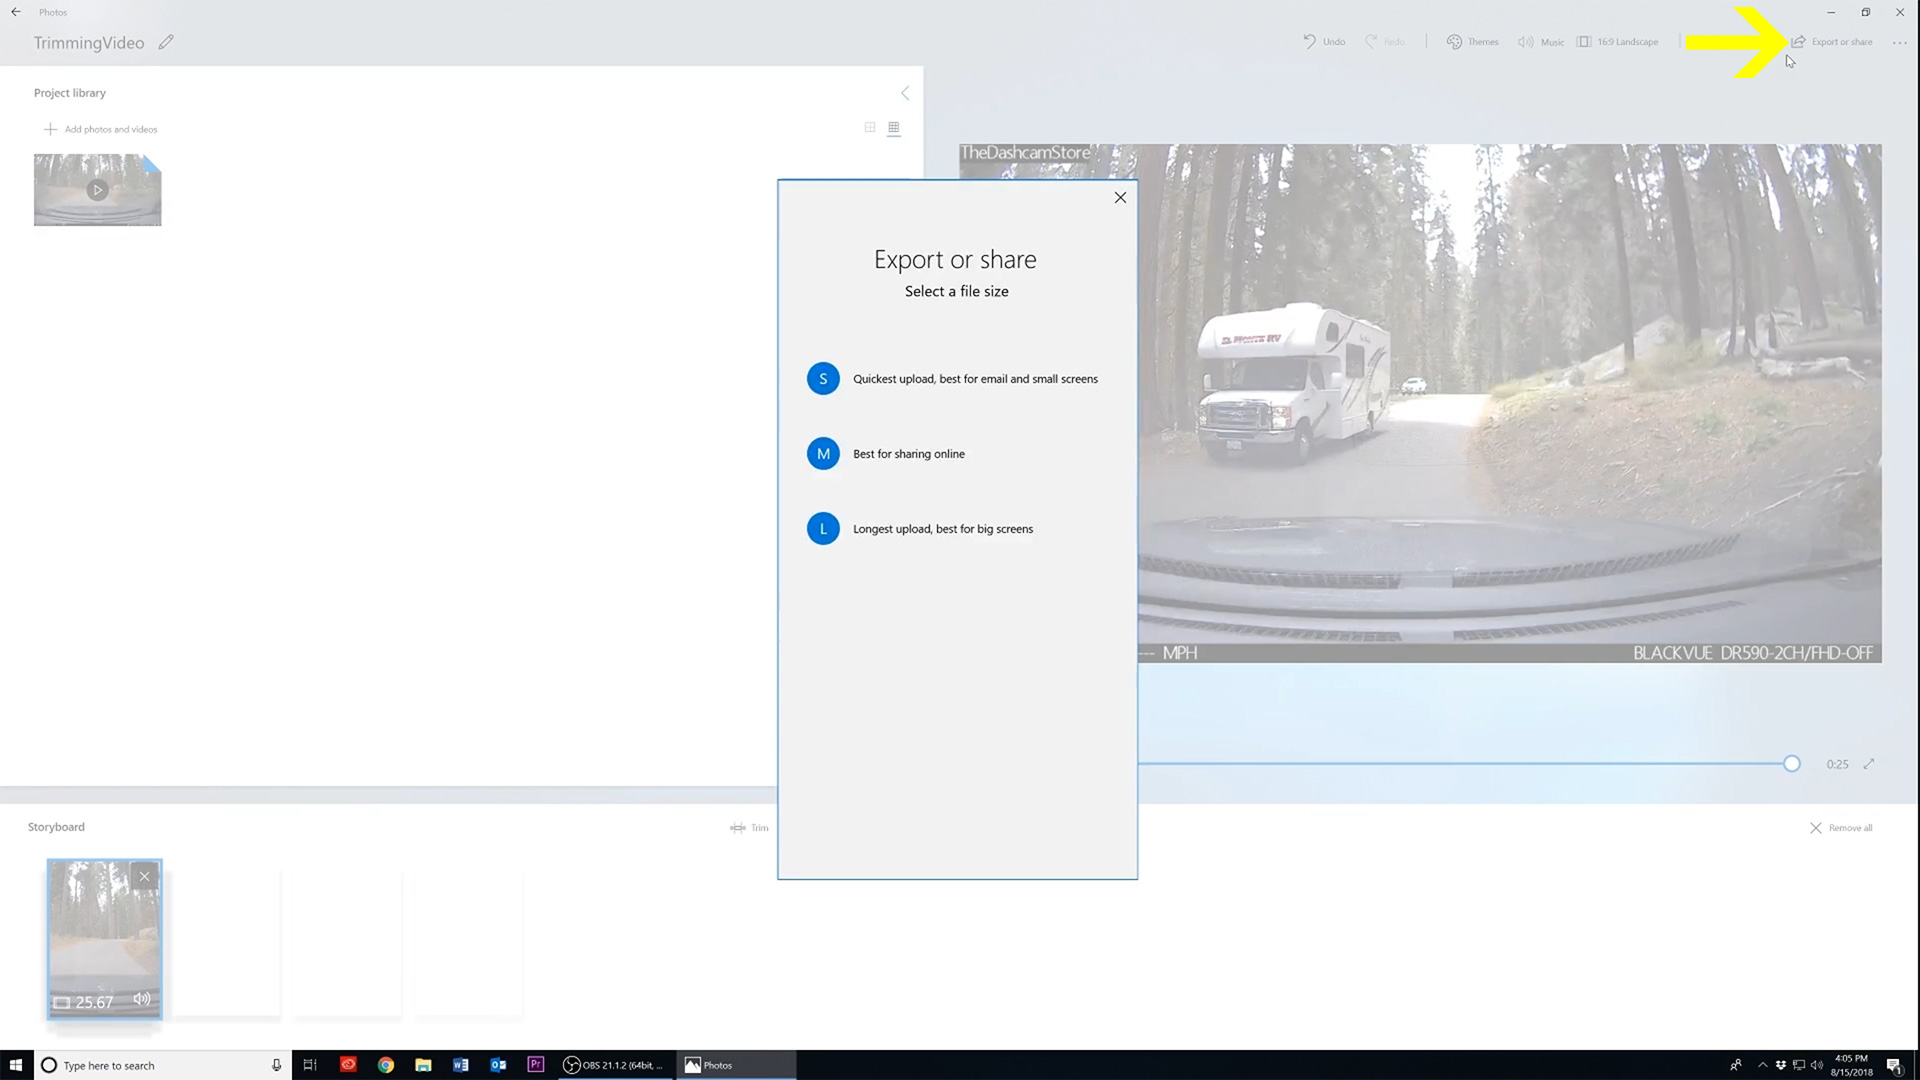
Then click on the "Export or share" button to save your edited video. You’ll then be prompted with three
options.
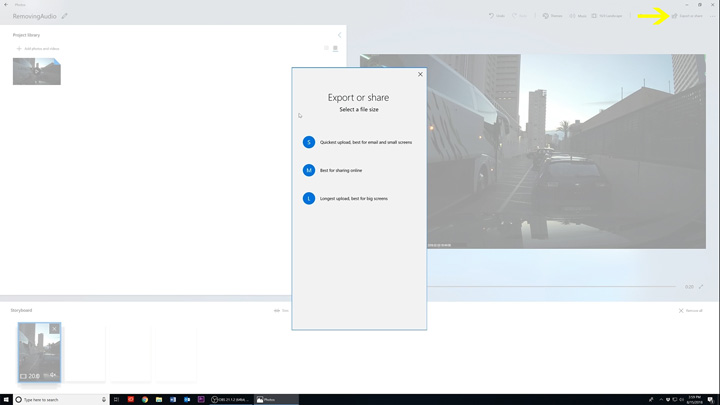
- S - is stated to be the quickest upload best for email and sharing on small screens. This option degrades your video’s visual quality for quicker sharing speeds.
- M - is stated to be “Best for sharing online” such as posting videos on social media sites.
- L - is stated to have the “Longest upload time and is best for big screens.” This option is focused on retaining your video’s visual quality at the cost of upload time.
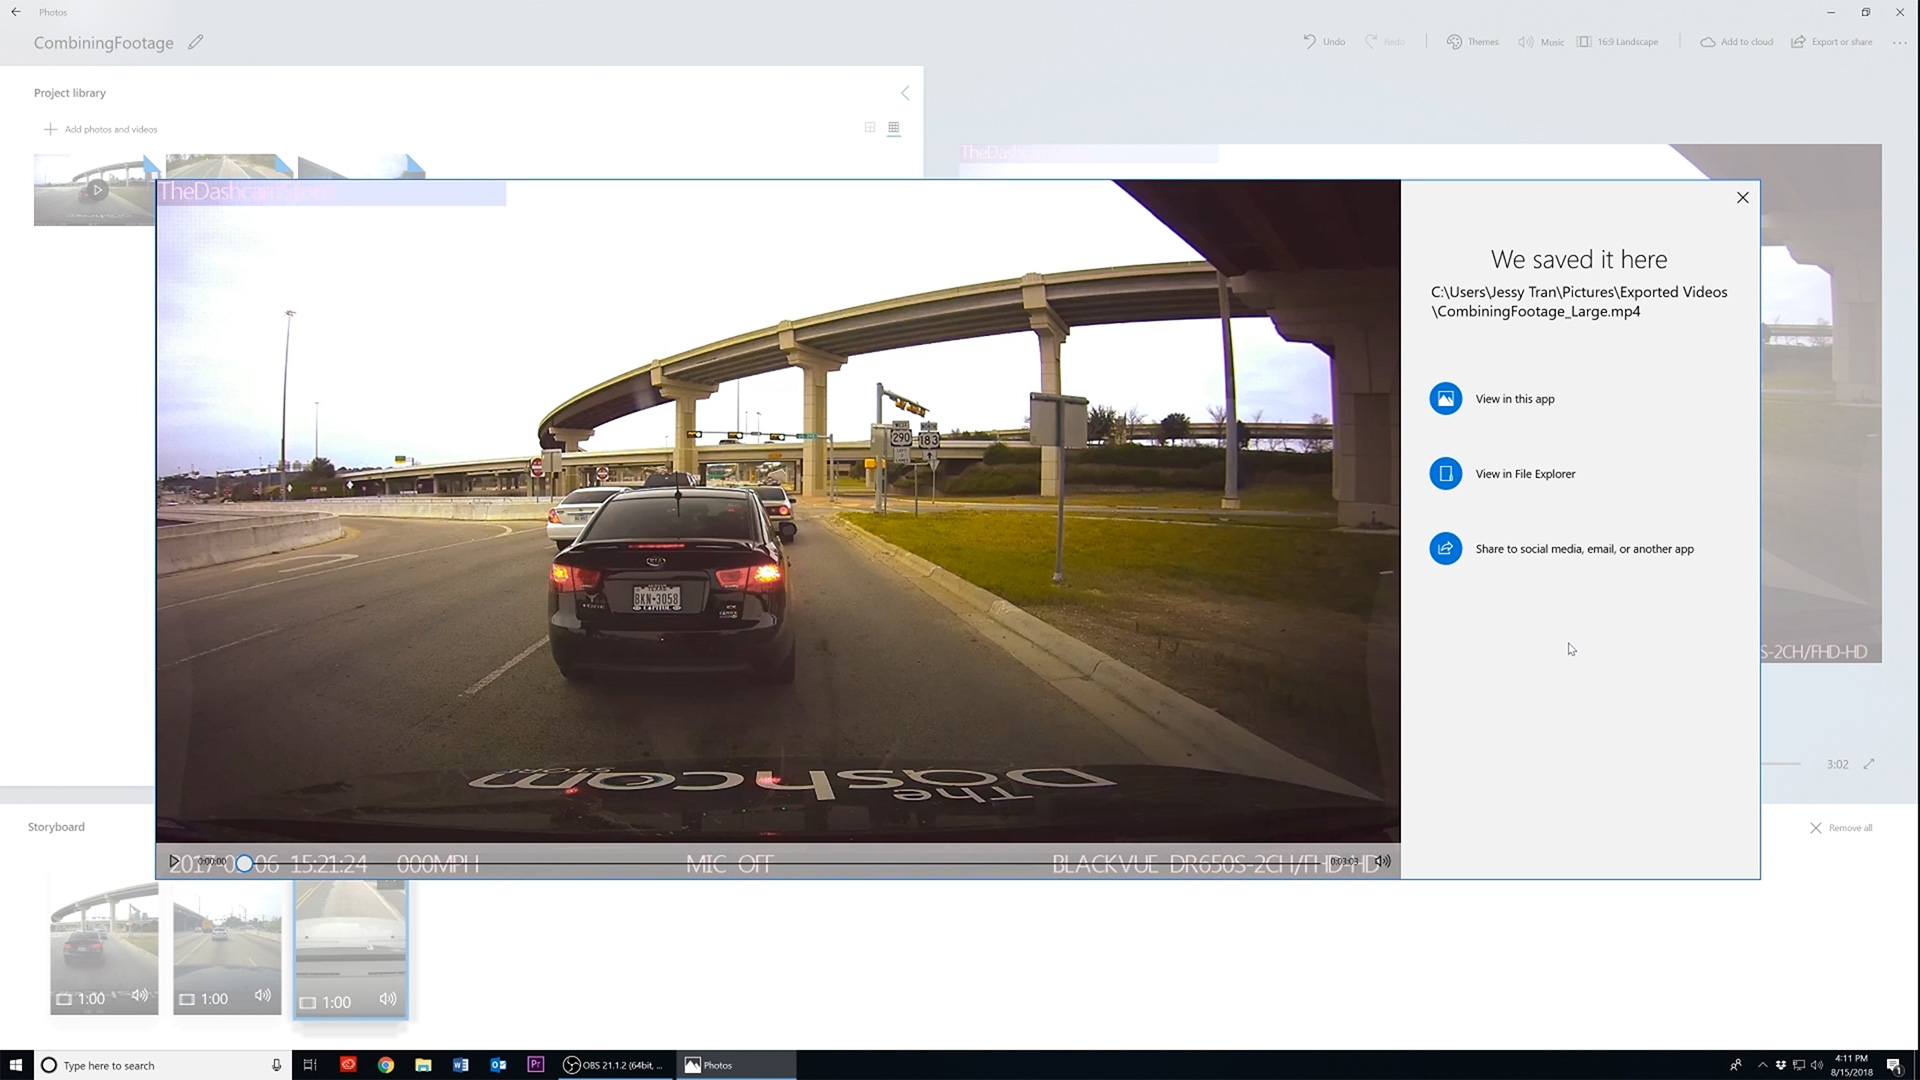
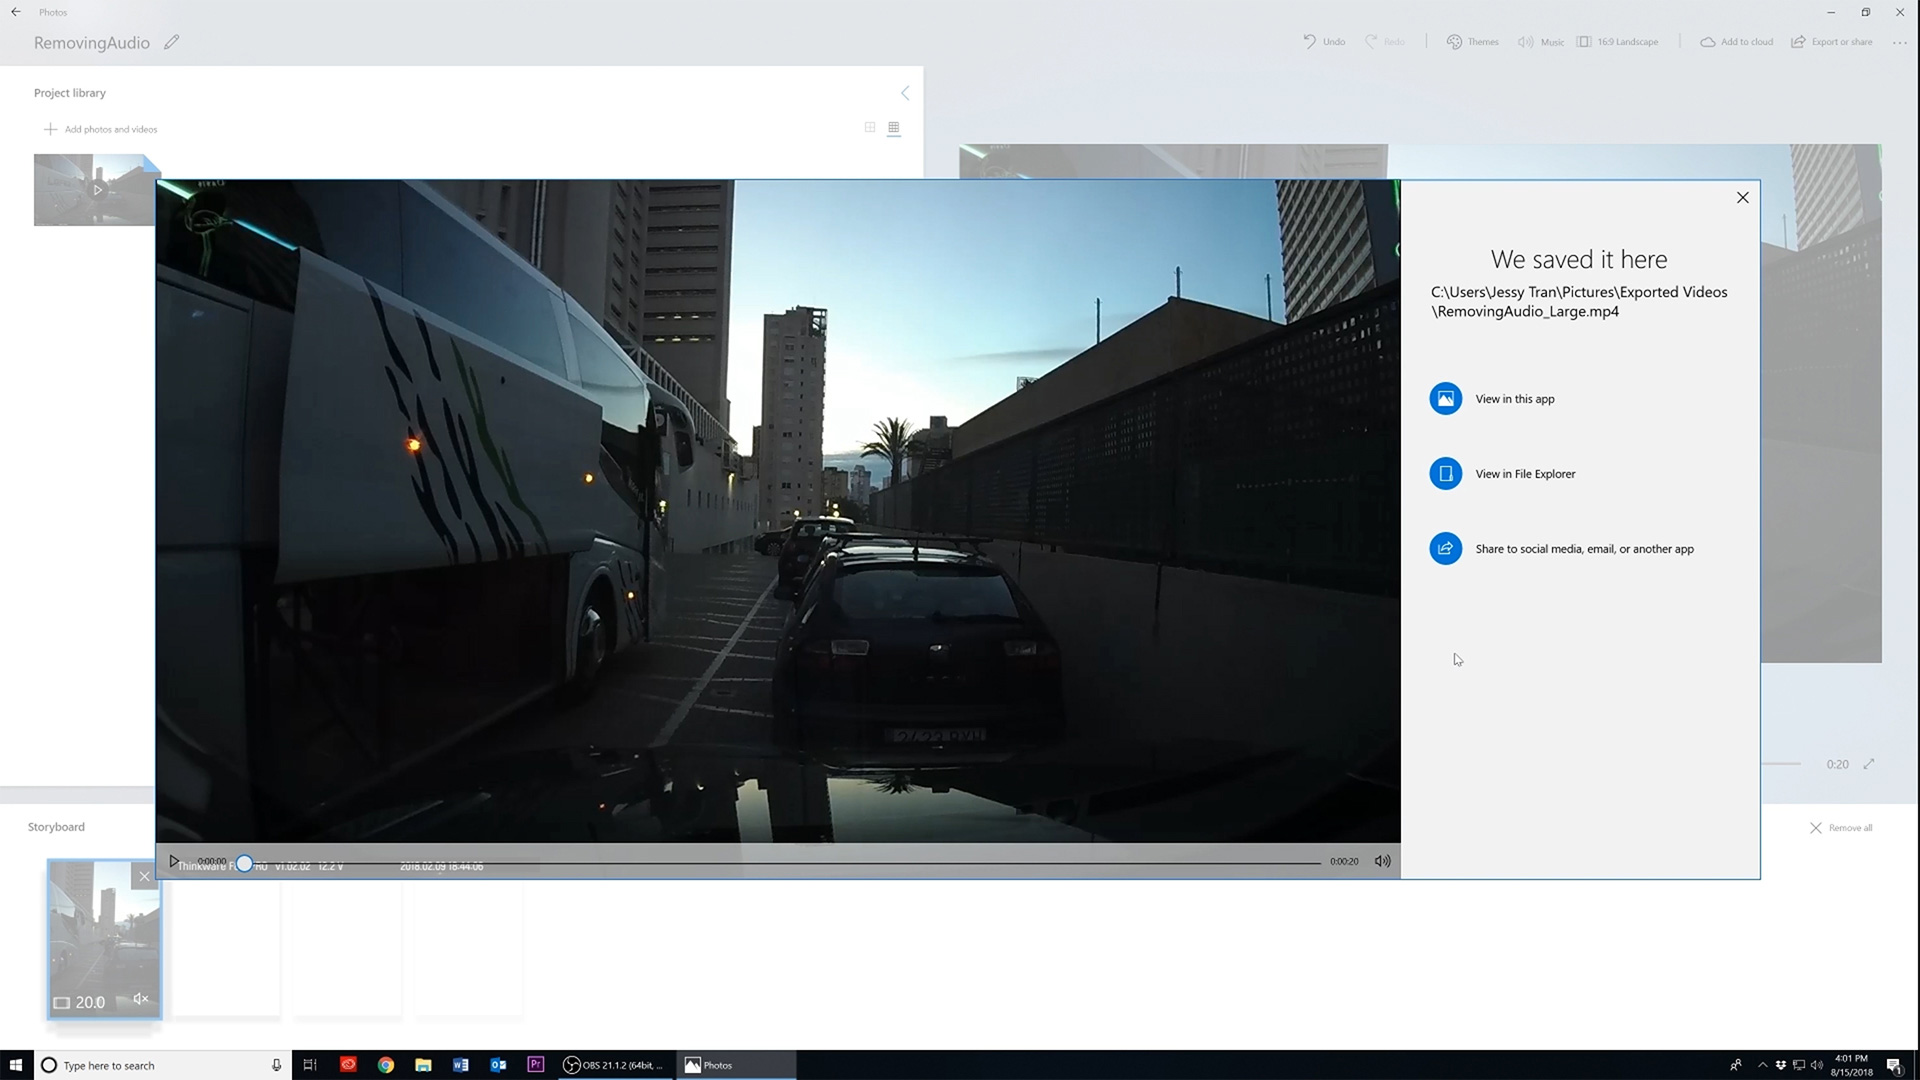
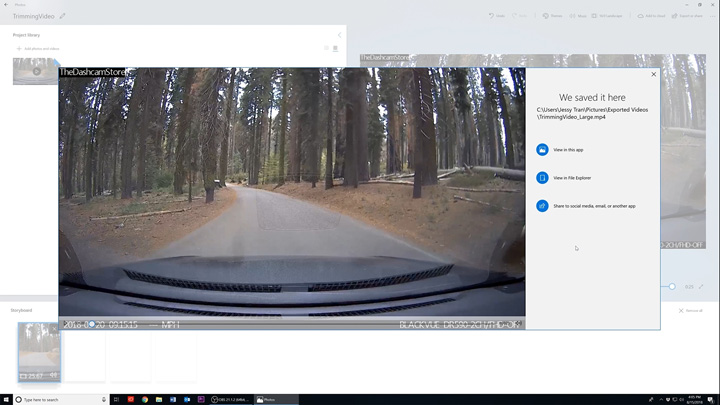
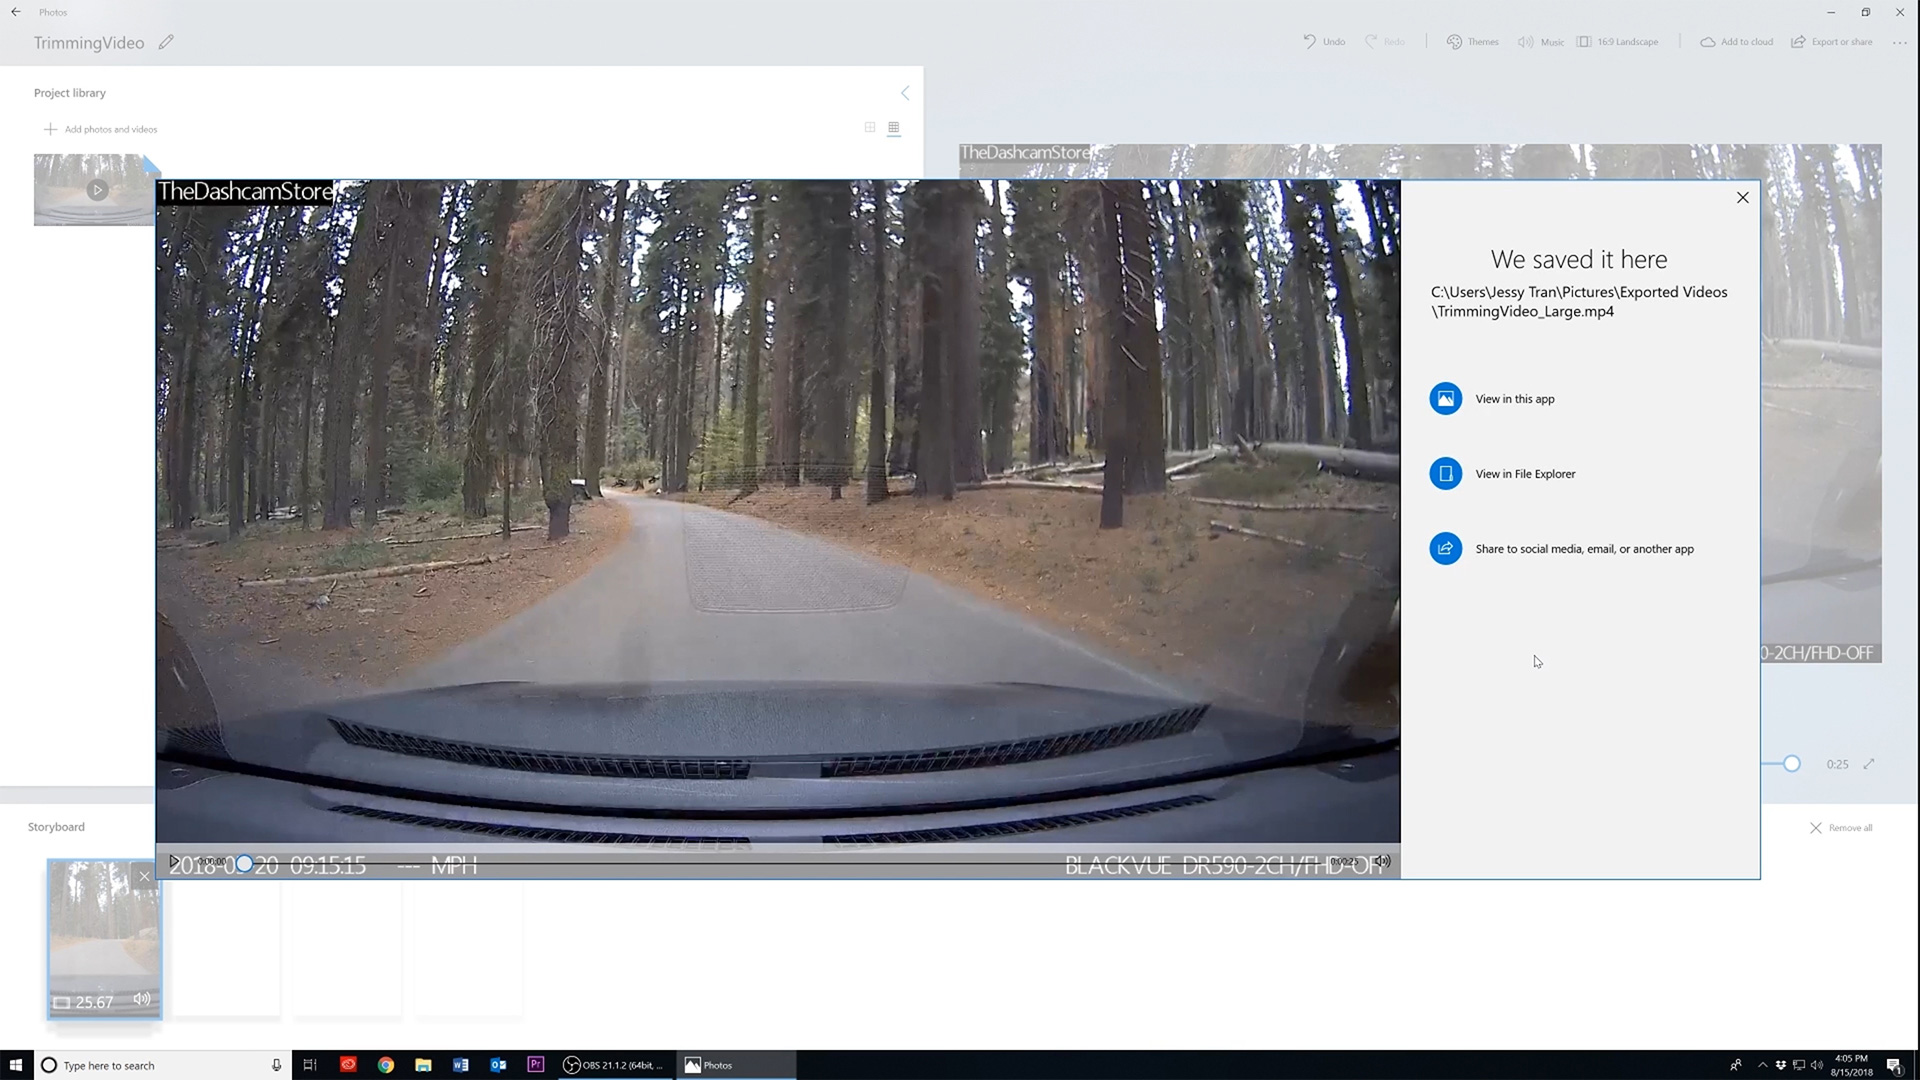
After you finish saving your clip through one of the three save options, by default "Photos" will save
the footage in your pictures folder.

Back to the Top- On this screen you can view your edited clip in the "Photos app" or click on "View in file explorer" to go the root of where your file is saved.
- And there’s also the option to "Share to social media, email, or another application."
Once again in the "Photos" application click on the “Create” button and select the custom video with
music option.

Then select a clip you want to trim, remember all selected videos will be indicated by a checkmark in the
right-hand corner of the video. Then click on the "Create" button to move forward.

Now give your project a name and take notice of the text "Drag photos and videos here to start your
video" at the bottom of the screen. All videos will have to be dragged into the project timeline or
"Storyboard" to begin editing.


After dragging your footage into the "Storyboard" timeline click on the "Trim" button to edit your
video.
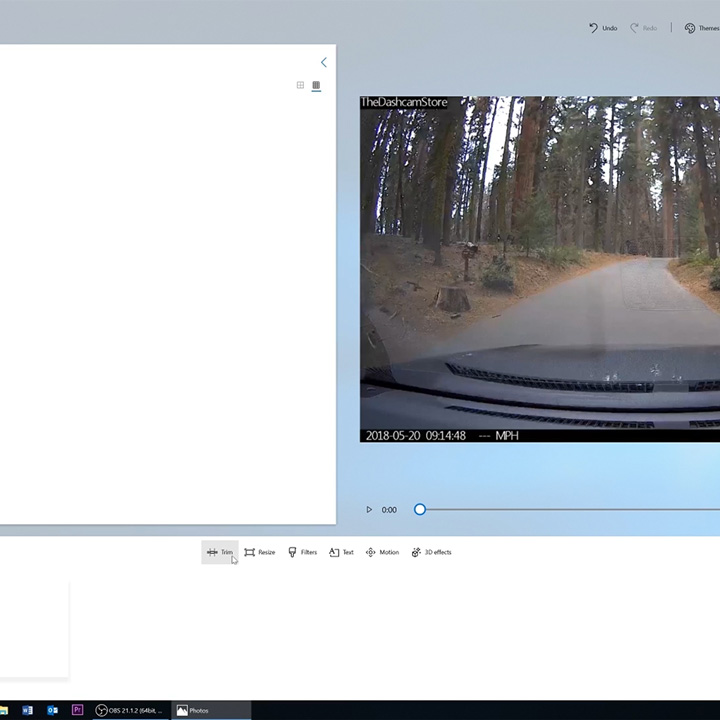
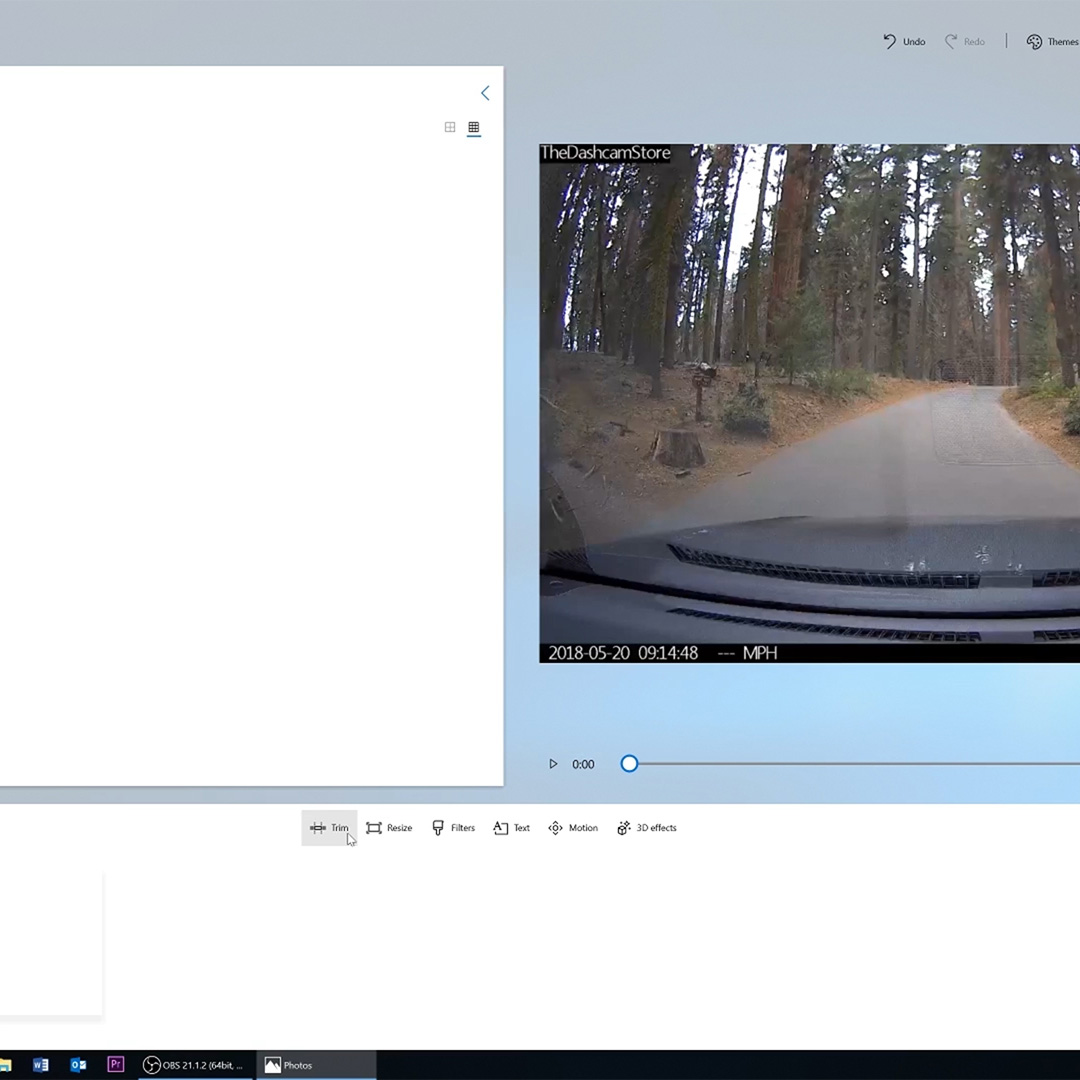
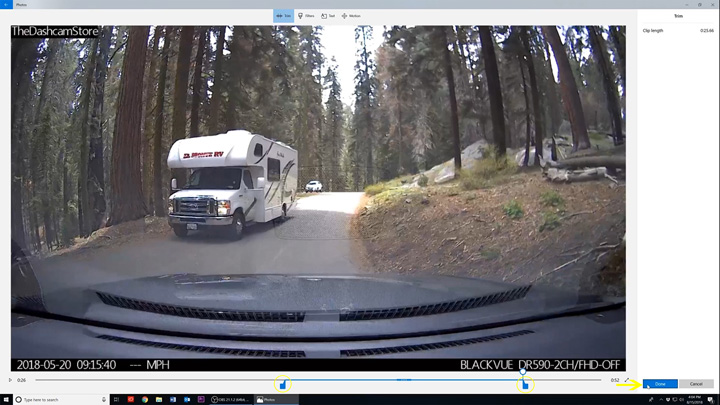
To trim your video, adjust the markers by dragging them inward or outward. Everything outside of the markers
will be cut from your video. Then click on done when you’re ready to finalize your edit.

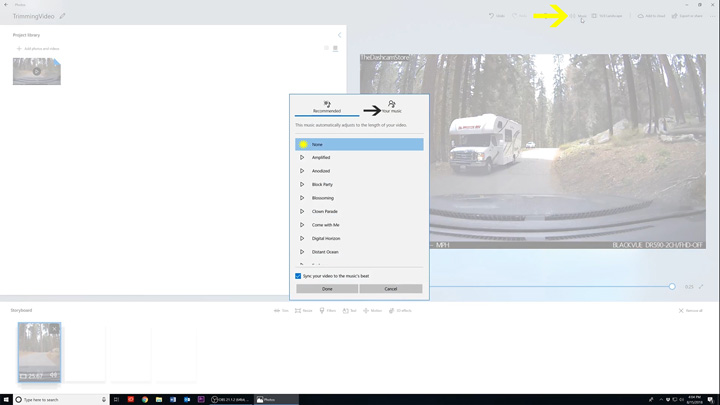
By default, all videos imported into the "Photos" application will have music attached to it. To remove
this music, click on the "Music" button at the top right-hand side of the application. Then select the
option "none" and the default music will be completely removed.
Or if you want to have "Photo’s" catalog of stock music in your video, you can scroll through and choose a music file of your liking. You can also click on the "Your music" tab to import your own very music files.
Or if you want to have "Photo’s" catalog of stock music in your video, you can scroll through and choose a music file of your liking. You can also click on the "Your music" tab to import your own very music files.

Then click on the "Export or share" button to save your edited video. You’ll then be prompted with three
options.

- S - is stated to be the quickest upload best for email and sharing on small screens. This option degrades your video’s visual quality for quicker sharing speeds.
- M - is stated to be “Best for sharing online” such as posting videos on social media sites.
- L - is stated to have the “Longest upload time and is best for big screens.” This option is focused on retaining your video’s visual quality at the cost of upload time.
After you finish saving your clip through one of the three save options, by default "Photos" will save
the footage in your pictures folder.
Back to the Top- On this screen you can view your edited clip in the "Photos app" or click on "View in file explorer" to go the root of where your file is saved.
- And there’s also the option to "Share to social media, email, or another application."
Once again in the "Photos" application click on the "Create" button and select the custom video
with music option.

Let's begin by selecting two video clips, remember all selected videos will be indicated by a checkmark in the
right-hand corner of the video. Then click on the "Create" button to move forward.

Now give your project a name and take notice of the text "Drag photos and videos here to start your
video" at the bottom of the screen. All videos will have to be dragged into the project timeline or
"Storyboard" to begin editing.
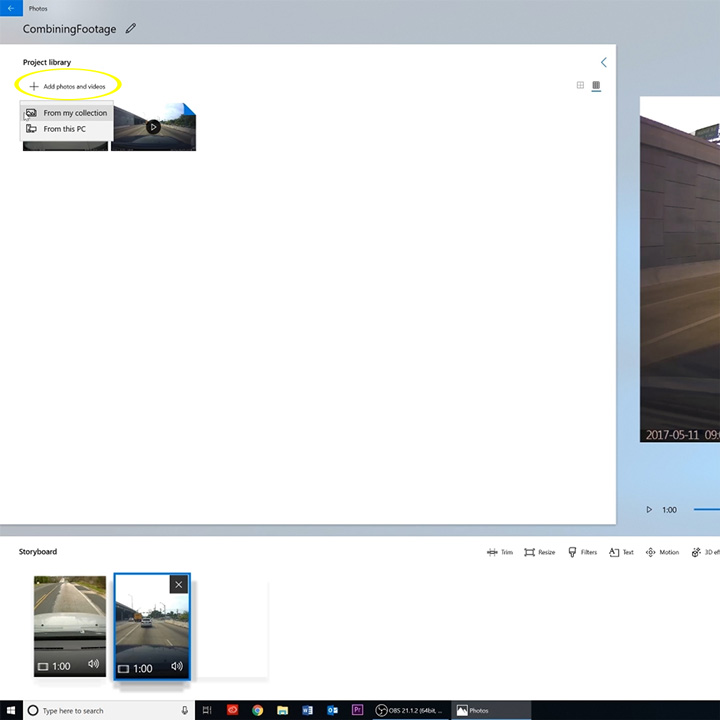
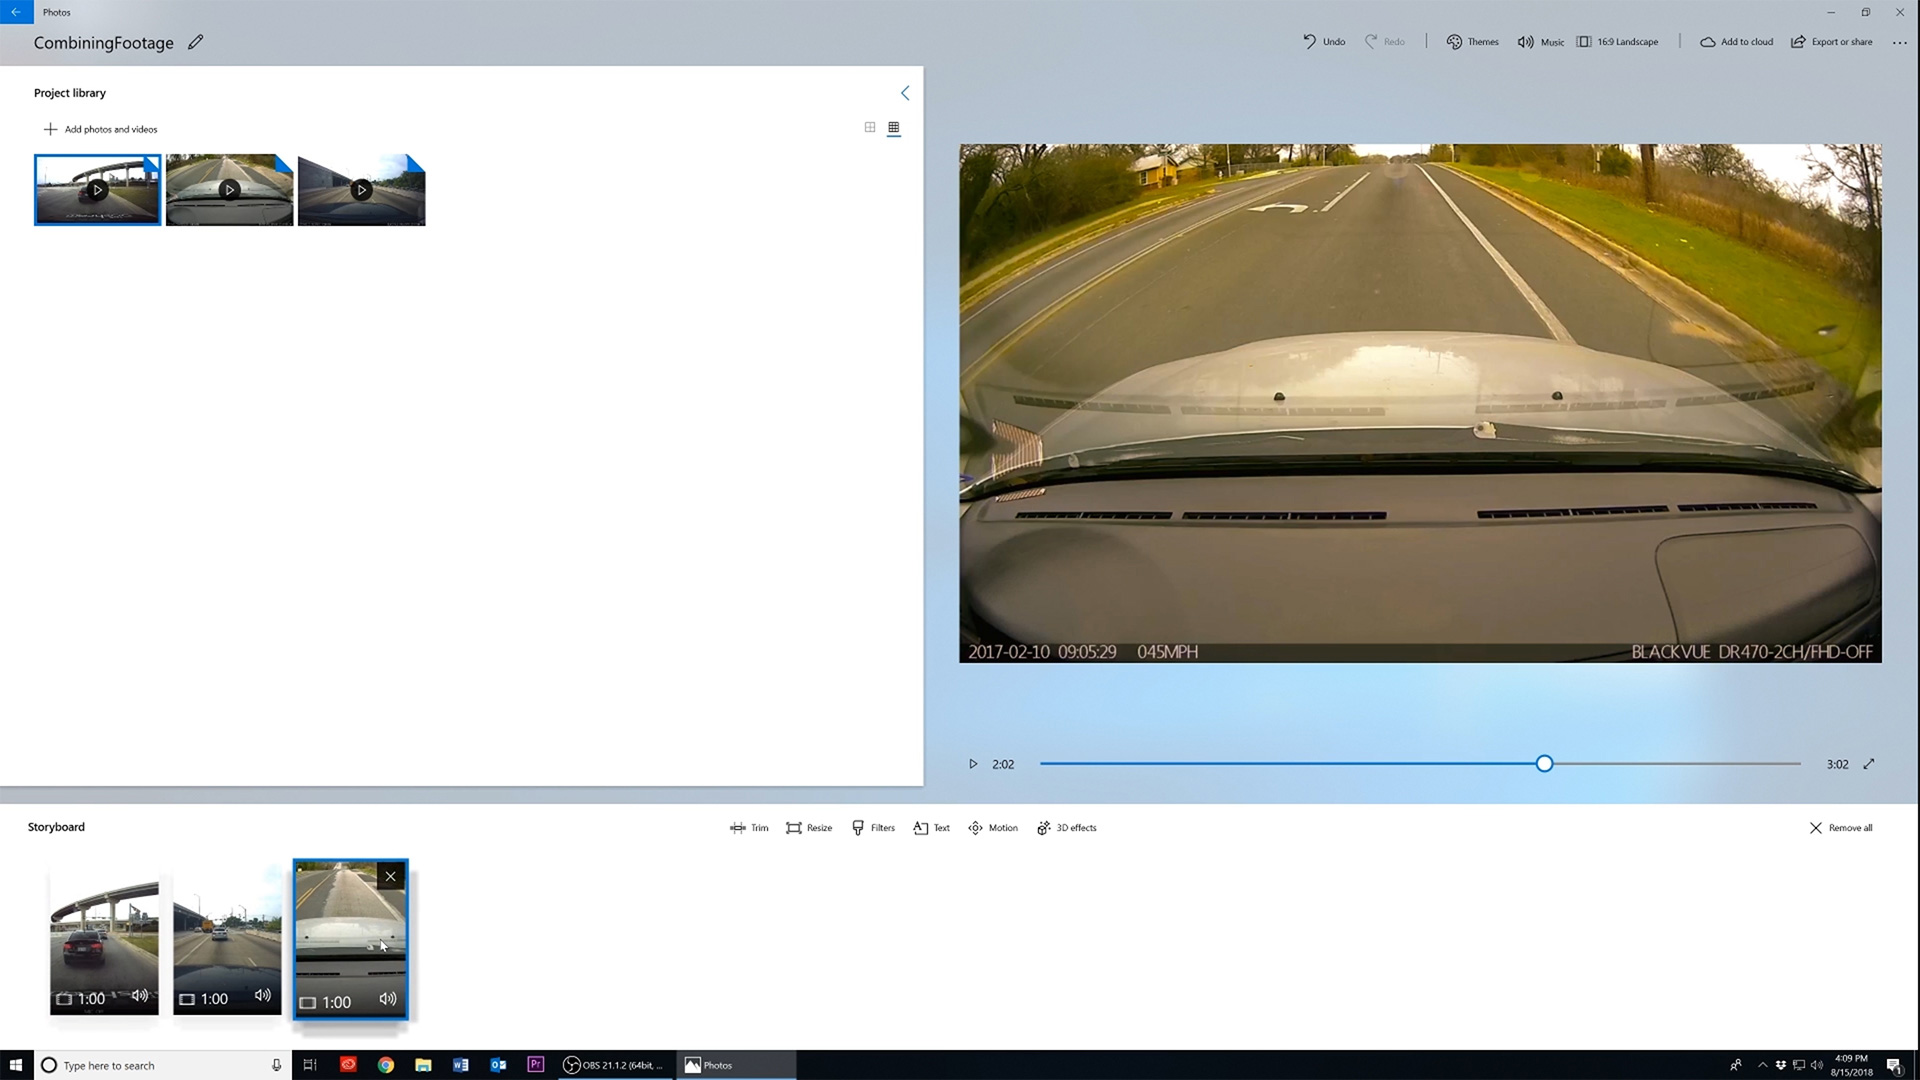
After dragging our two videos into the storyboard timeline, navigate over to the left-hand corner of the
"Photos" application. Then click on the "Add photos and videos" button to add another video that
we want merged with our two other clips.

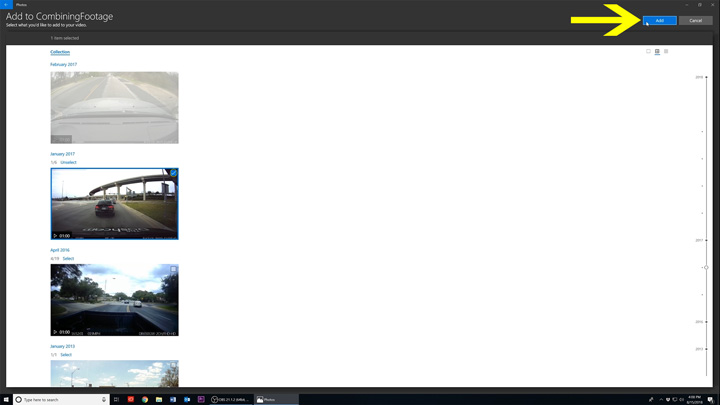
Now select a clip that you want merged with your other clips and when you’re ready click on the "Add"
button.

Now that all three videos are merged on a single timeline, we can rearrange the order of our clips by dragging
the in front of each other or behind one another.
- Here, I’m dragging my first video clip to the end of my video timeline.
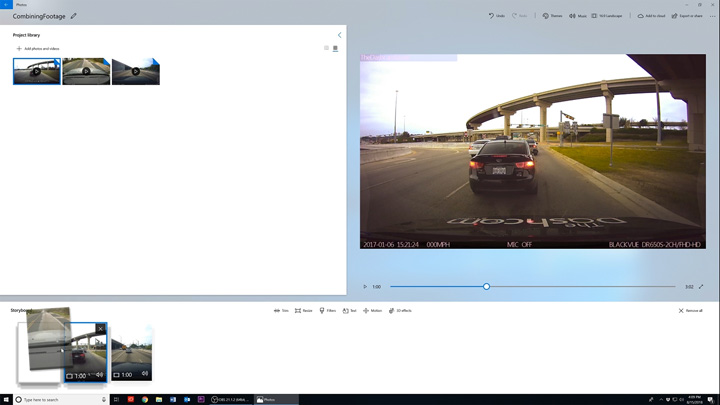
- Here, my video clip is now at the end of my video timeline rather than the beginning.


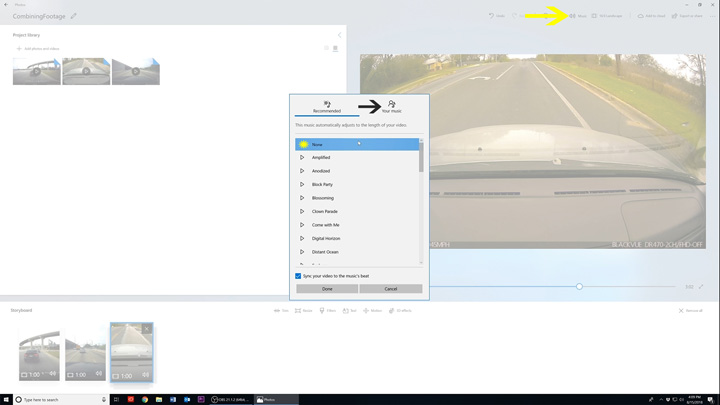
By default, all videos imported into the "Photos" application will have music attached to it. To remove
this music, click on the "Music" button at the top right-hand side of the application. Then select the
option “none" and the default music will be completely removed.
Or if you want to have "Photo’s" catalog of stock music in your video, you can scroll through and choose a music file of your liking. You can also click on the "Your music" tab to import your own very music files.
Or if you want to have "Photo’s" catalog of stock music in your video, you can scroll through and choose a music file of your liking. You can also click on the "Your music" tab to import your own very music files.

Then click on the "Export or share" button to save your edited video. You’ll then be prompted with three
options.

- S - is stated to be the quickest upload best for email and sharing on small screens. This option degrades your video’s visual quality for quicker sharing speeds.
- M - is stated to be “Best for sharing online” such as posting videos on social media sites.
- L - is stated to have the “Longest upload time and is best for big screens.” This option is focused on retaining your video’s visual quality at the cost of upload time.

After you finished saving your clip through one of the three save options, by default "Photos" will save
the footage in your pictures folder.

Back to the Top- On this screen you can view your edited clip in the "Photos app" or click on "View in file explorer" to go the root of where your file is saved
- And there’s also the option to "Share to social media, email, or another application".