
Our how-to video and these instructions will explain the complete process of installing one of BlackVue's high-end DR650GW-2CH/DR750S-2CH/DR900S-2CH dual lens (front and rear) dash cams and a Power Magic Pro (BlackVue's battery discharge prevention module) in a 2015 Chevrolet Suburban.
*** The DR650GW-2CH dash cam has been discontinued, but the DR750S-2CH and the 4K DR900S-2CH are the latest and greatest versions with upgraded components for higher quality! In this video we will refer to the DR650GW, the DR750S, and the DR900S interchangeably because the installation process is identical for all BlackVue dash cams. These instructions also apply to all BlackVue DR590 and 590W series dash cams as well.
How To Hardwire Your BlackVue Dash Cam
In the video, our technician touches on the following subjects (at the times listed in minutes:seconds):
- 00:15 - Planning the installation: locating the fuse box, front and rear camera and Power Magic Pro placement considerations
- 01:20 - Explaining the Power Magic Pro: dip switch settings and override switch functionality
- 01:55 - Identifying 'switched' and 'constant' fuses in the fuse box: using a test light to know where to tie in
- 03:00 - Explaining the Power Magic Pro wire harness and installing our free fuse taps (Micro2 version)
- 06:17 - Explaining ground wire location: ensuring contact with a bare metal surface on the body of the car or truck
- 06:44 - Attaching and testing the Power Magic Pro: mounting the box and a first test of the wiring
- 08:03 - Installing the front camera of the DR650GW-2CH: attaching the adhesive pad to the front windshield
- 09:04 - Running the power cable from the front camera to the Power Magic Pro: hiding the wiring in the headliner and A-pillar
- 11:53 - Running the coaxial cable from the front camera to the rear camera: running the cable through the interior to the rear
- 13:19 - Installing the rear camera of the DR650GW-2CH: attaching the adhesive pad to the rear tailgate glass
- 14:26 - Running coaxial cable through conduit to tailgate: dash cam installation zip tie trick Pro Tip!
- 16:38 - Testing the installation: ensuring the BlackVue turns on and starts recording as expected
- 17:40 - Completed installation photos showing the system all buttoned up and ready for use
Step 1: Plan the Installation
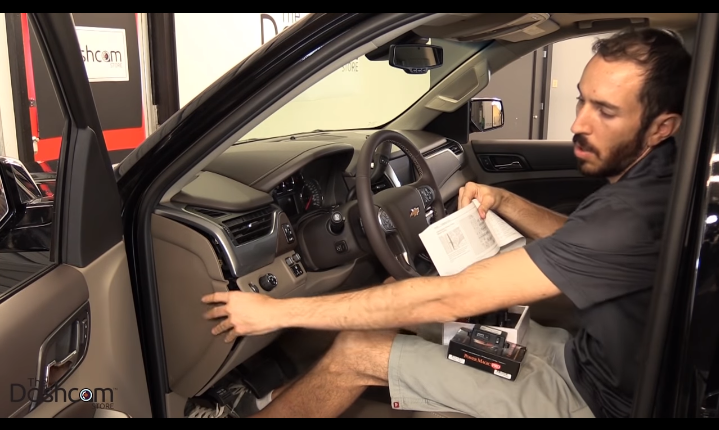
The first thing you need to consider when doing any BlackVue dash cam installation is the placement of the components. Of course, the front camera will go on the front windshield. The rear camera will be placed on the back windshield facing the back. If it's an IR (inside facing) camera, then it will also be mounted on the front windshield facing the interior of the vehicle. The Power Magic Pro module needs to be installed near the fuse box and also within reach of the driver for easy access to the toggle switch, which lets you enable or disable parking mode.
Step 2: Configure Dip Switches

Set the voltage set to cut off at 12 volts. That means if the power Magic Pro is in parking mode and the vehicle battery goes down to 12 volts the Power Magic Pro will turn off voltage to the camera. The other three are the time values, which are set to Infinity. This means that it's not going to turn off according to a timer. It's only going to turn off according to voltage.
Step 3: Identify Constant and Switched Fuses
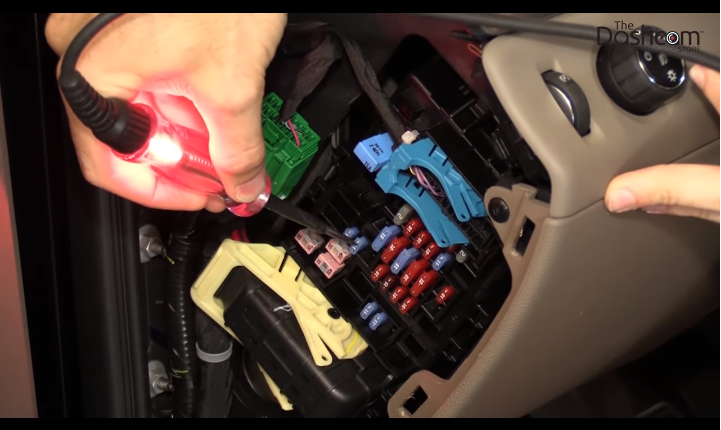
Now we need to identify a constant fuse (continuous power) as well as a switched fuse (powered only when the engine is running). Use a test light by attaching the copper clip side to bare metal and then use the probe side to test the fuses. If the fuse lights up when probed while the engine is off, it's a constant fuse. If it doesn't light up when probed, then try turning the engine on and probing again. If that same fuse lights up, it's a switched fuse.
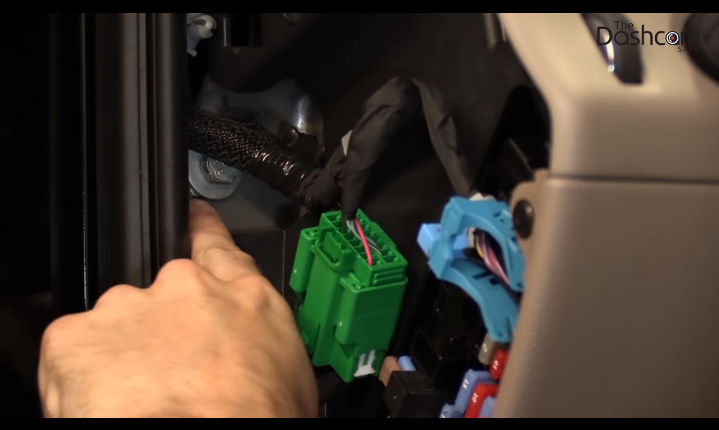
Step 4: Install Fuse Taps Onto Power Magic Pro Wire Harness
Plug the white plastic end of the Power Magic Pro wire harness into the Power Magic Pro. Install the fuse taps onto the wire harness with a crimping tool. The yellow wire is the constant power, the red wire is the switched power, and the black wire is the ground (they're also labeled for you). Once the wires are crimped and securely attached to the fuse taps, plug the fuses into the empty slots on the fuse taps. Now that the wires are crimped and the fuses are on the fuse taps, you can now plug the fuse taps directly into the fuse box.
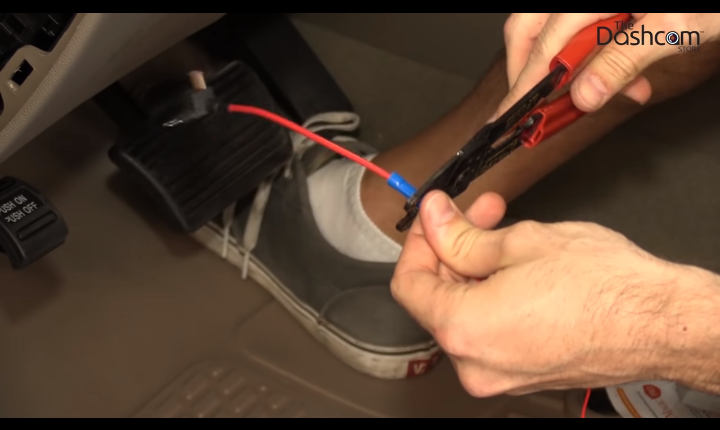
Step 5: Locate Proper Ground Point and Attach Ground Wire
Attach the ground wire to a bare metal part of the vehicle's frame. In this example, we used a metal nut as a ground point.
Step 6: Mount and Test Power Magic Pro
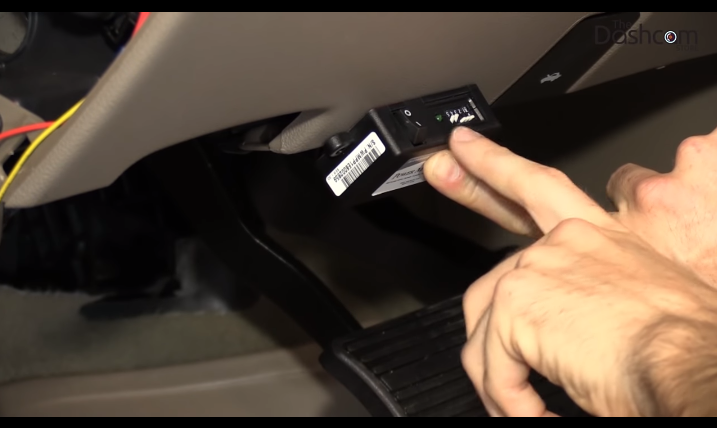
When determining the best location for mounting your Power Magic Pro, it's important to consider how easily you can access the toggle switch as well as the distance from the fuse box. Typically, we try to choose an inconspicuous location. Remove the adhesive pad and press the PMP firmly into place. For added security utilize the self-tapping screws. Be sure not to over-tighten the screws when installing onto a plastic surface, as it can crack as well as weaken the grip of the screws. Once mounted, test the PMP by toggling the switch. If the green LED light corresponds appropriately with the toggle switch, then it's property wired!
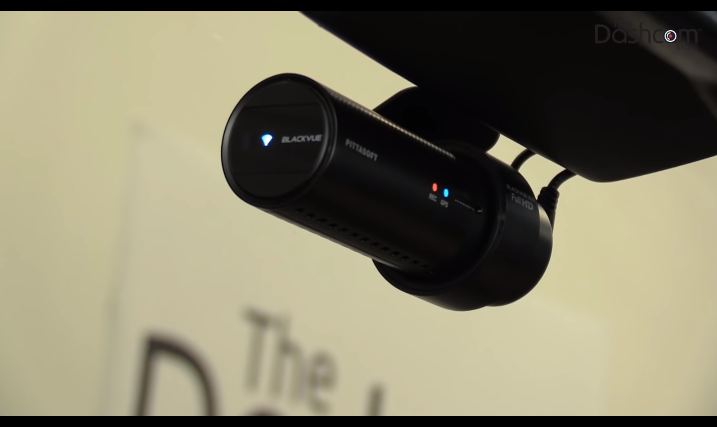
Step 7: Mount Front Camera on Front Windshield
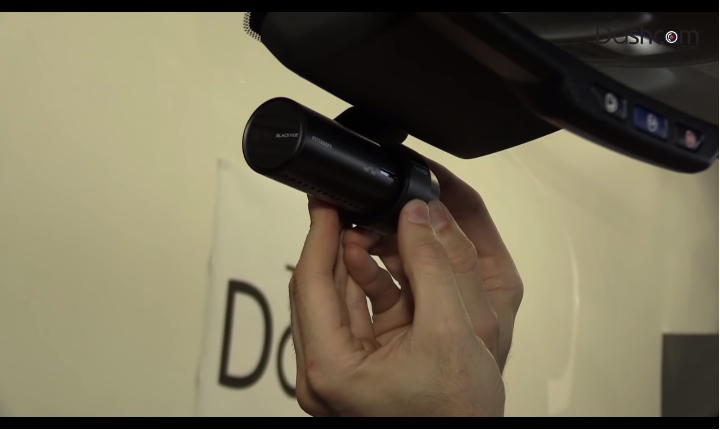
Determine where on the front windshield you'd like to place the front camera. Typically it's centered. Once you've determined the placement, clean the glass thoroughly to ensure a smooth surface for the adhesive bond to really take hold of. Remove the film from the adhesive pad and then carefully place the camera in the spot that you've decided. Hold the camera firmly into place for a few seconds. Now your front camera is mounted!
Step 8: Run Power Cable From the Front Camera to the Power Magic Pro.
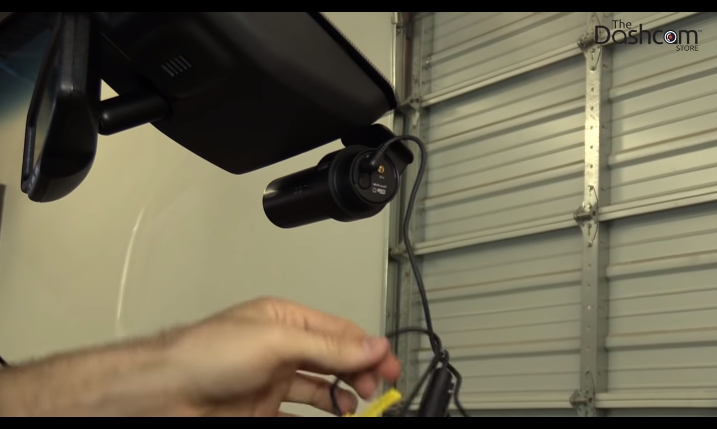
DO NOT plug your power cable into the gold coaxial cable because it will cause damage to the unit. Be sure to plug the power cable into the DC port on your front camera. Tuck the cable into the headliner and the trim as you make you're way down the Power Magic Pro. Once the cable is ran, plug the cigarette lighter male plug into the female port of the Power Magic Pro. Now that you're all connected, bundle and zip tie the loose wires together in a safe manner and tuck them out of sight and away from the path of your legs and feet to the pedals (typically the wires are tucked underneath the dashboard, above the pedals, out of the way).
Step 9: Run Coaxial Cable From the Front Camera to the Rear Camera
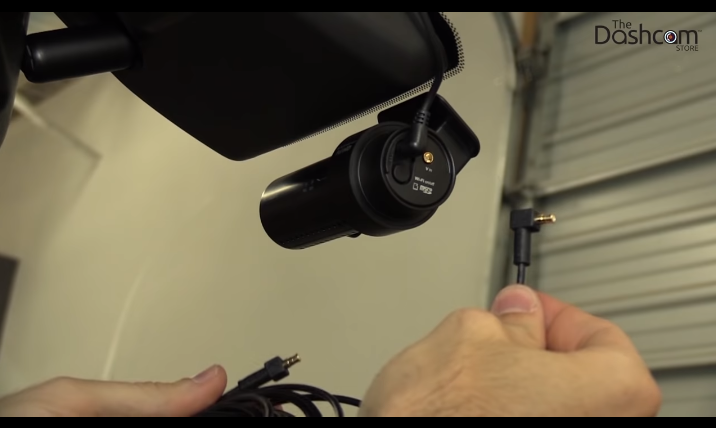
Take the right-angle end of the coaxial cable and plug into the front camera. Gently tuck the cable across the headliner and across the A-pillar. Pull away the segment of rubber weather stripping and run the cable along the gap. Continue along the B-pillar by tucking the cable behind. Continue on by exposing the rubber weather stripping and running the cable along the gap all the way to the back of the vehicle.
Step 10: Mount Rear Camera on Rear Windshield

Be mindful that the orientation of the rear camera is correct (when the tailgate is folded down the words should be readable). Clean the glass thoroughly to ensure a smooth surface for the adhesive bond to really take hold of. Remove the film from the adhesive pad and then carefully place the camera in the spot that you've decided. Hold the camera firmly into place for a few seconds. Now your rear camera is mounted!
Step 11: Securing Excess Cable and Testing the Installation
Pull the excess wire through the conduit in between the tailgate and body of the vehicle by using a zip tie to fish it through. Once the cable is through, bundle it up, secure it, and tuck it away somewhere inconspicuous. Once the excess cables are put away, it's time to test the installation. Simply flip the toggle switch on the Power Magic Pro to the 'On' position and wait for it to boot up. After a few seconds the record light will indicate that the BlackVue dash cam has automatically began to record.
For More Information on the products click on the links below:
- BlackVue DR650GW-2CH/DR750S-2CH/DR900S-2CH
- BlackVue Power Magic Pro
Below there are two videos, the first of which goes over the use of the BlackVue Cloud smartphone app that is available for both Apple and Android devices, which allows you to configure the BlackVue DR650S-2CH/DR750S-2CH/DR900S-2CH and view the live camera feed from the local WiFi hotspot. In the second and final video, we demonstrate the brand new BlackVue-Over-the-Cloud real-time remote viewing and downloading capabilities:
Thanks for watching, and as always, drive safe!
To request additional information, please don't hesitate to contact us. We always give our best effort to respond to inquiries within 1 business day.