
How To Configure Your DR750-2CH-LTE & SIM Card
This info has been updated, please see the newest setup guide HERE.
Congratulations on your purchase of the best new dash cam from BlackVue, the game-changing DR750-2CH-LTE with built-in 4G-LTE! Follow our step-by-step guide for getting set up and running on the Cloud using your very own SIM card.
Supplies You Will Need:
- BlackVue DR750-2CH-LTE Dash Cam
- 4G/LTE SIM Card
Tools You Will Need:
- Android or iPhone Smartphone
- BlackVue Smartphone App (Free Download for Android or iPhone)
Total time: 20 Minutes
Step 1: Obtain and Activate Your SIM Card
Obtain and register/activate your SIM card from your provider. Be sure to specify you need a 4G/LTE nano-size compatible SIM card (these are extremely common in 2020, but it doesn't hurt to confirm this with your carrier).
SIM Card Types
You’ll need to ensure your new SIM card is the very small “nano” type. SIM cards will typically come in a larger size than nano, but usually you can carefully snap out the smallest (nano) version of the SIM card, this tiny chip is what you will insert into the BlackVue DR750-2CH-LTE.
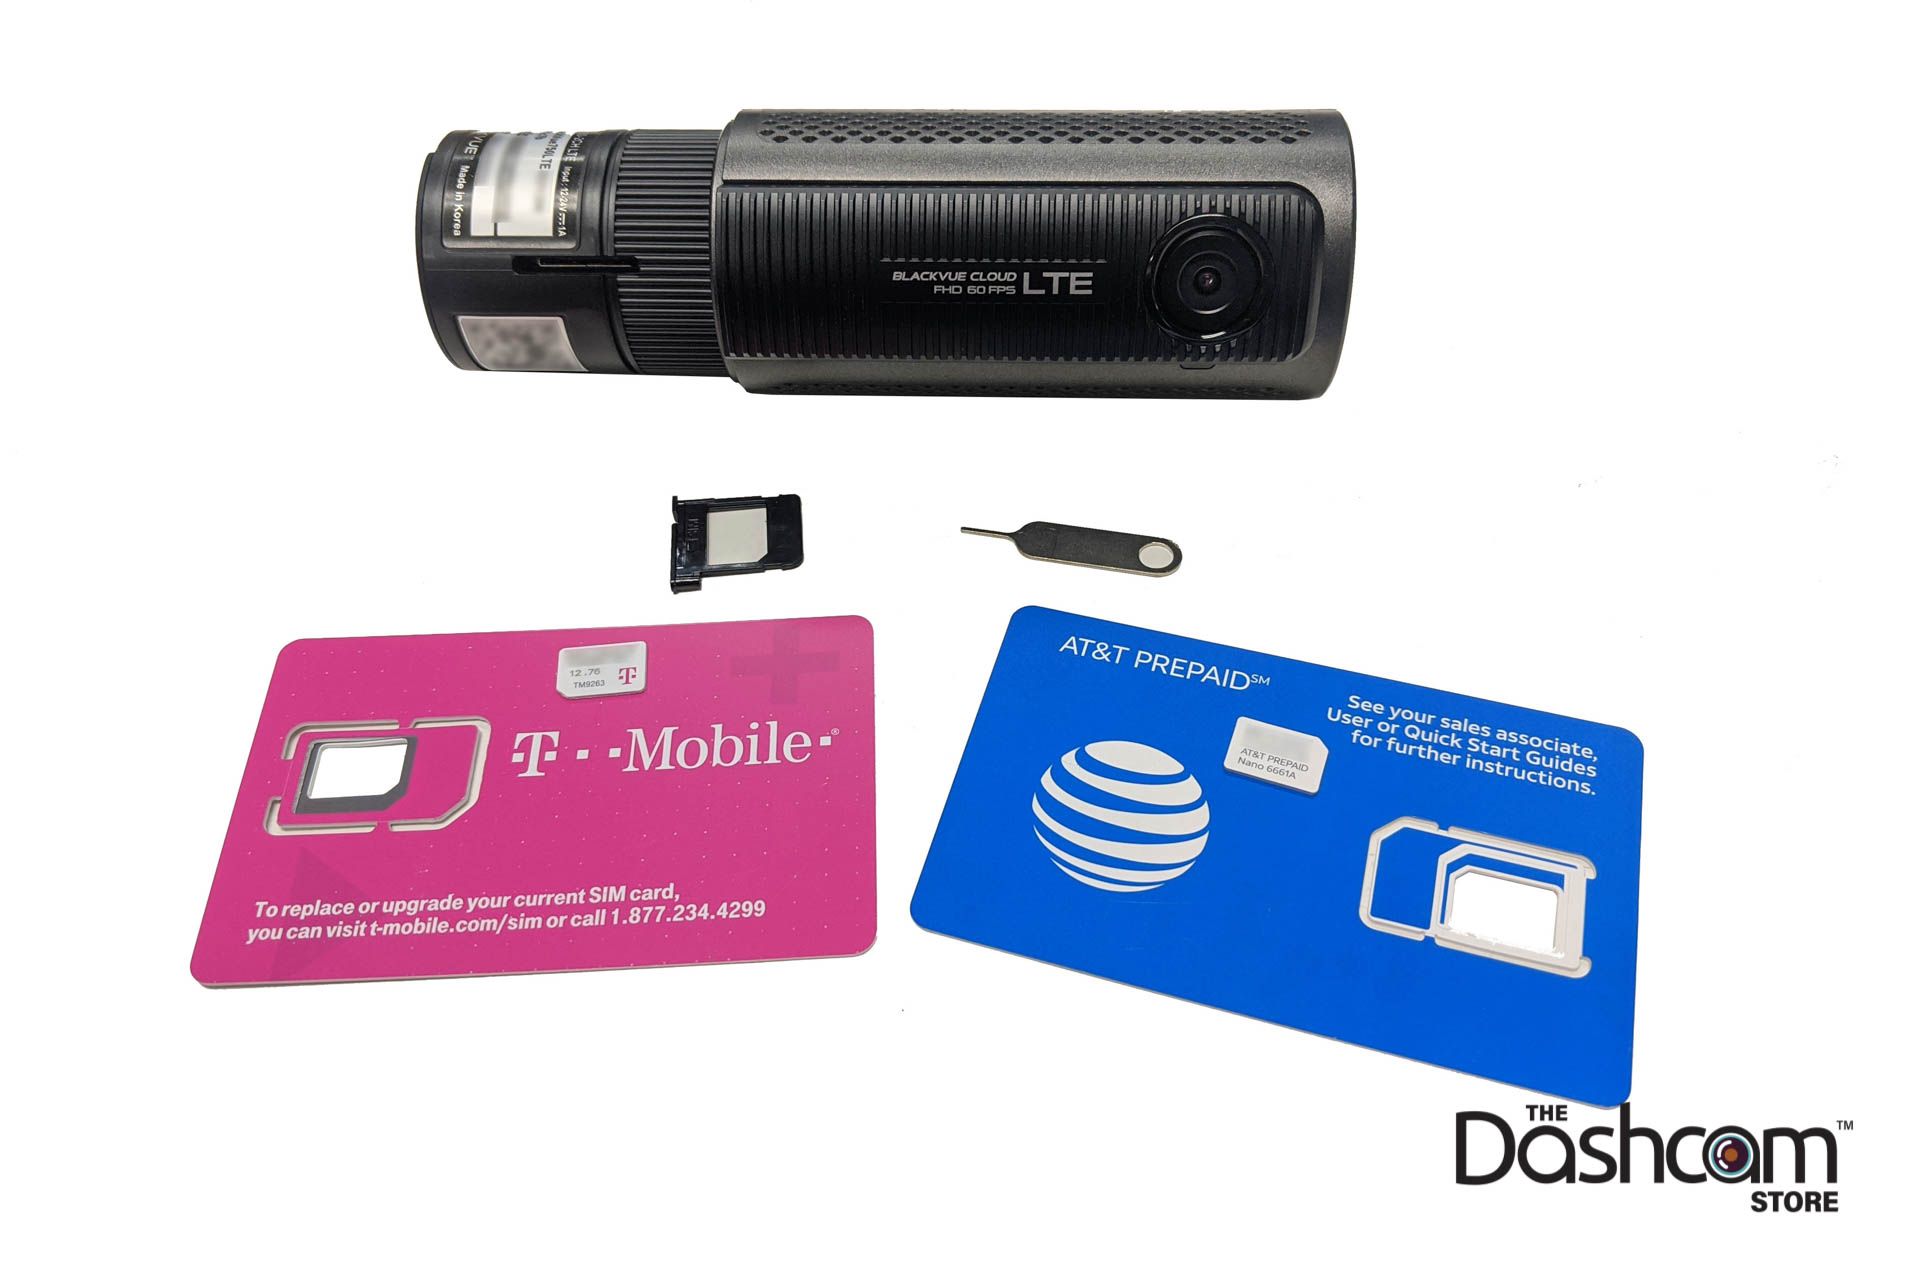
Plan Options
Your new SIM card can be added to an existing account you have with your current carrier, or it can be a new standalone account that you set up separately, just for the 750-LTE. You can even use pay-as-you-go and/or pre-paid SIM cards from the various carriers such as AT&T, T-Mobile or Verizon.
Pro Tip: ask your carrier to provide you with a “data-only LTE SIM card that will work with an unlocked tablet”. The carriers aren’t going to understand that you want to use the SIM card in a new type of dash cam so best to keep it simple for them. Telling them you want to use the SIM card in a "tablet-type device" is essentially what you will be doing and it's something they will understand, so it's an easy way to ensure that they can help provide the SIM card to you.
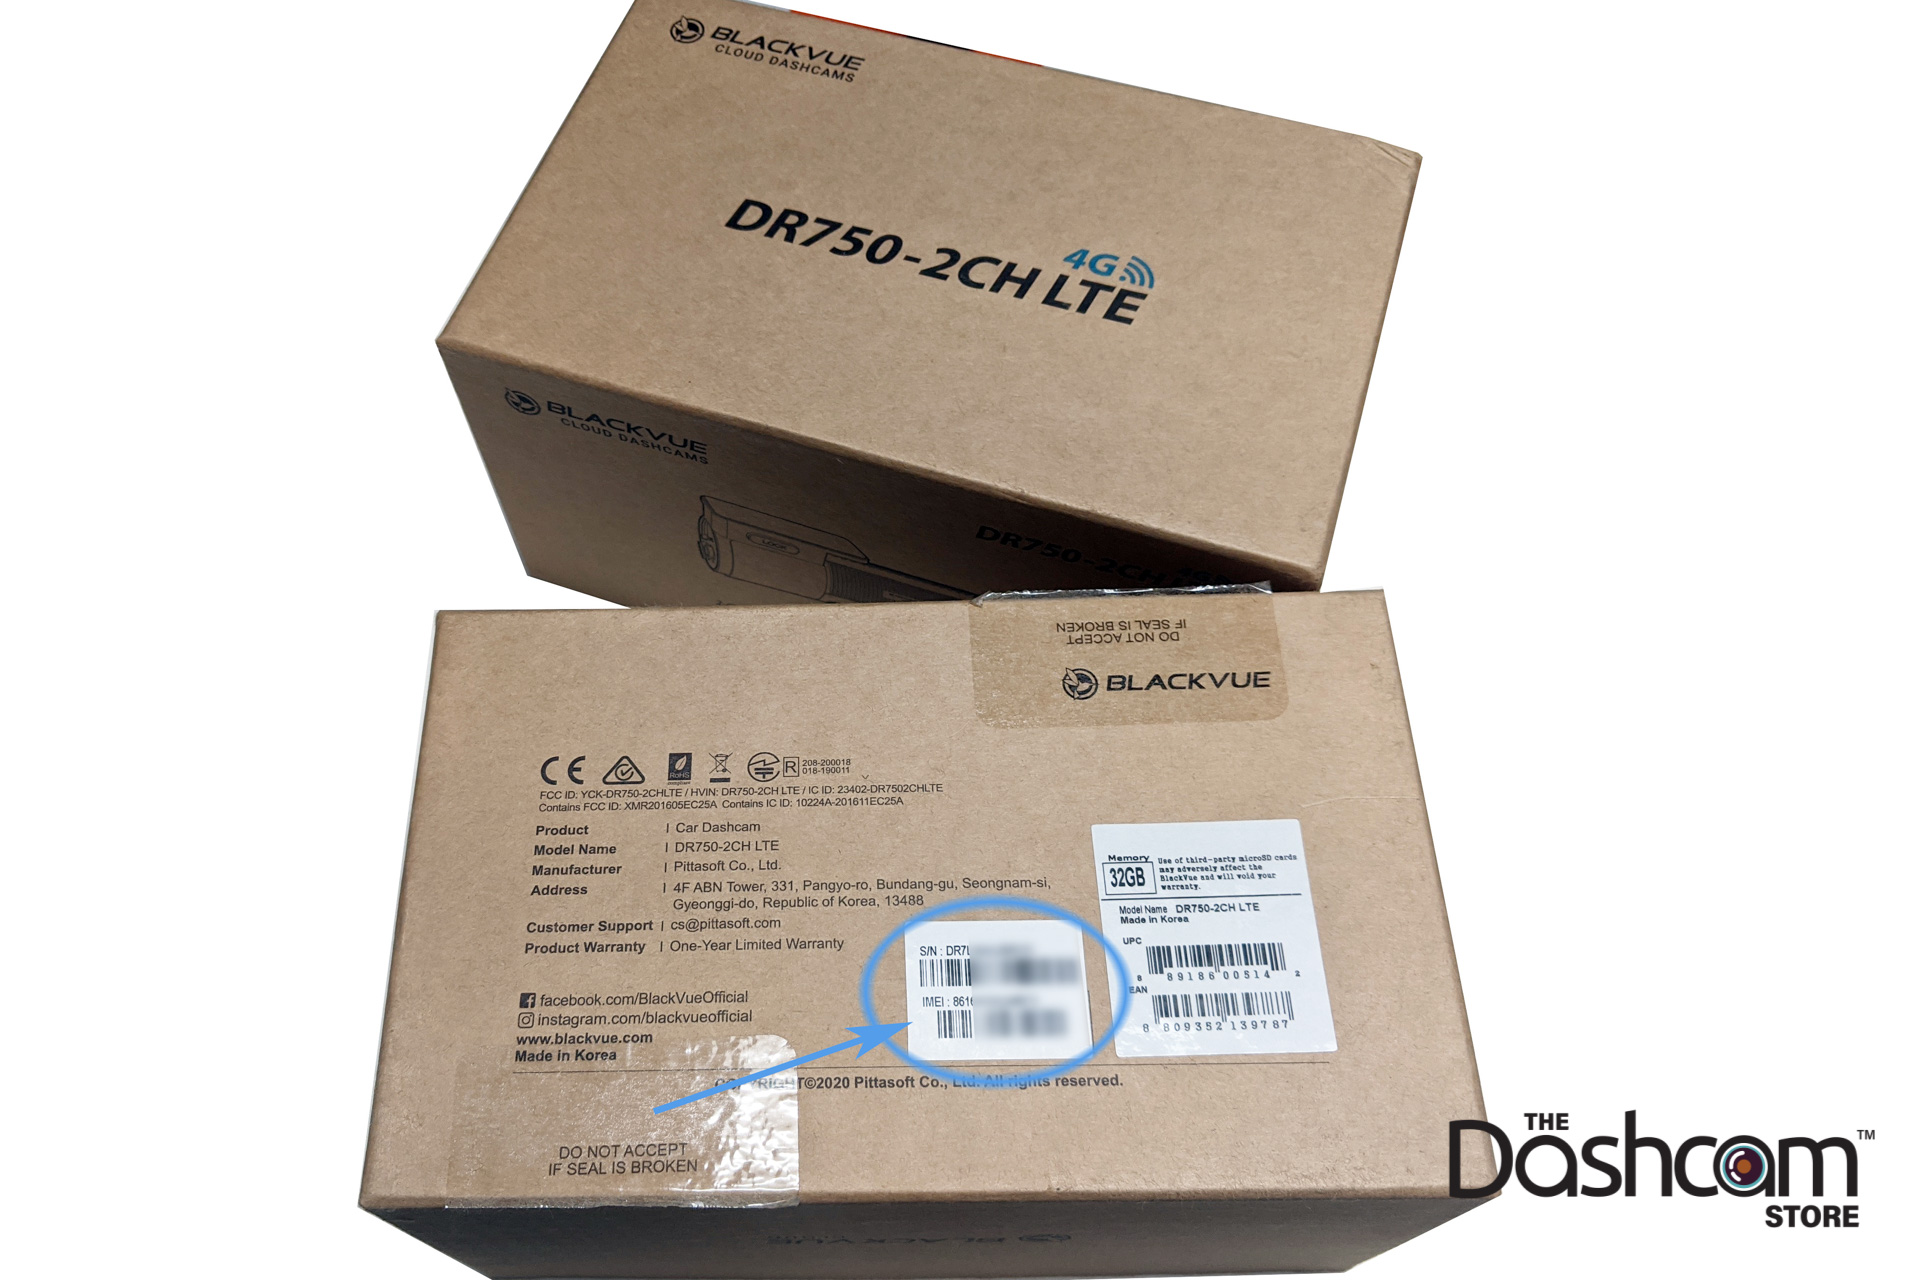
Whether you purchase your SIM card online or in person, you may be asked to provide the IMEI number of the device you need the SIM card for, in order to activate the SIM card, so be sure to have this information handy when procuring your SIM card.
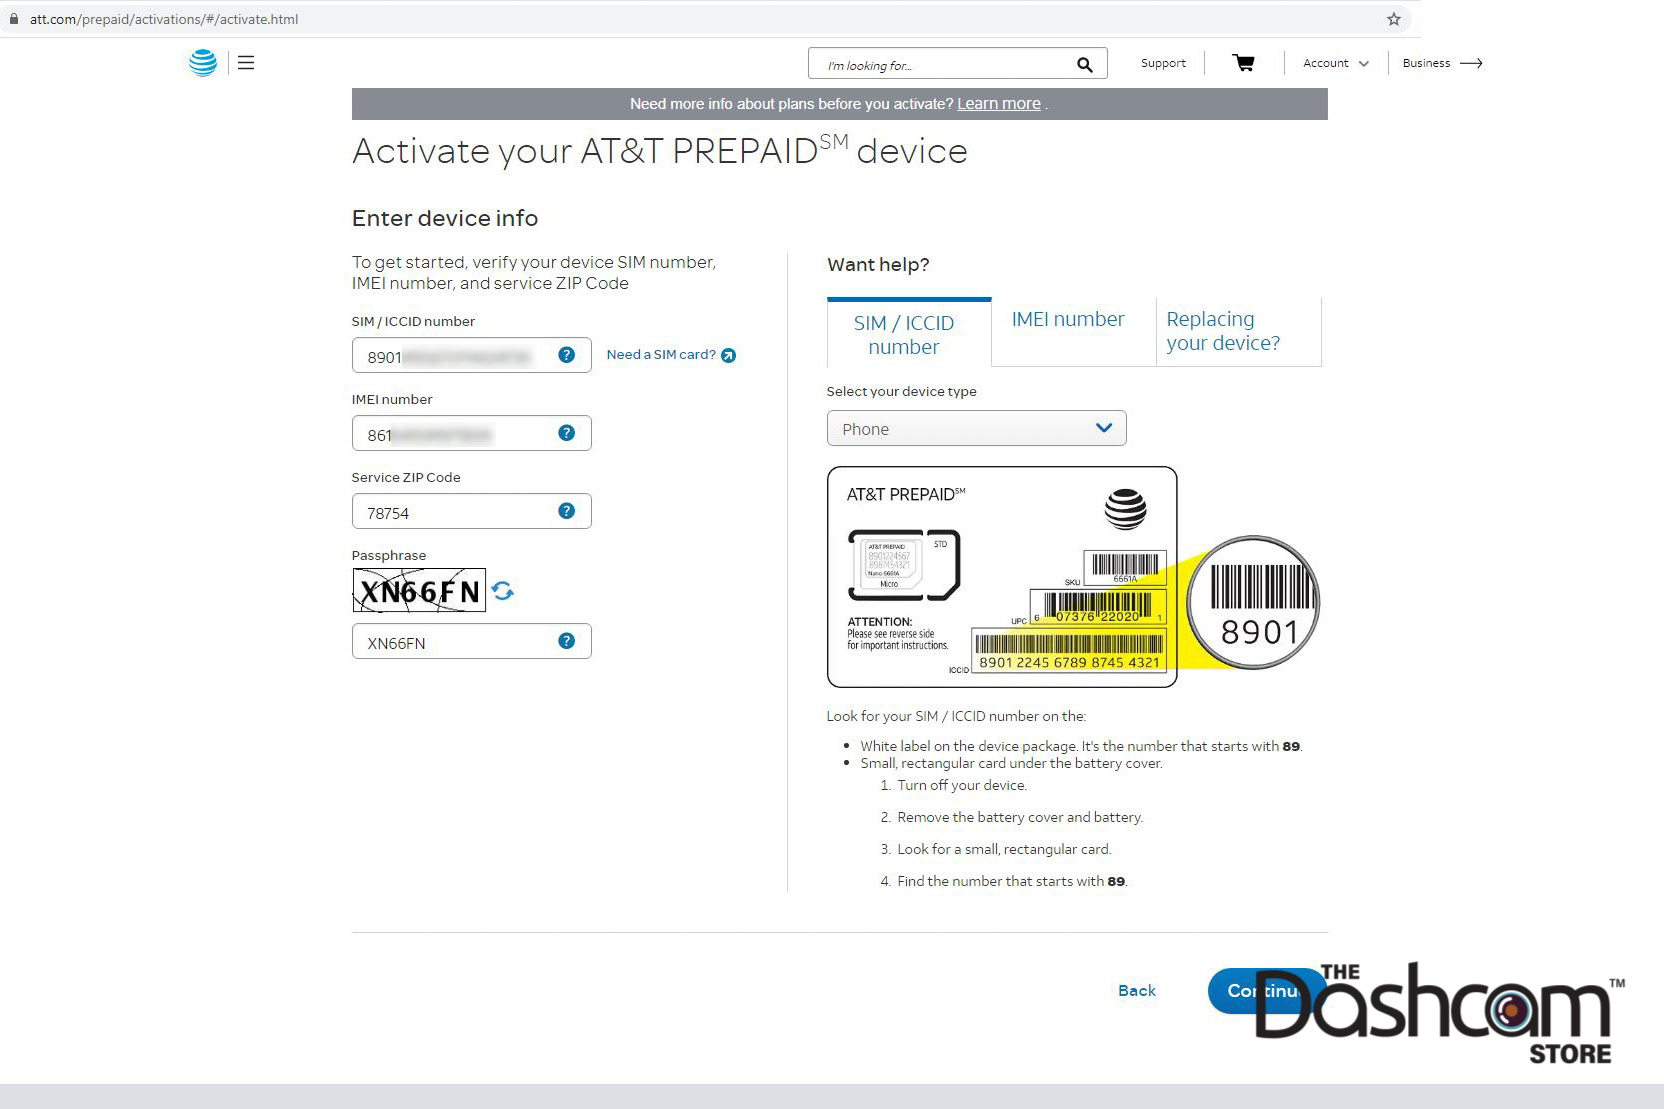
The IMEI number of the 750-LTE is printed on the bottom of the DR750-2CH-LTE box, beneath the serial number.
The cost of the SIM card itself should not exceed around $10.00 or so, and depending on the plan and carrier, you may or may not need to pay an additional up-front sum of anywhere from $10-30 dollars for your first month of data service on your new SIM card plan. This cost is paid directly to your carrier and is not a fee collected by BlackVue.
Pro Tip: if your carrier does not accept the BlackVue 750-LTE IMEI number, that's OK. You can register the SIM card with any device IMEI (such as an old cell phone, or any other cellular-enabled item like a tablet device or old cellular-based WiFi hotspot device). Once the SIM card has been activated using a different IMEI, it will still work in the 750-LTE once you complete the rest of the steps in this how-to guide. **This method has been personally tested by the team at The Dashcam Store.**
Step 2: Create a BlackVue Cloud Account
If you don't already have an account with BlackVue, use the BlackVue app to sign up for your free or paid BlackVue Over-the-Cloud account. The free plan is sufficient for most users. More details on BlackVue Over-the-Cloud accounts may be viewed here.
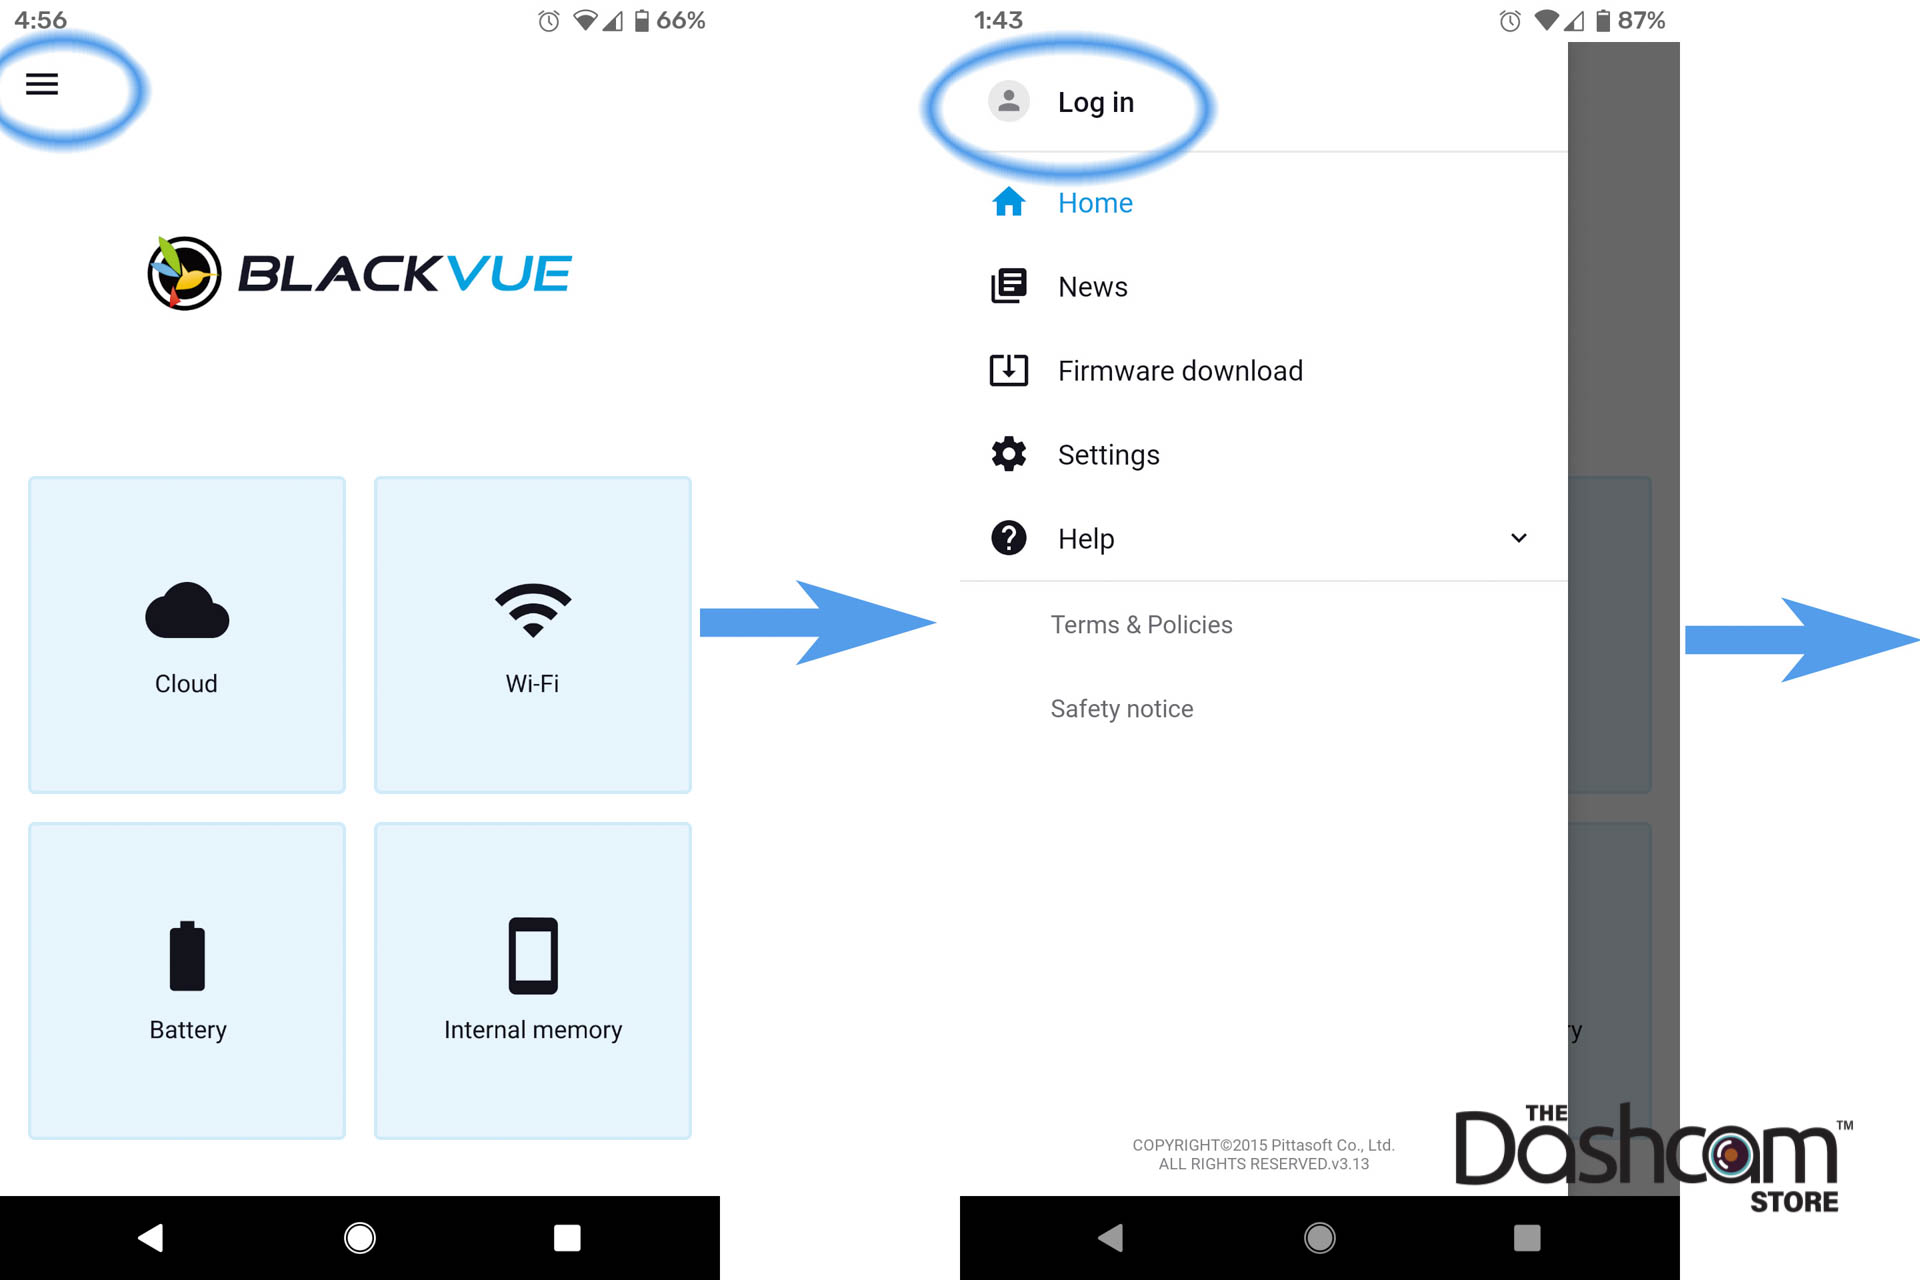
Click the 3-line icon at the top left of the BlackVue app main menu to get started on creating your new account or logging in to your existing account.
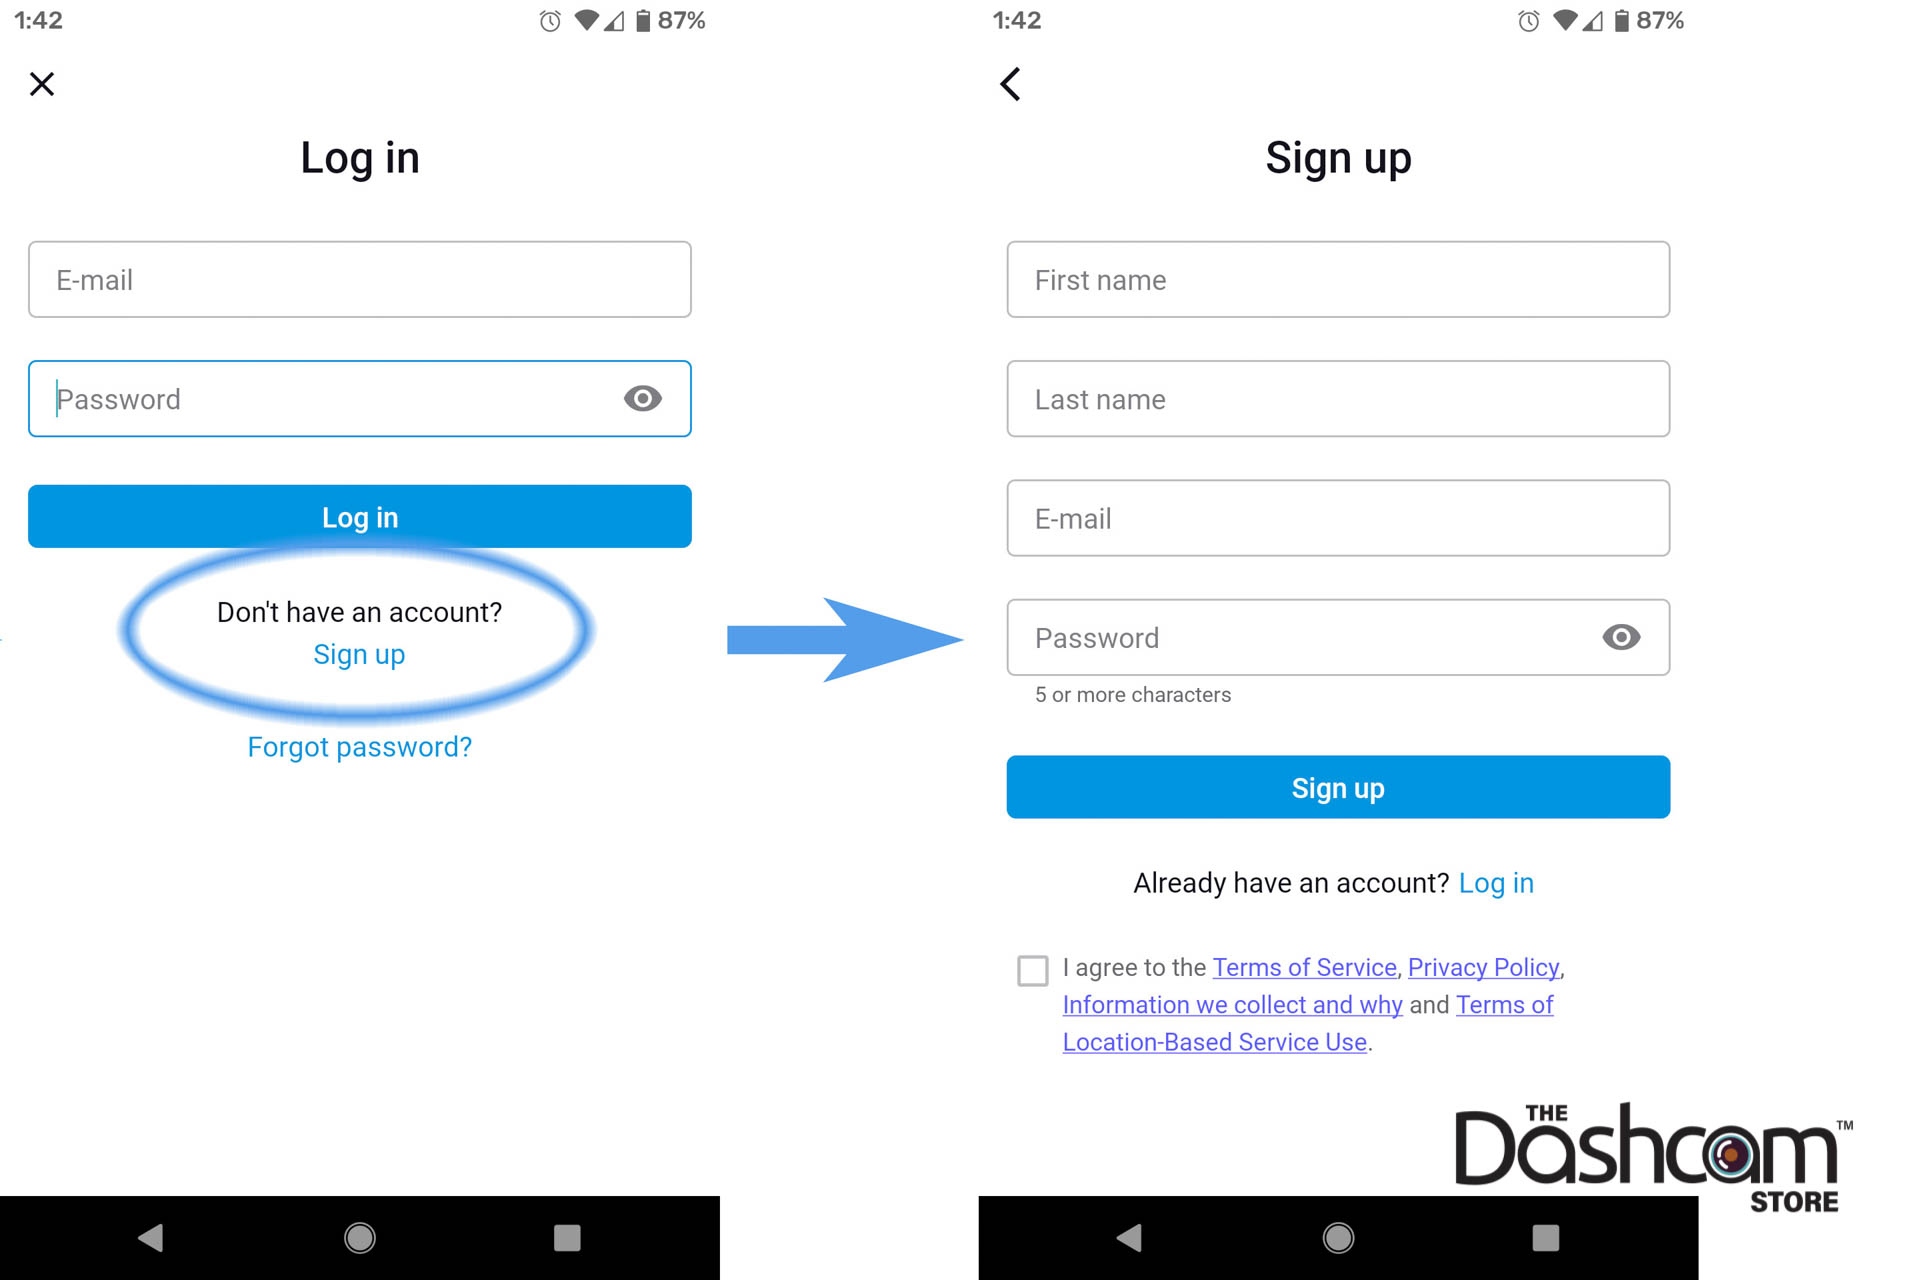
Follow the steps in the BlackVue app to complete and verify your account registration. You will need to confirm your email address to verify the account. Be sure and check your spam folder if you do not receive the BlackVue email verification message within a few minutes.
Step 3: Register Your DR750-2CH-LTE
Use the BlackVue app to register your new DR750-2CH-LTE. Be sure you're logged in your newly-created Cloud account, then tap the Cloud icon from the main menu of the BlackVue app.

Now tap the "+" symbol at the top right to add your cloud-capable BlackVue dash cam to your BlackVue account. Point your smartphone camera at the QR code on the camera label or the label on the box. The code will be scanned and automatically accepted by the app once it is well framed by your camera.
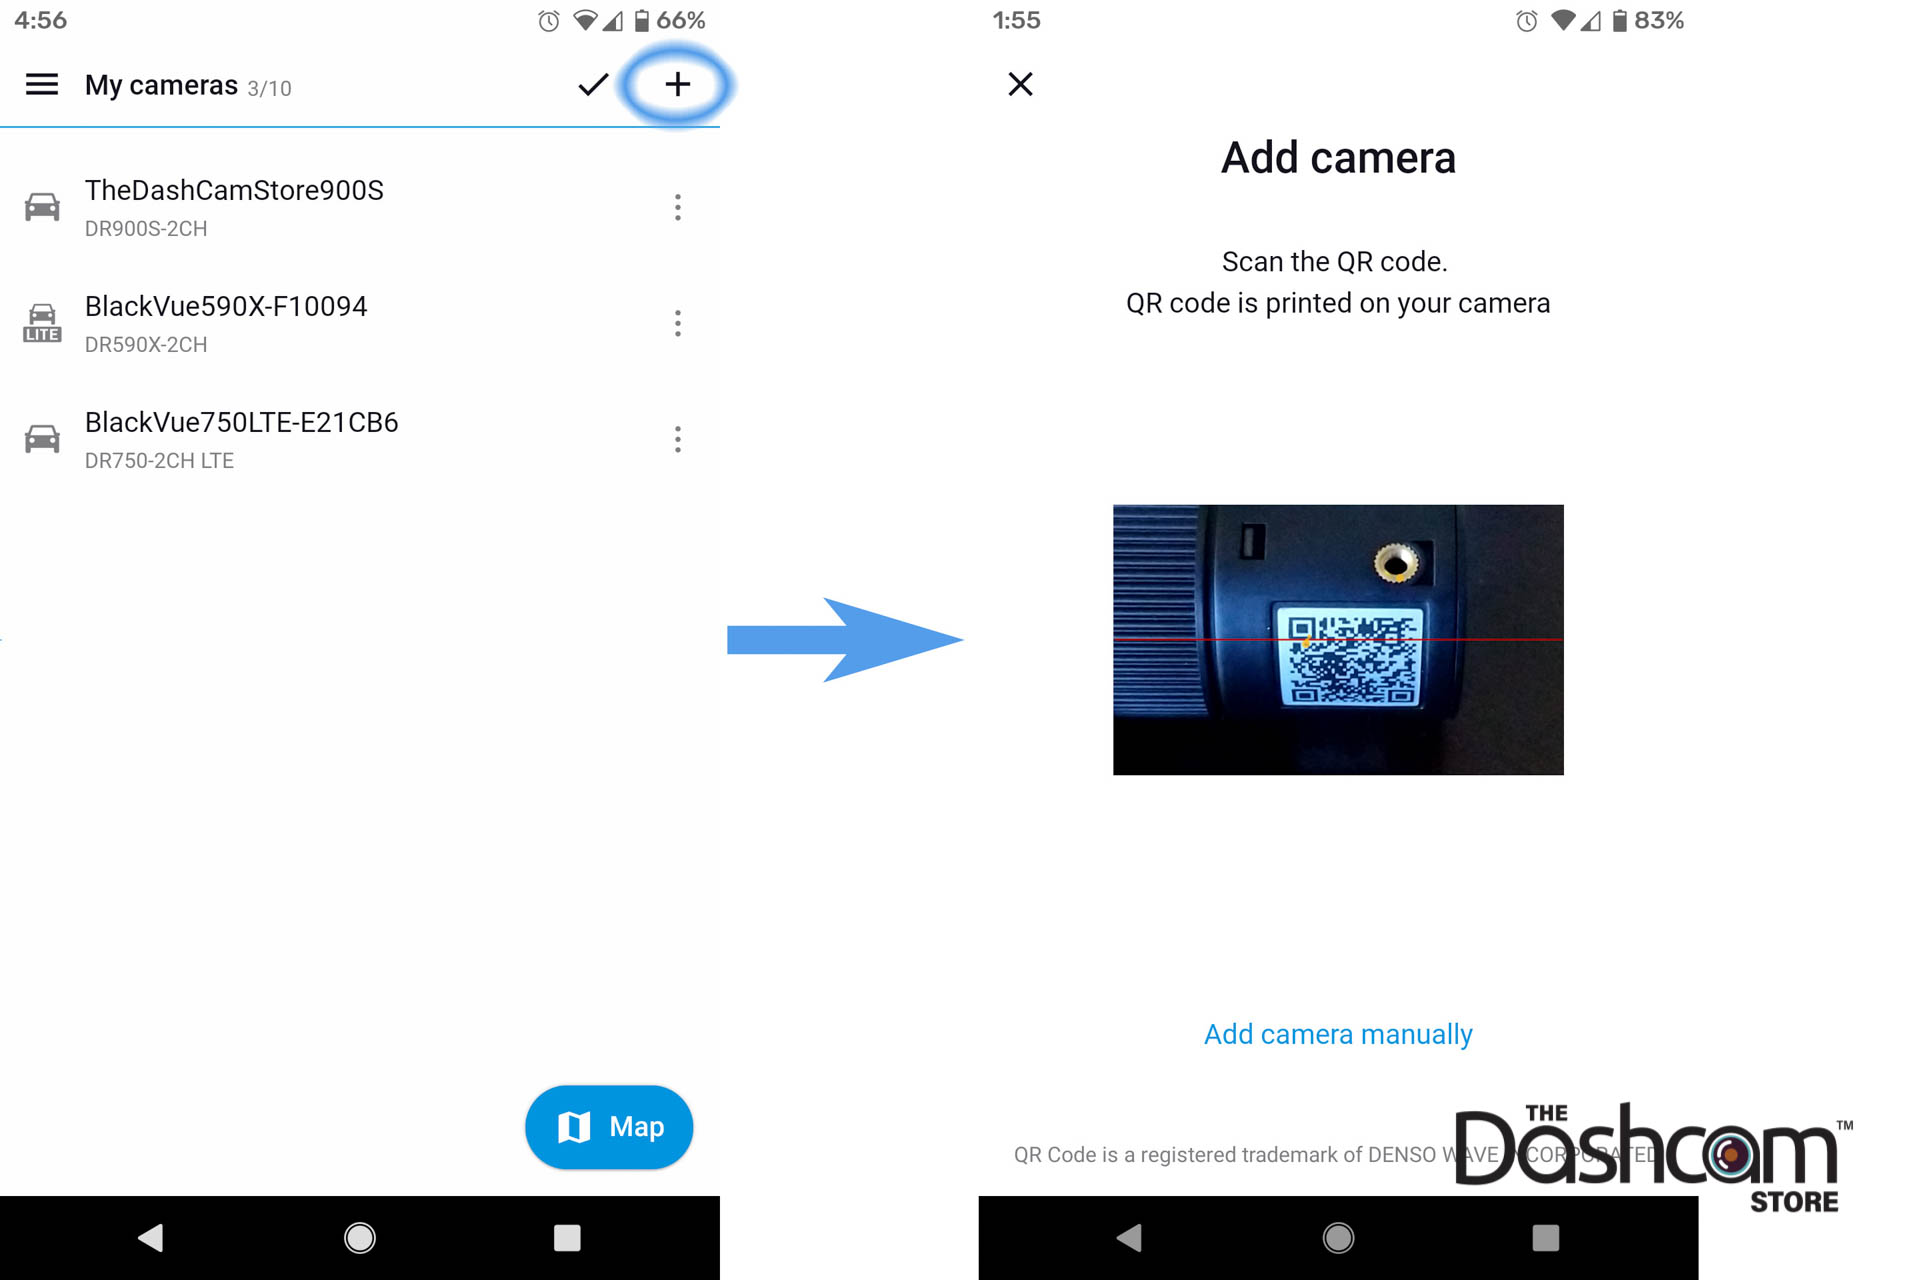
If the QR code is not working, the camera can also be added manually by tapping the blue "Add camera manually" text at the bottom of the screen.
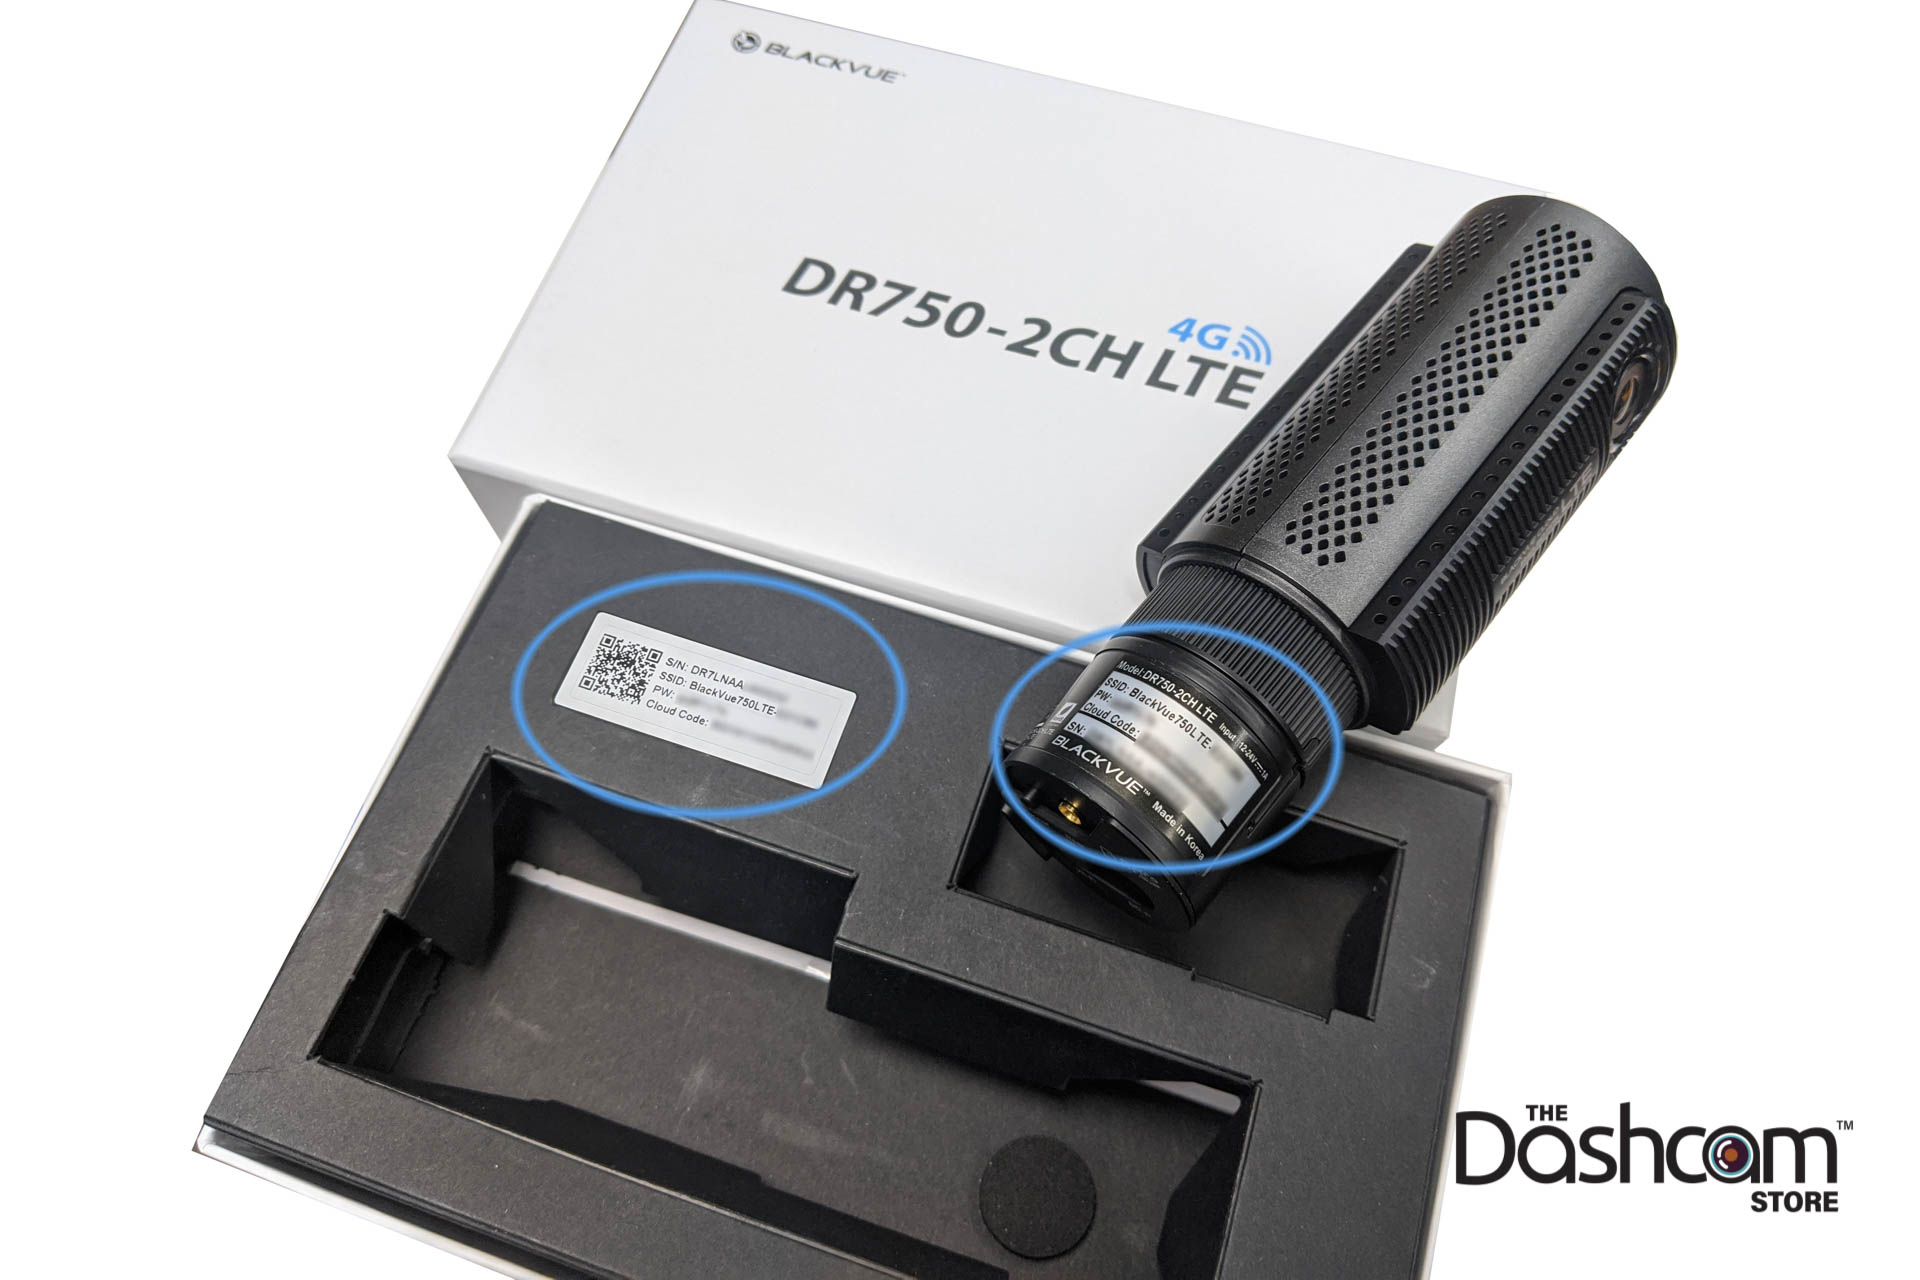
Important: Be sure to make note of the BlackVue direct-connection WiFi SSID (hotspot signal name) and Password. You will need this information later. The WiFi name (SSID) and password are located on the label next to the registration QR code, on both the retail box and under the mounting bracket on the body of the camera itself as well.
Step 4: Installing the SIM Card
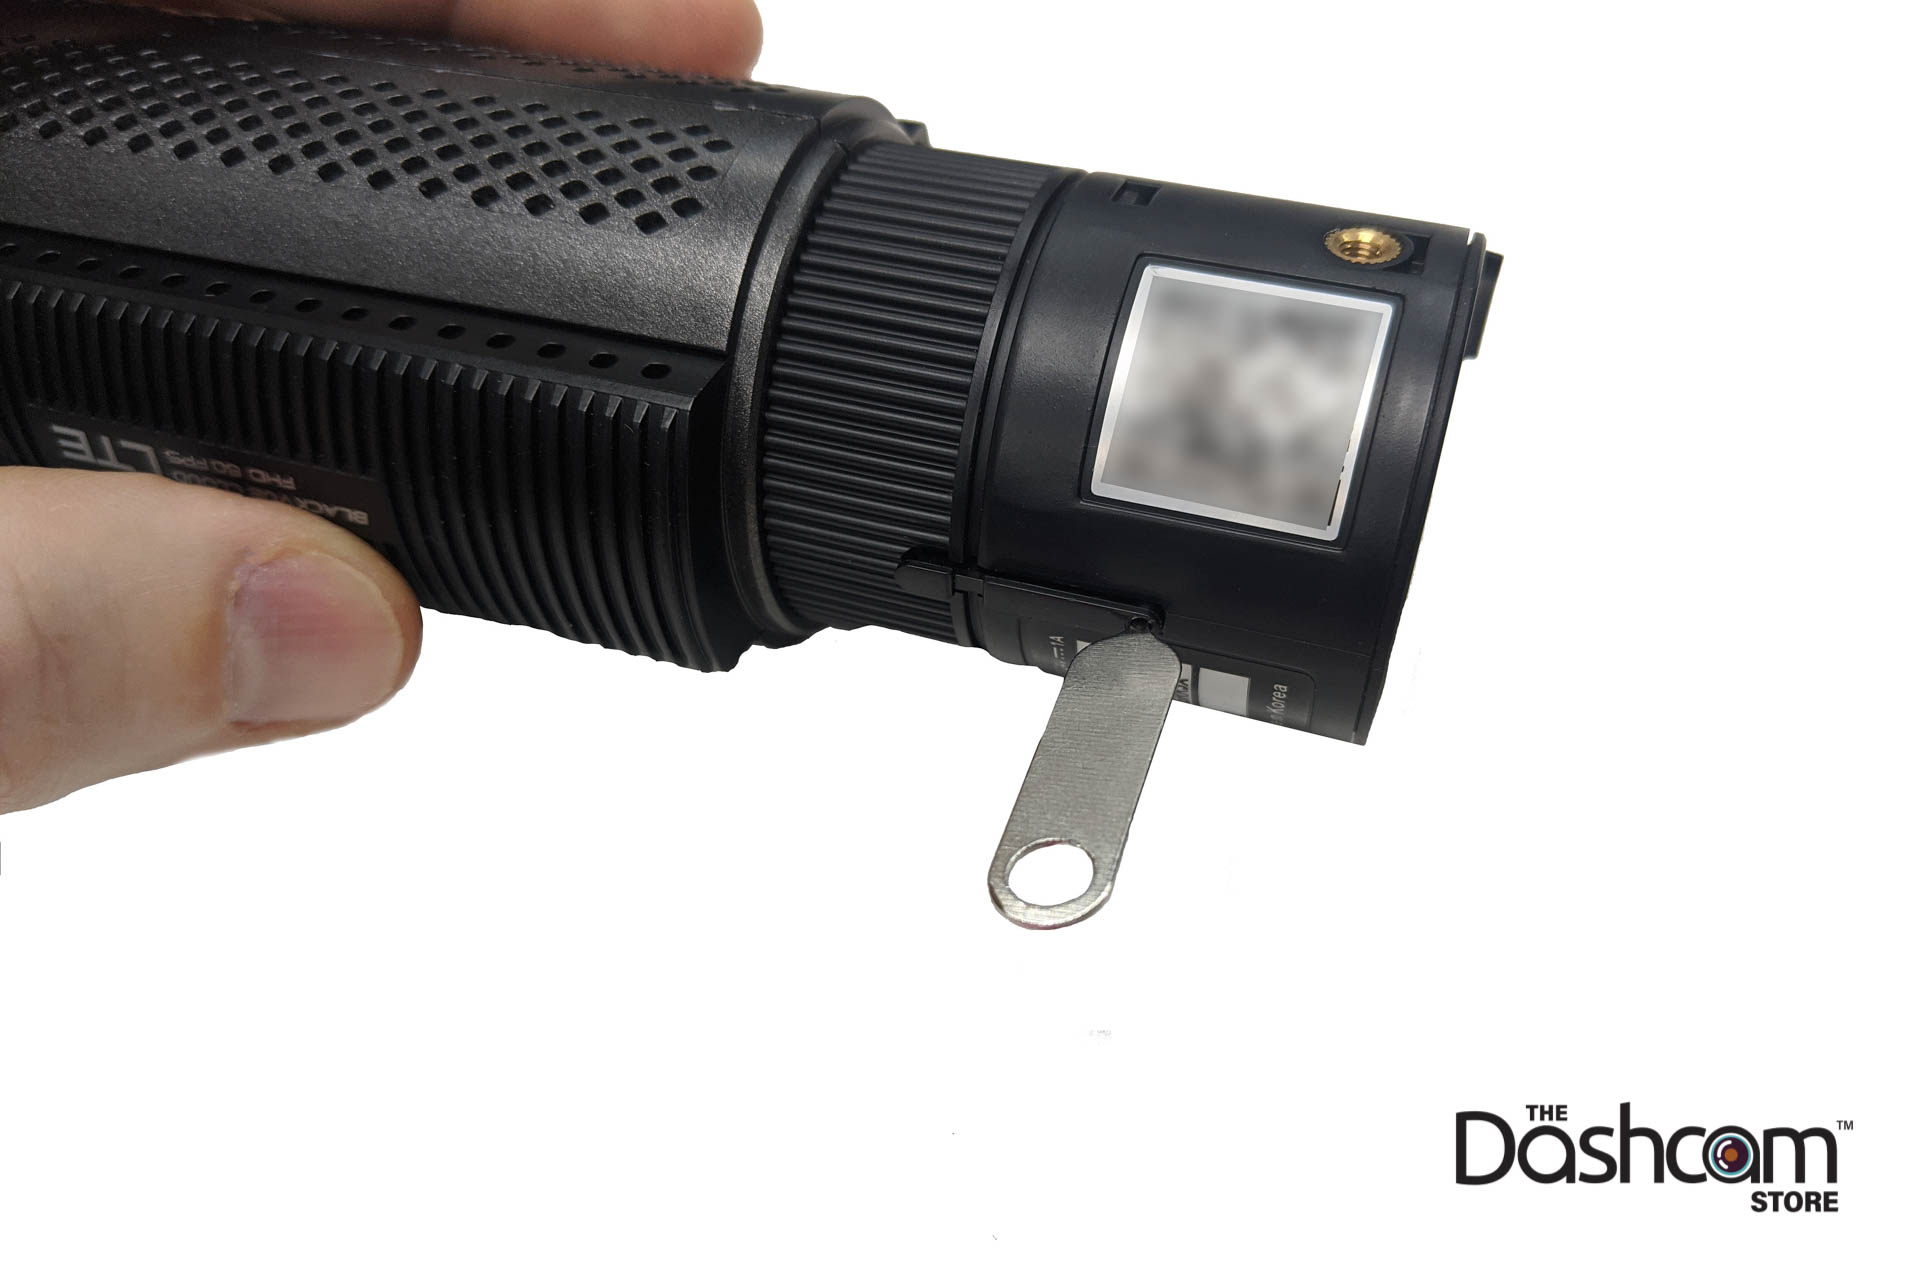
Once the camera has been registered, it's time to install the SIM card. Carefully eject the SIM card tray from the 750-LTE using the supplied SIM card tray eject tool. Note that the DR750-2CH-LTE should be held upside down when working with the SIM card tray.
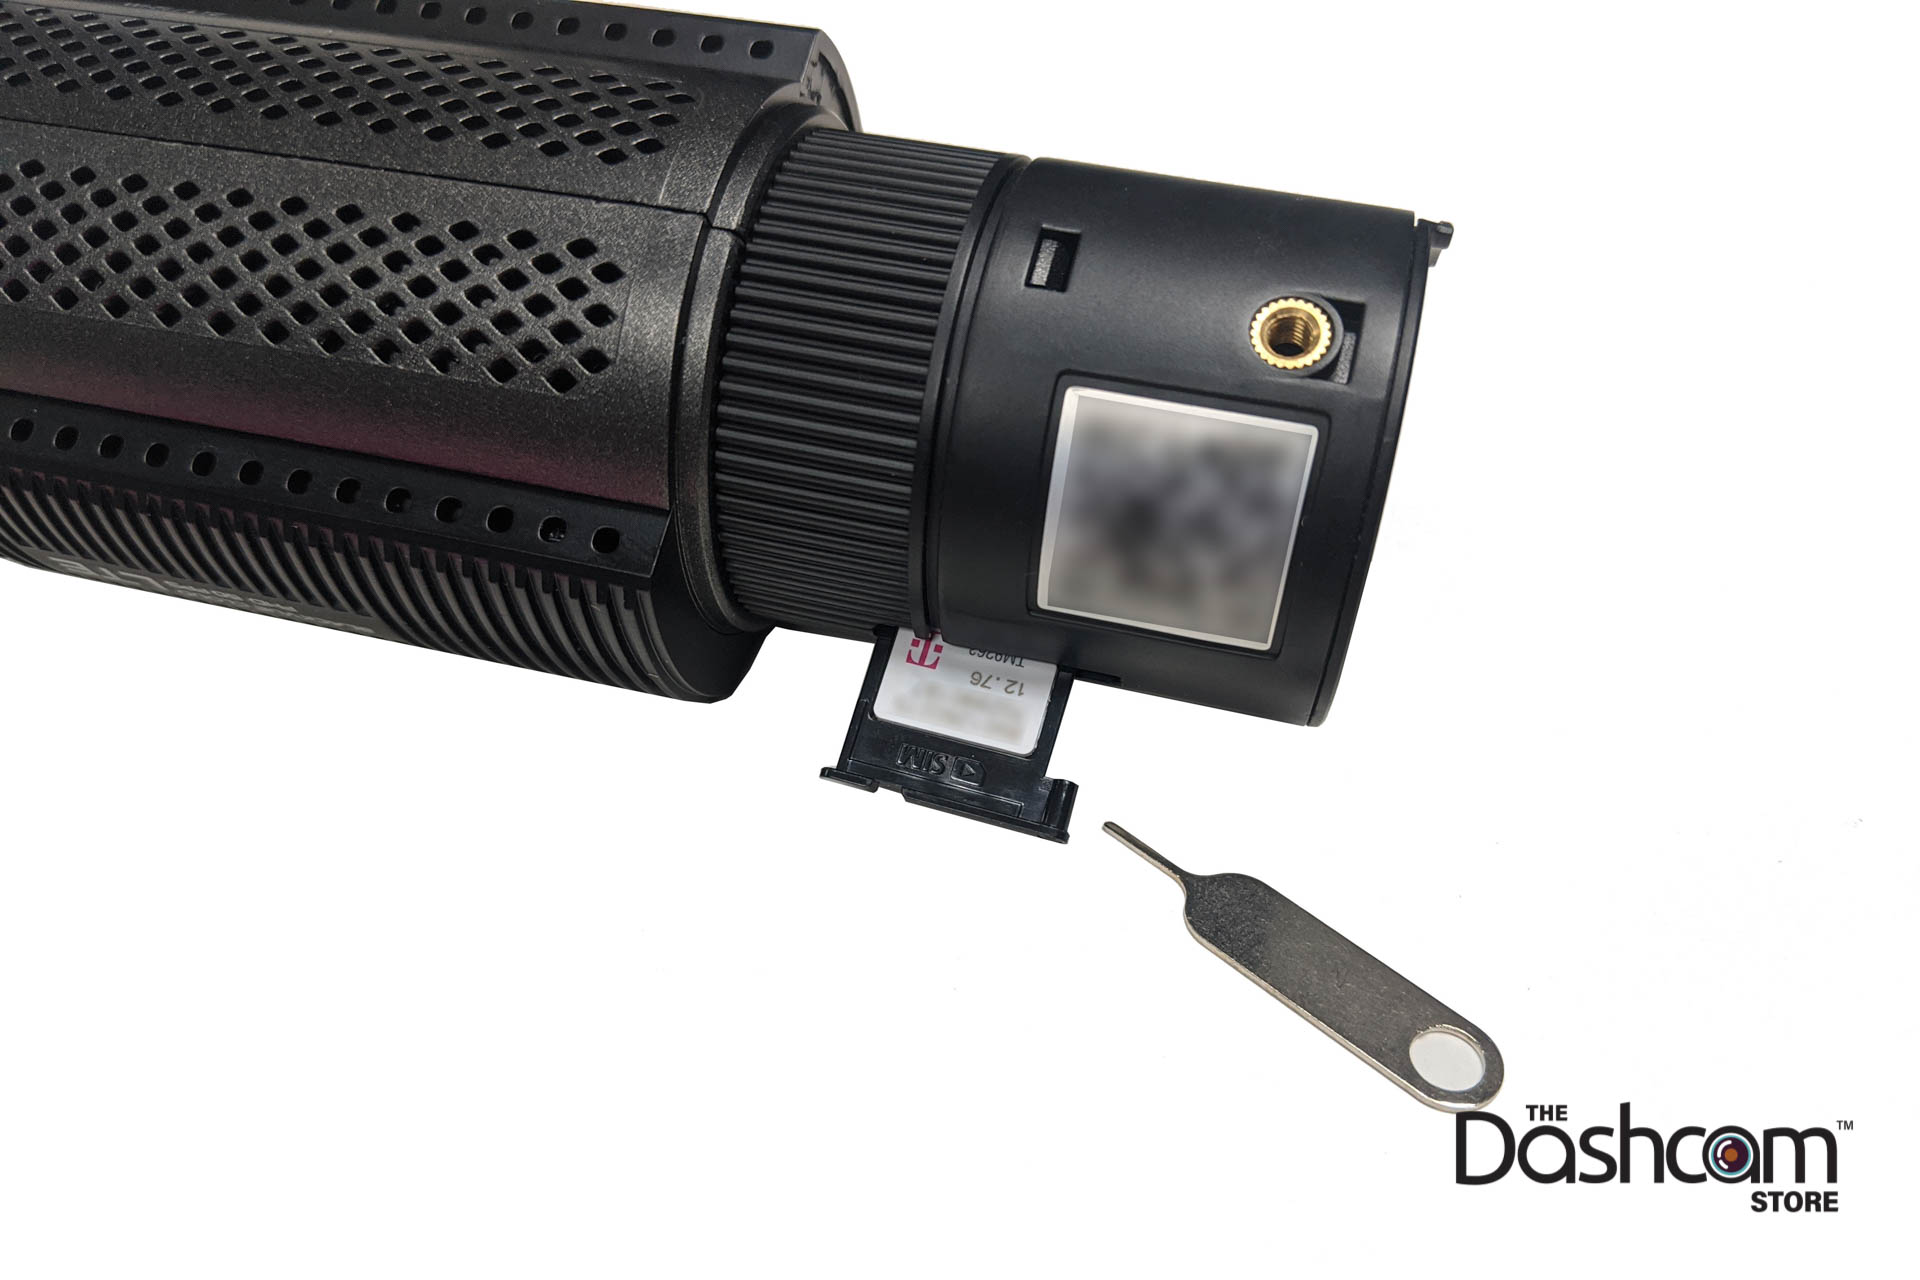
With the tray fully removed from the 750-LTE, place the nano SIM card into the SIM card tray, then carefully place the tray back and SIM card back in to the BlackVue DR750-2CH-LTE. Use your fingernail to gently seat the SIM card tray fully in to the dash cam until it is flush with the camera body.
Important: do not force the tray back in place, if it is binding, remove the tray, check that everything is oriented correctly, and try again.
Step 5: Connect via Direct WiFi Connection
Once the SIM card is successfully inserted, power on the BlackVue and allow it to boot up normally. You will likely hear a voice alert saying “please register your SIM card”, this is to be expected.
Now use your phone's WiFi settings menu to directly connect to the DR750-2CH-LTE WiFi signal, just like you would connect to any other WiFi network at your home, office, or favorite coffee shop. You will enter the unique 8-digit BlackVue password from the label you noted earlier to connect to the DR750-2CH-LTE via WiFi.
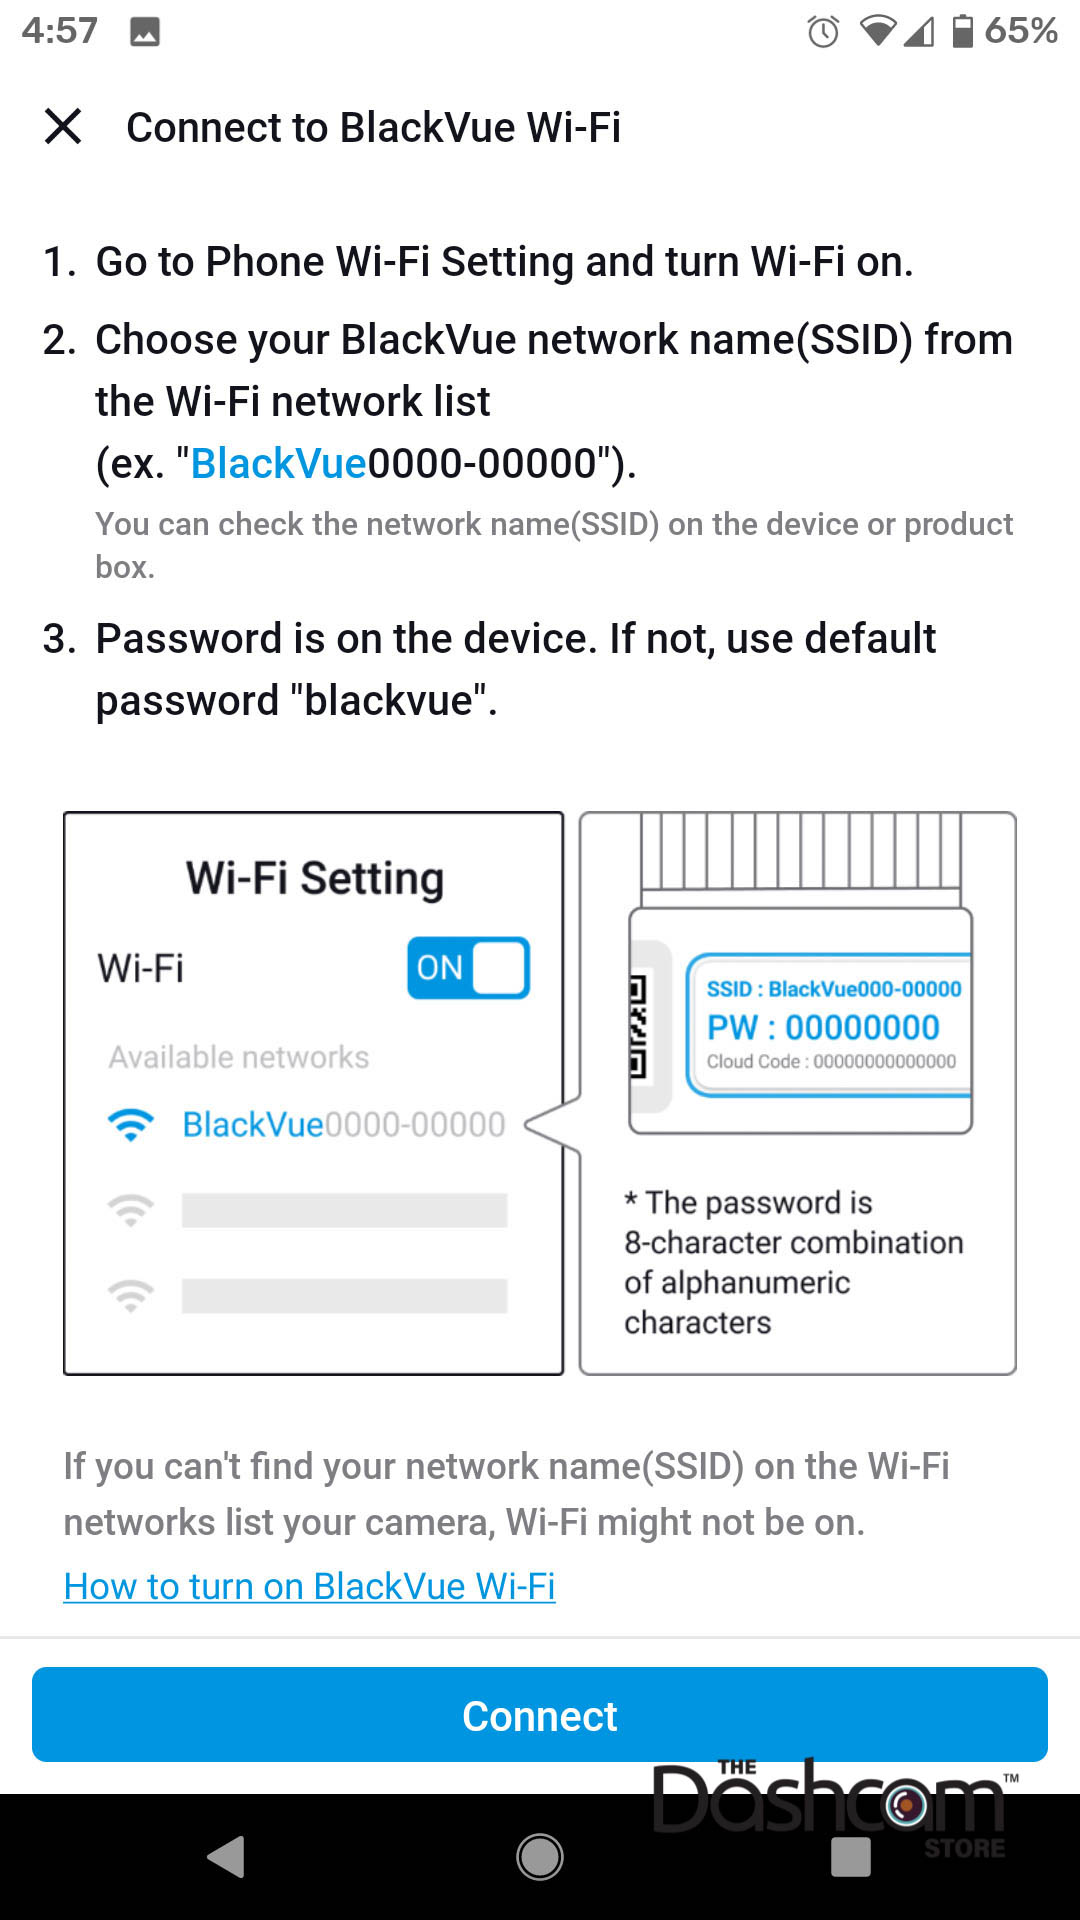
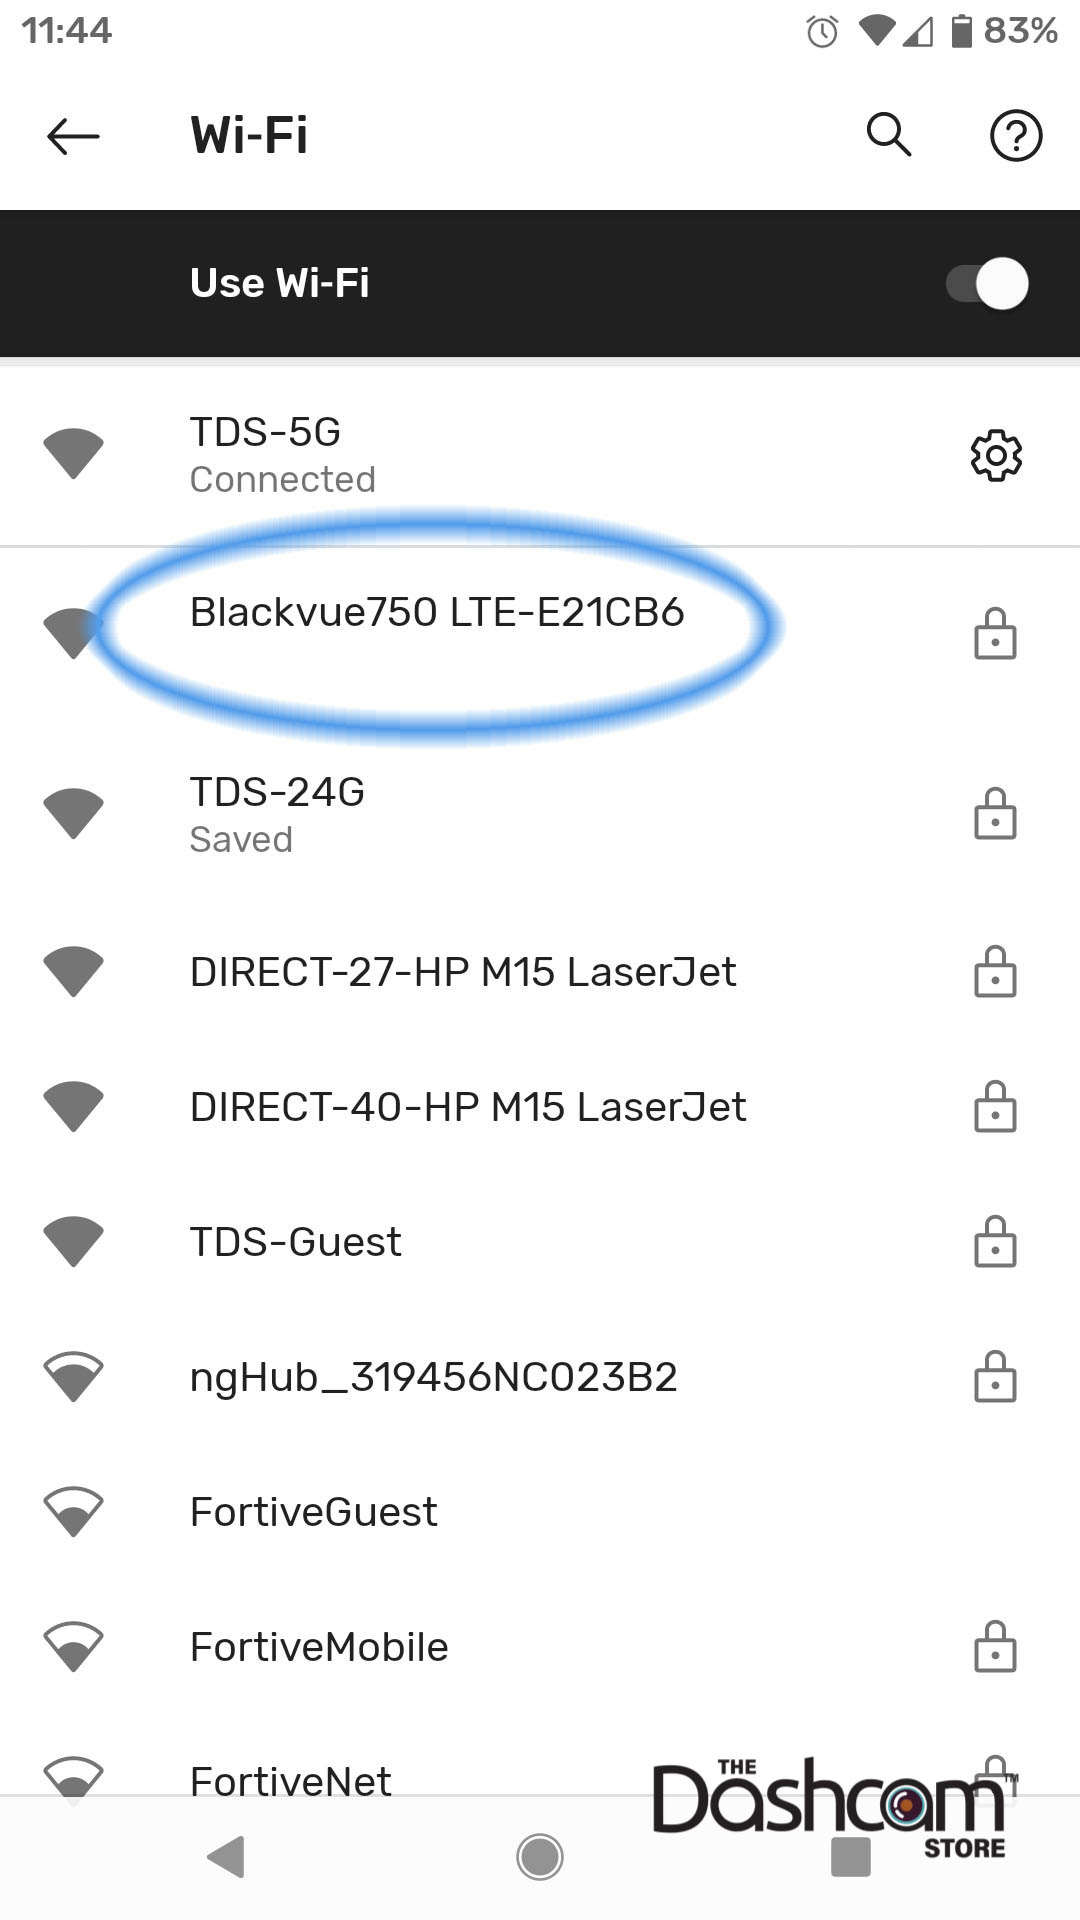
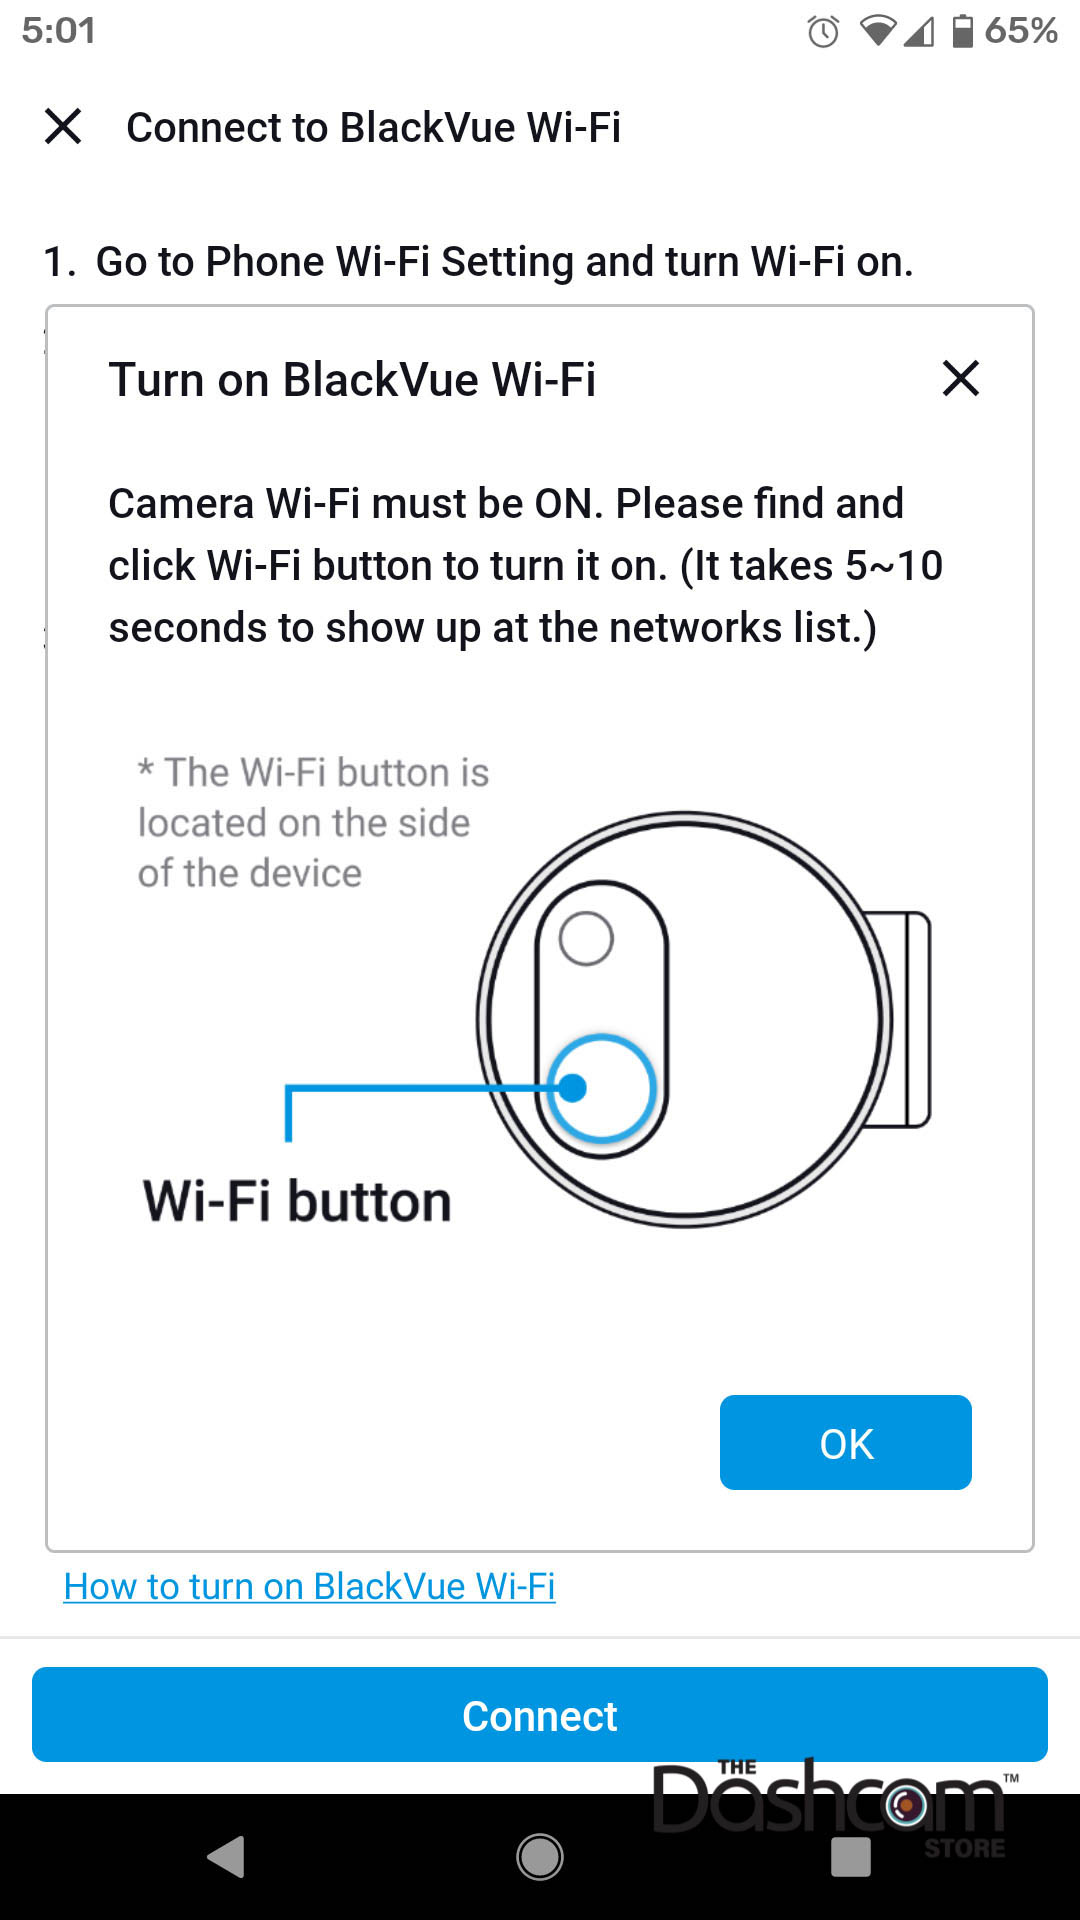
From your phone's WiFi settings menu, you should see the BlackVue WiFi signal as shown in the example below.
If the 750-LTE's WiFi did not come on automatically, turn on WiFi by pressing the WiFi button once. Then you can follow the instructions above.
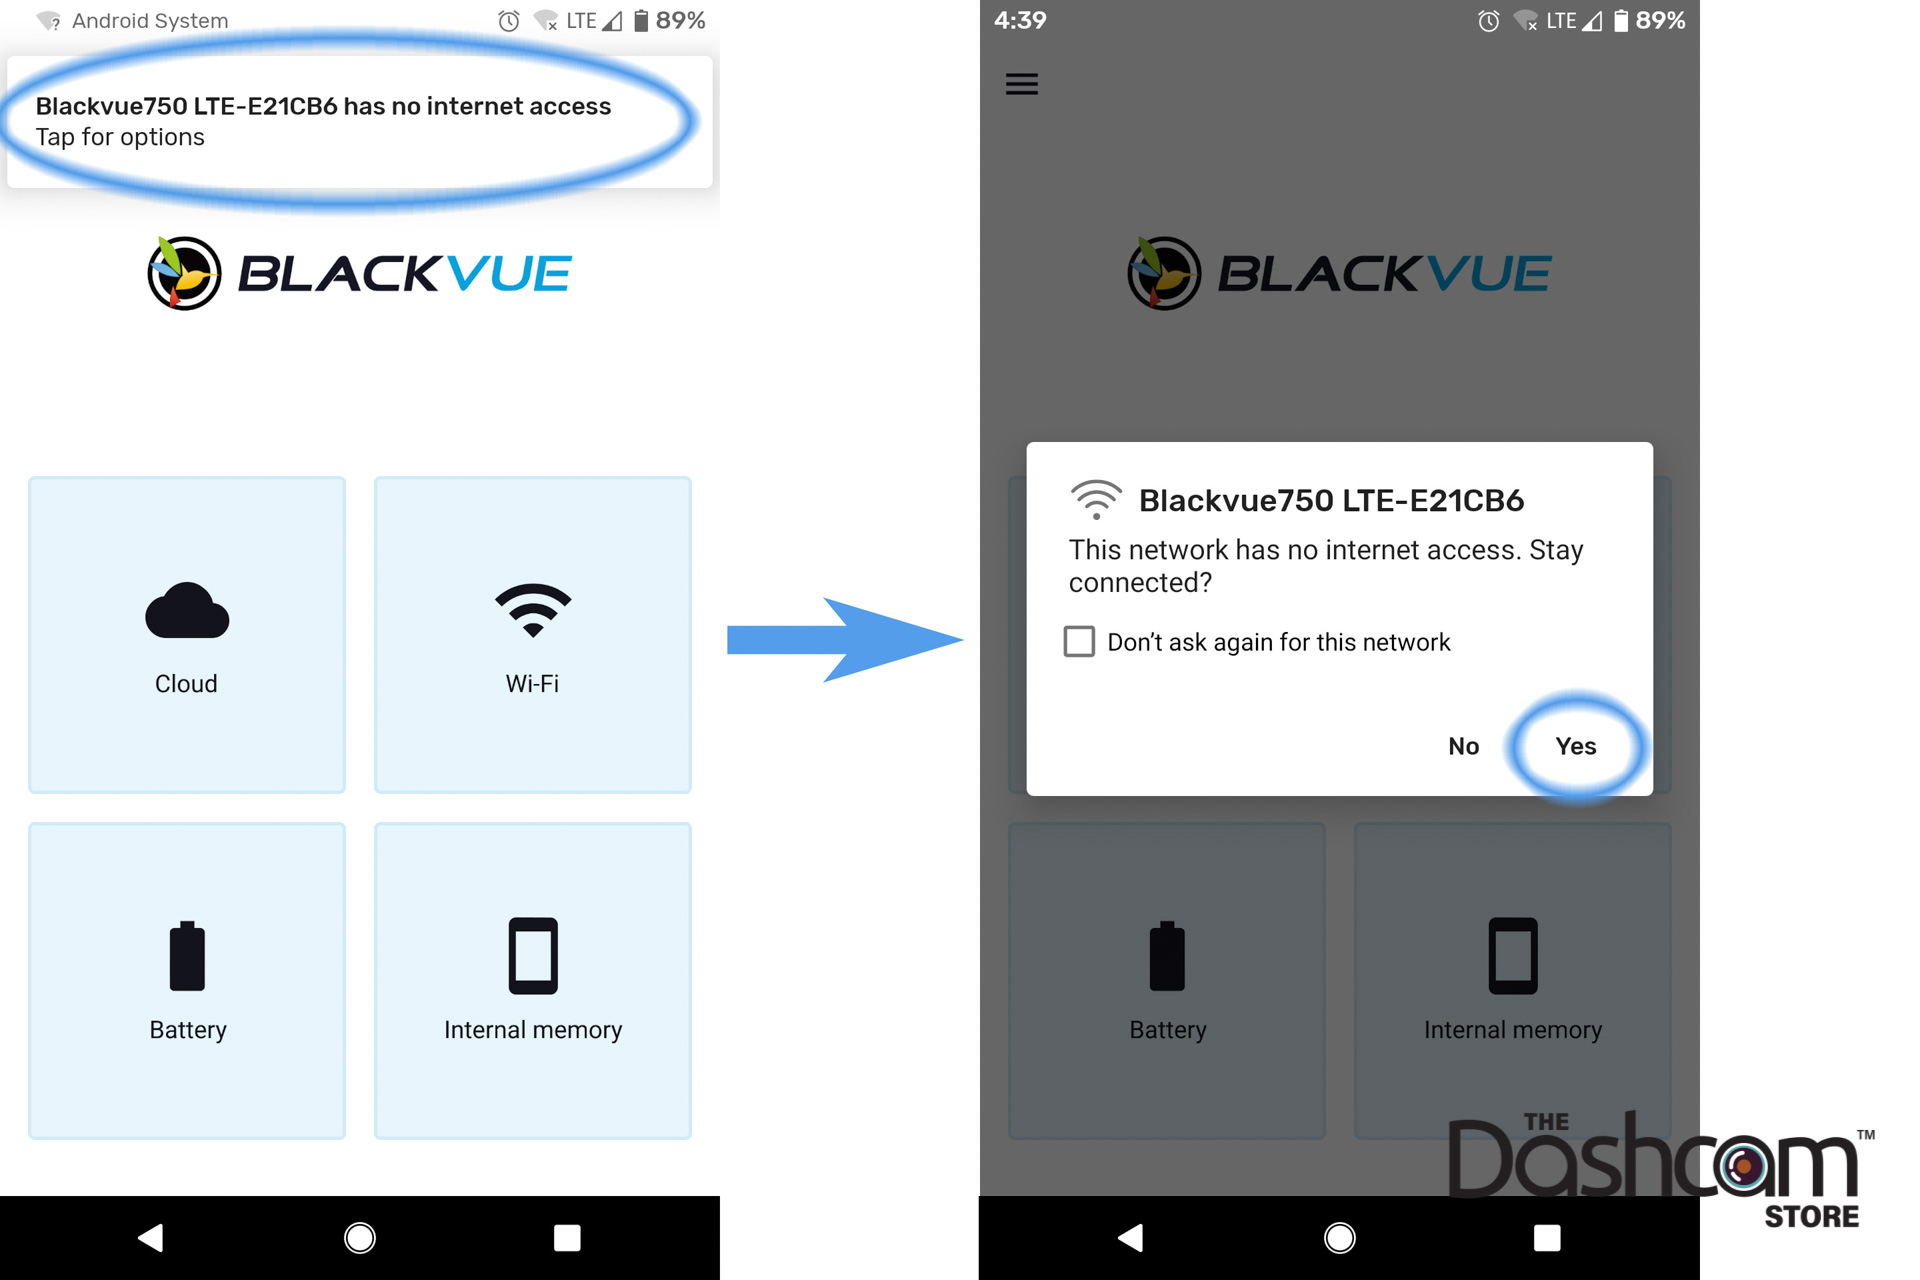
Android Pro Tip: Android users, if you see an alert or notification on your phone immediately after connecting to the 750-LTE via WiFi that says "BlackVue750 LTE-xxxx has no internet access", be sure to tap the prompt "Tap for options" then, on the next window hit "Yes" to stay connected. If you like, you can also check the box for "Don't ask again for this network".
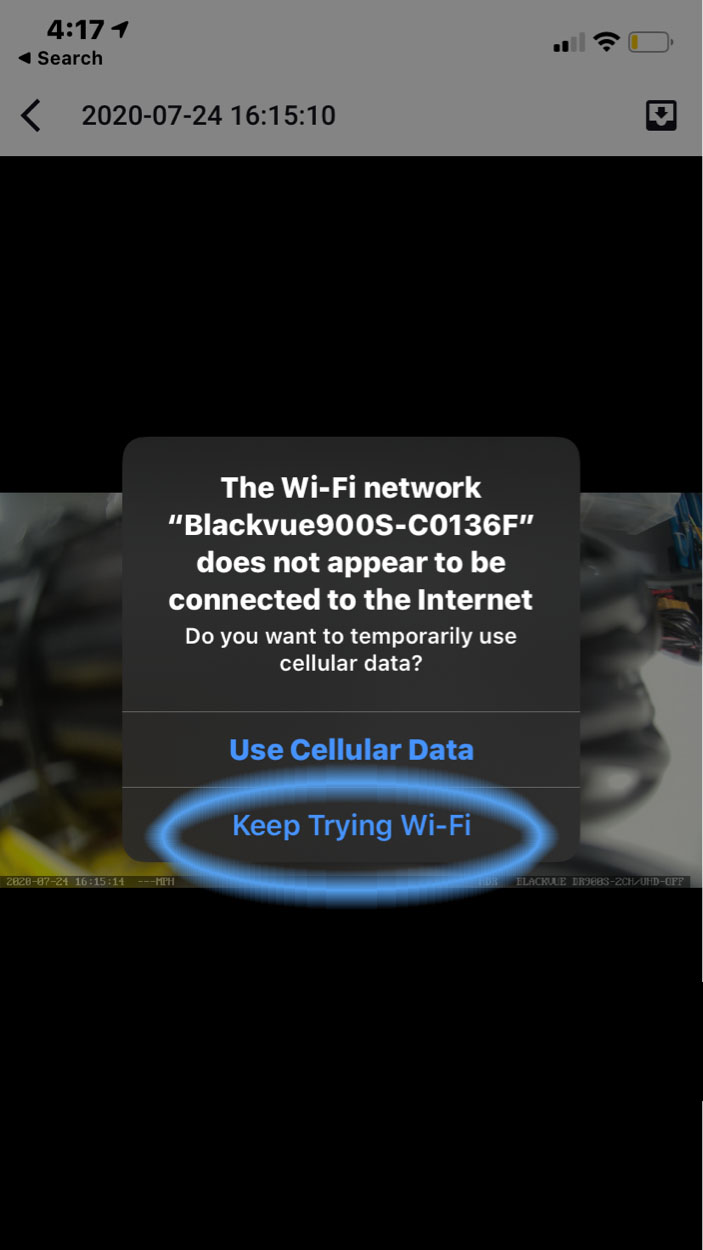
iPhone Pro Tip: iPhone users, if you see an alert or notification on your phone after connecting to the 750-LTE via WiFi regarding an issue with the WiFi network, be sure to hit "Keep trying Wi-Fi" to stay connected.
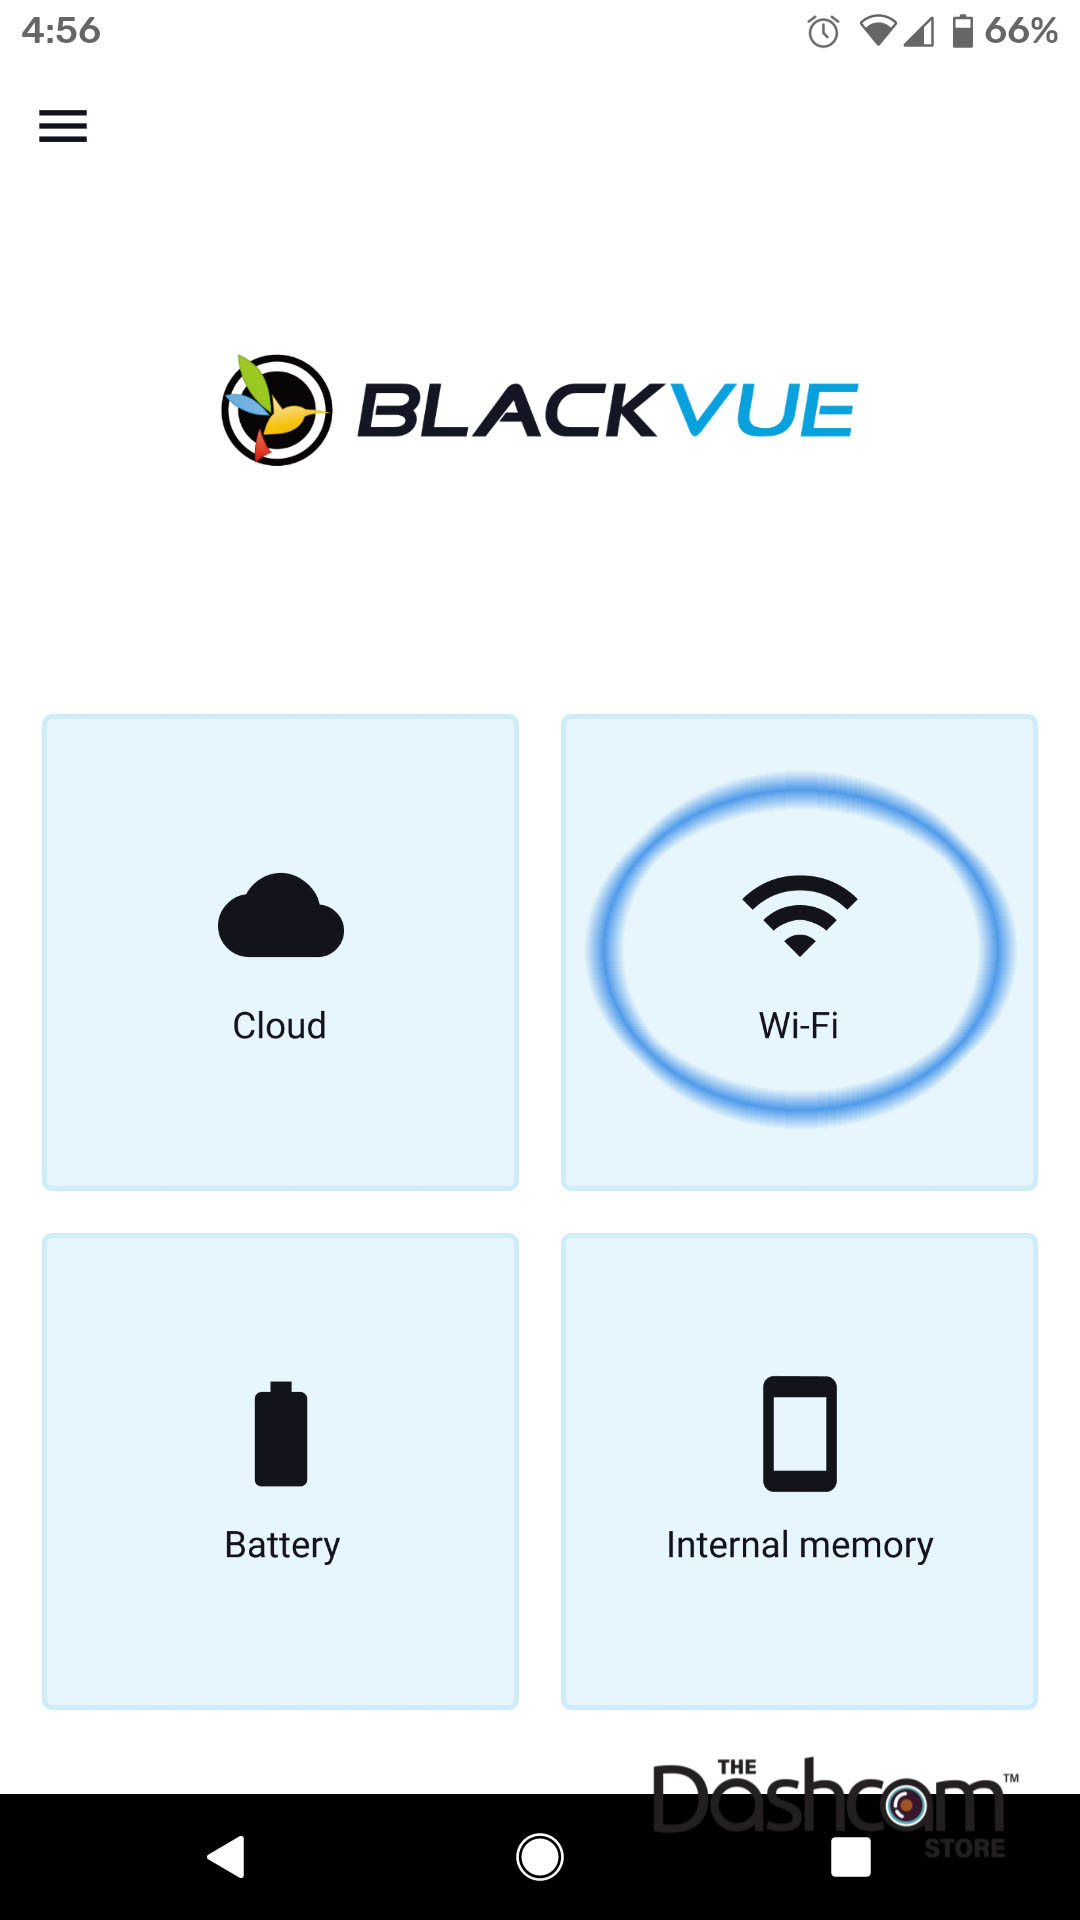
Once your phone is connected to the WiFi signal created by the DR750-2CH-LTE, open the BlackVue App and select “WiFi" from the main menu.
Click the SIM card configuration symbol at the top right to access the SIM card activation window. Ensure your IMEI displayed at the top of the window matches what is written on the BlackVue label next to the WiFI SSID and password.
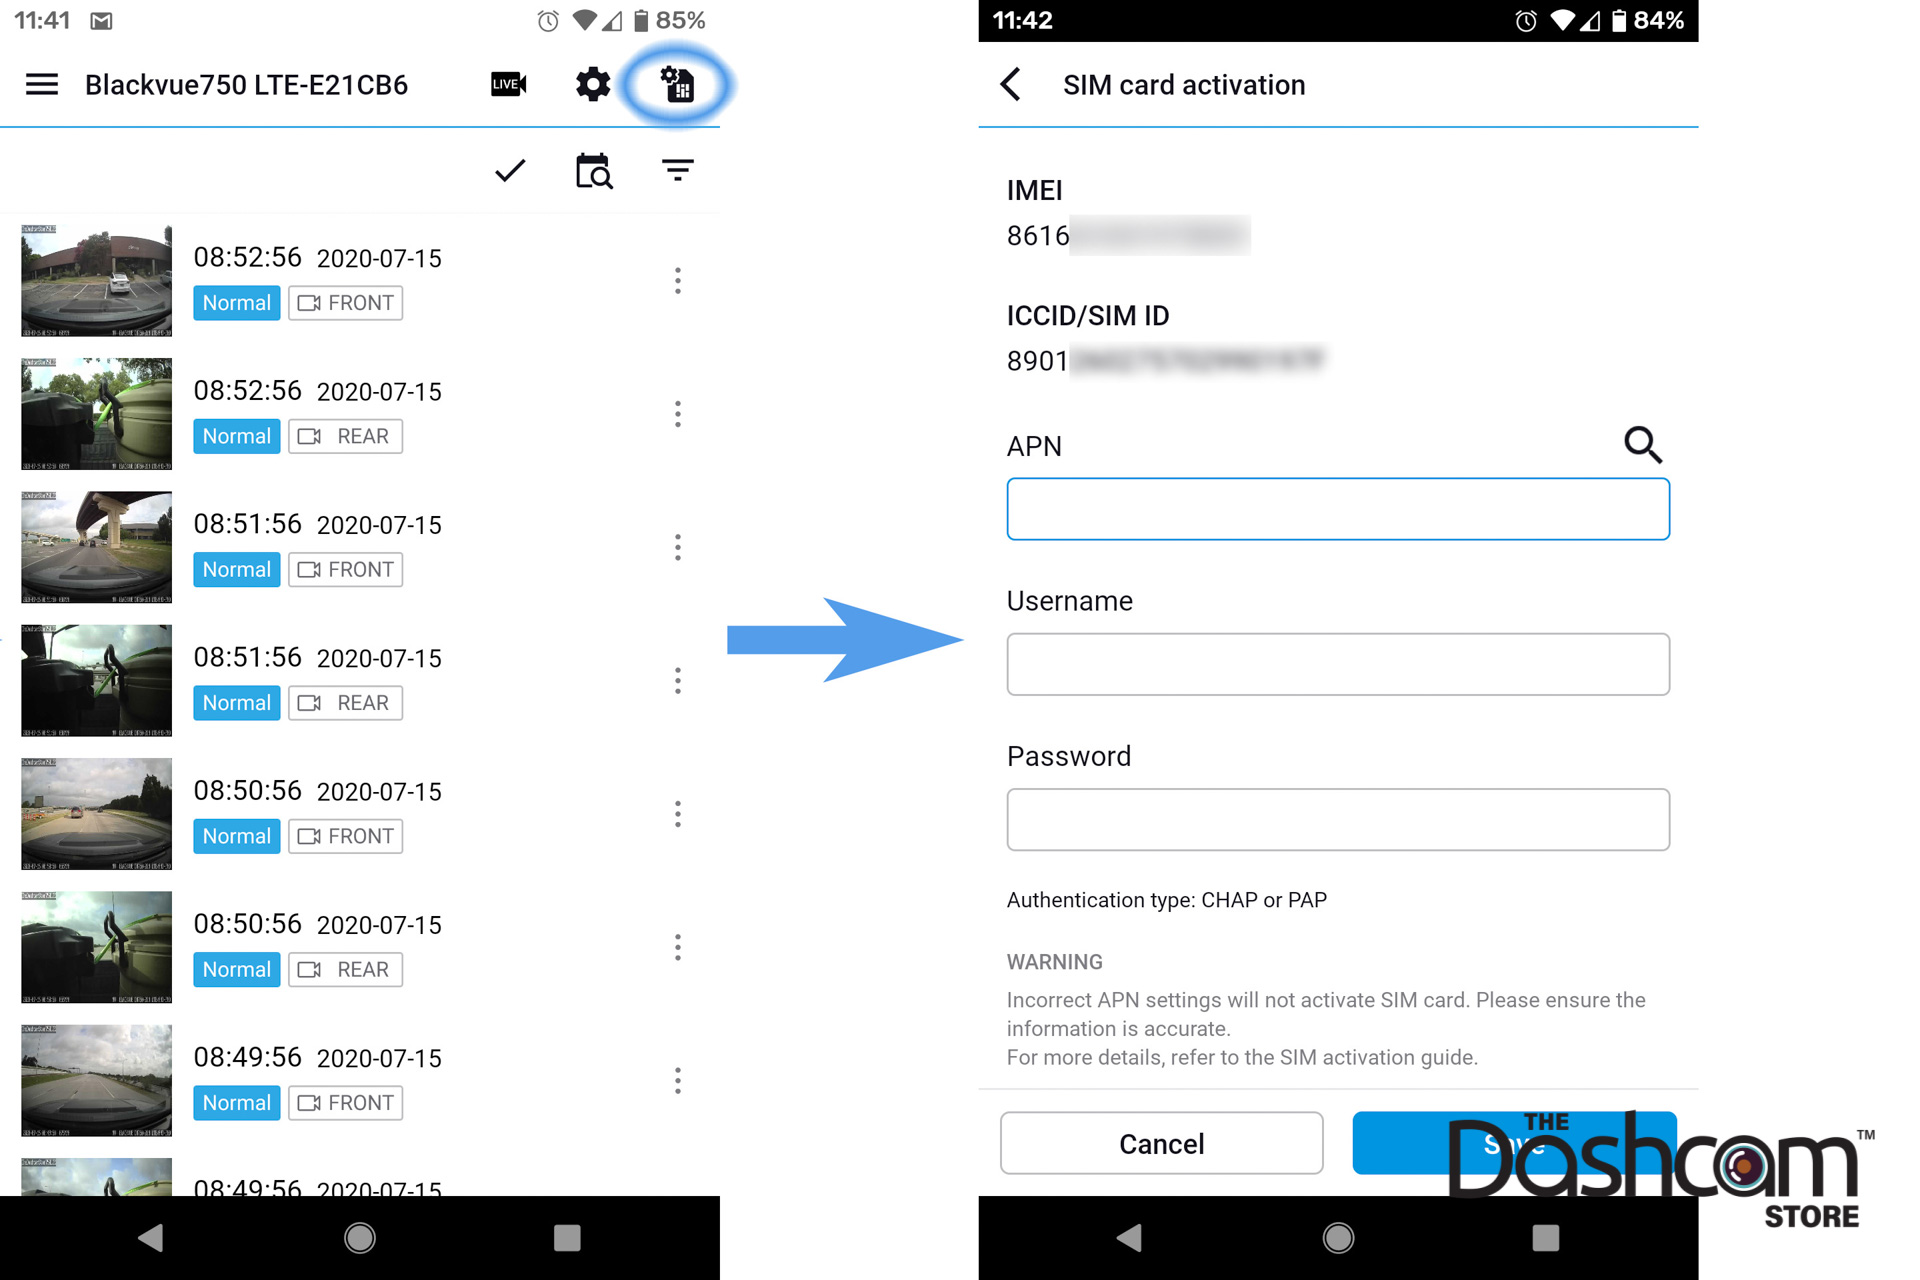
Also ensure the ICCID/SIM ID matches what you were given when you obtained the SIM card from your provider.
Step 6: Configure the SIM Card Settings
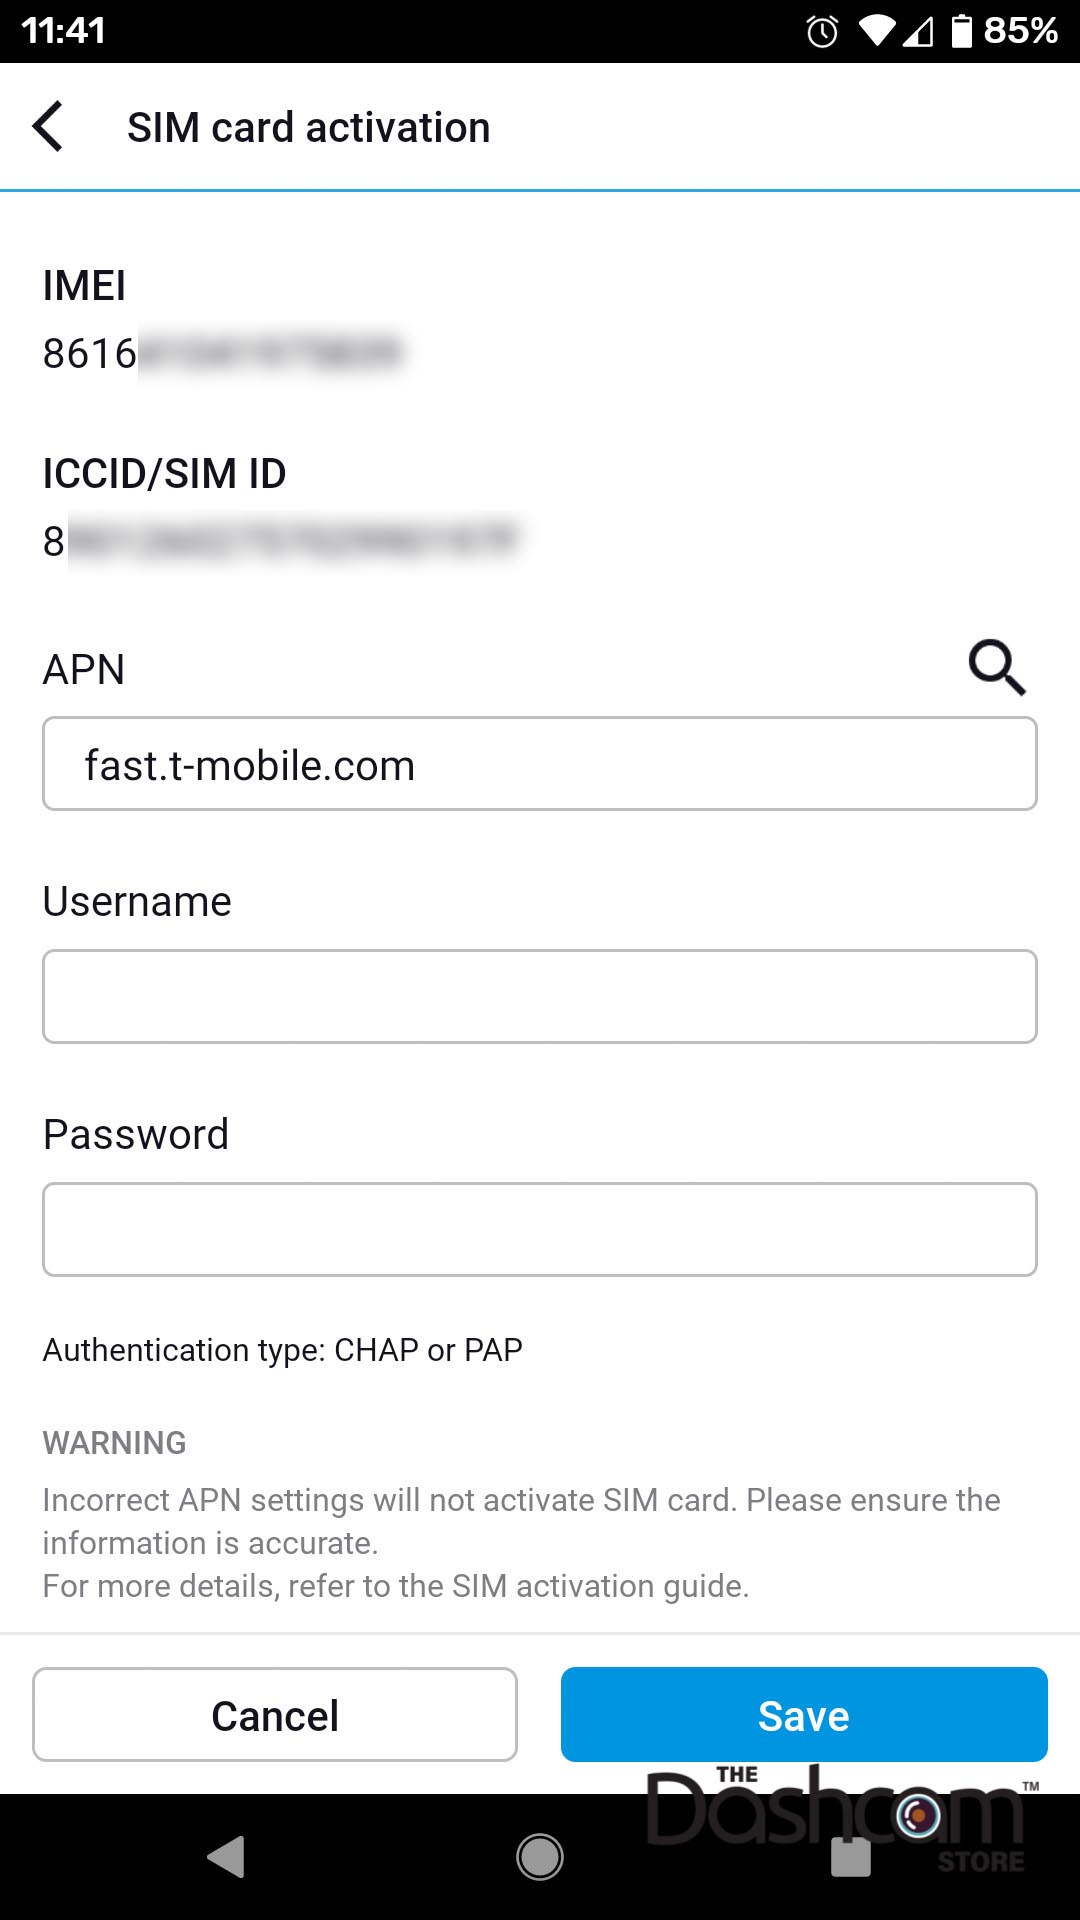
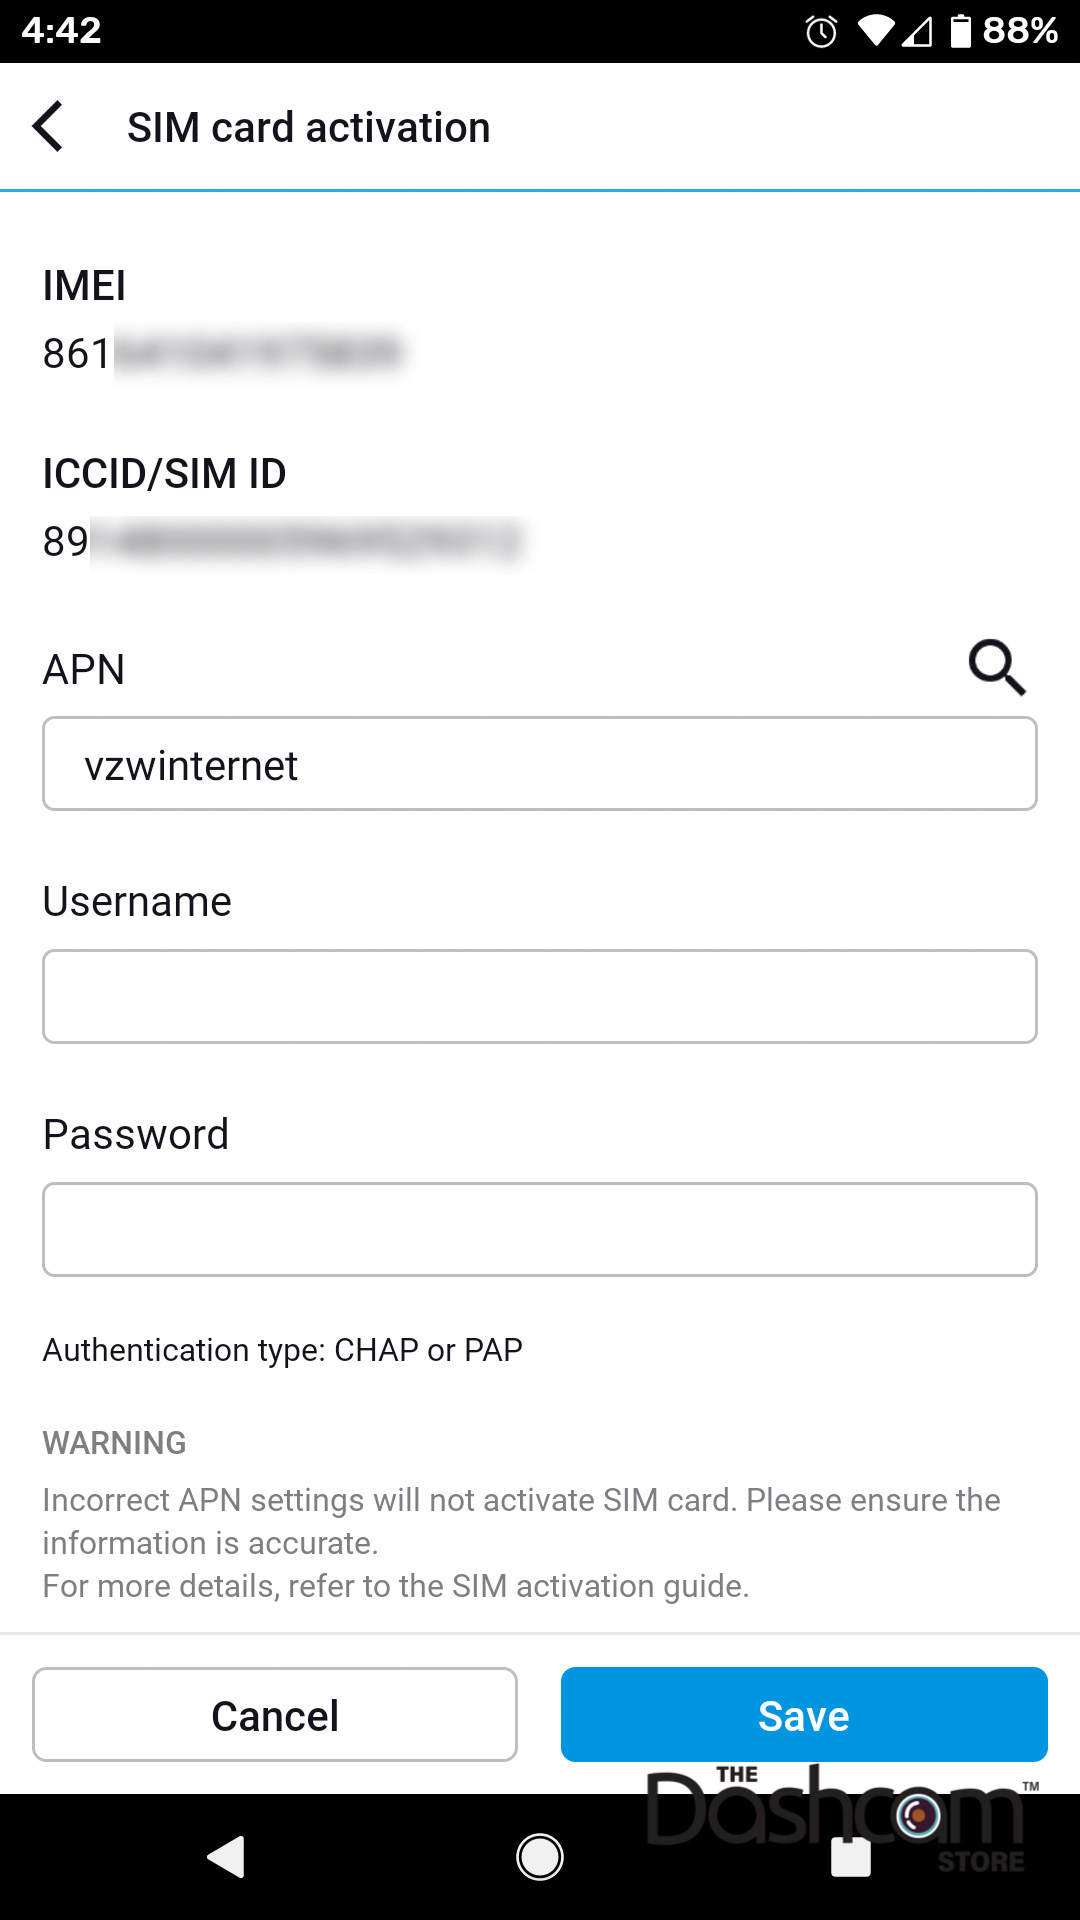
For "APN", use one of the following values according to your SIM card carrier (this is a partial list, other carriers may be compatible as well):
- AT&T: NXTGENPHONE
- T-Mobile: fast.t-mobile.com
- Verizon: vzwinternet
- Sprint: (TBD)
- Google Fi: h2g2
UPDATE: we have also successfully tested both AT&T and T-Mobile SIM cards *without* any value entered for the APN. We recommend trying these networks without an APN and only using the APN values above if absolutely necessary.
Leave the Username and Password fields blank.

Click “Save”. Allow the camera to reboot.
Step 7: Connect Via BlackVue-Over-the-Cloud
Once the camera has rebooted, after a few moments you should hear “Cloud connected”. Do not connect to the BlackVue DR750-2CH-LTE via WiFi at this time, you're welcome to connect back to your normal home or office WiFi, or simply use your cellular data on your phone.
Pro Tip: you may even want to have your phone "forget" the BlackVue WiFi network so that your phone does not automatically connect to the dash cam when you get in your vehicle every day. If your phone connects to the dashcam automatically via direct WiFi, on some phones you won't receive any mobile data while connected to the camera, which we don't want to happen.
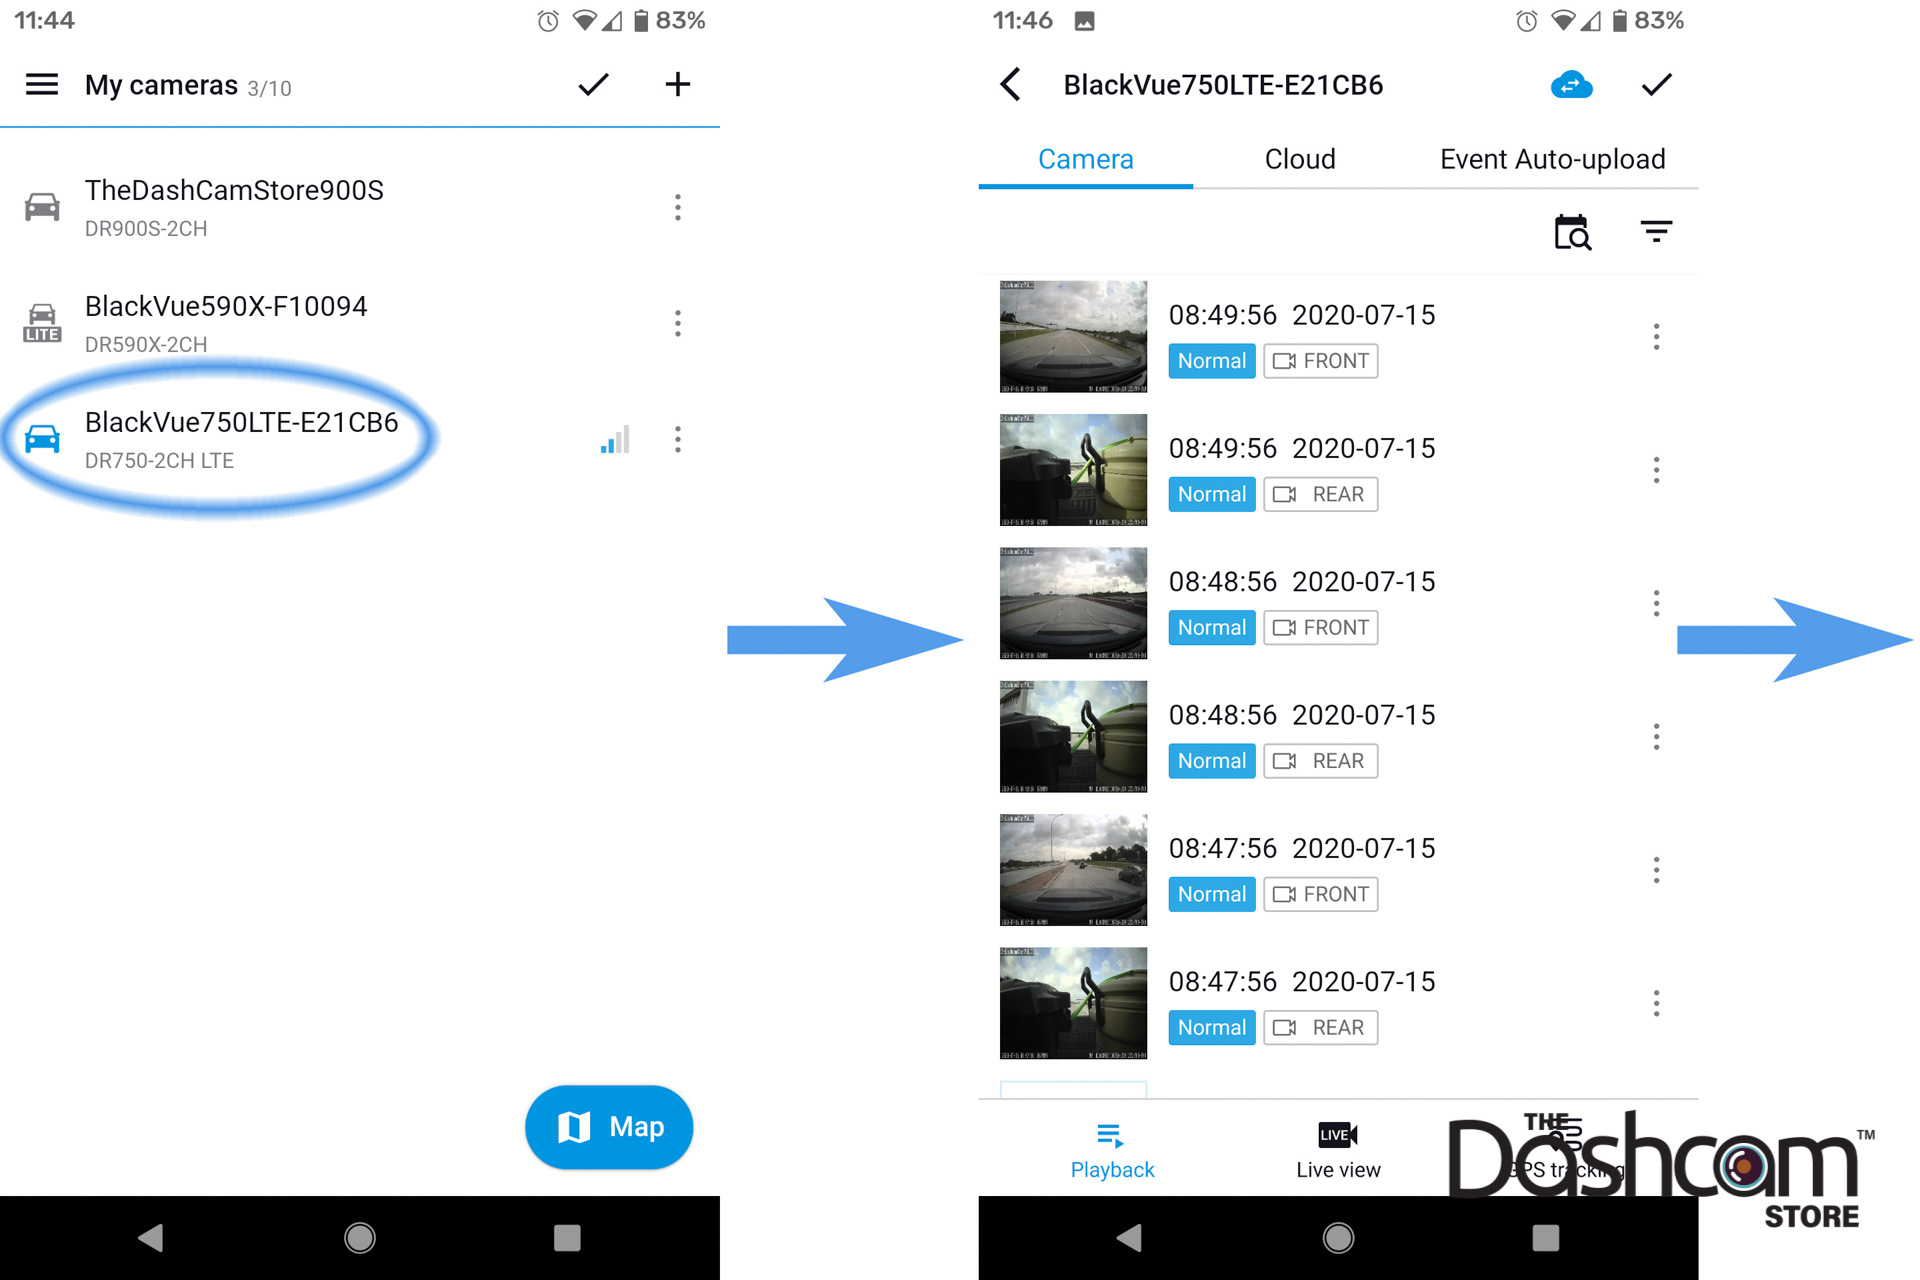
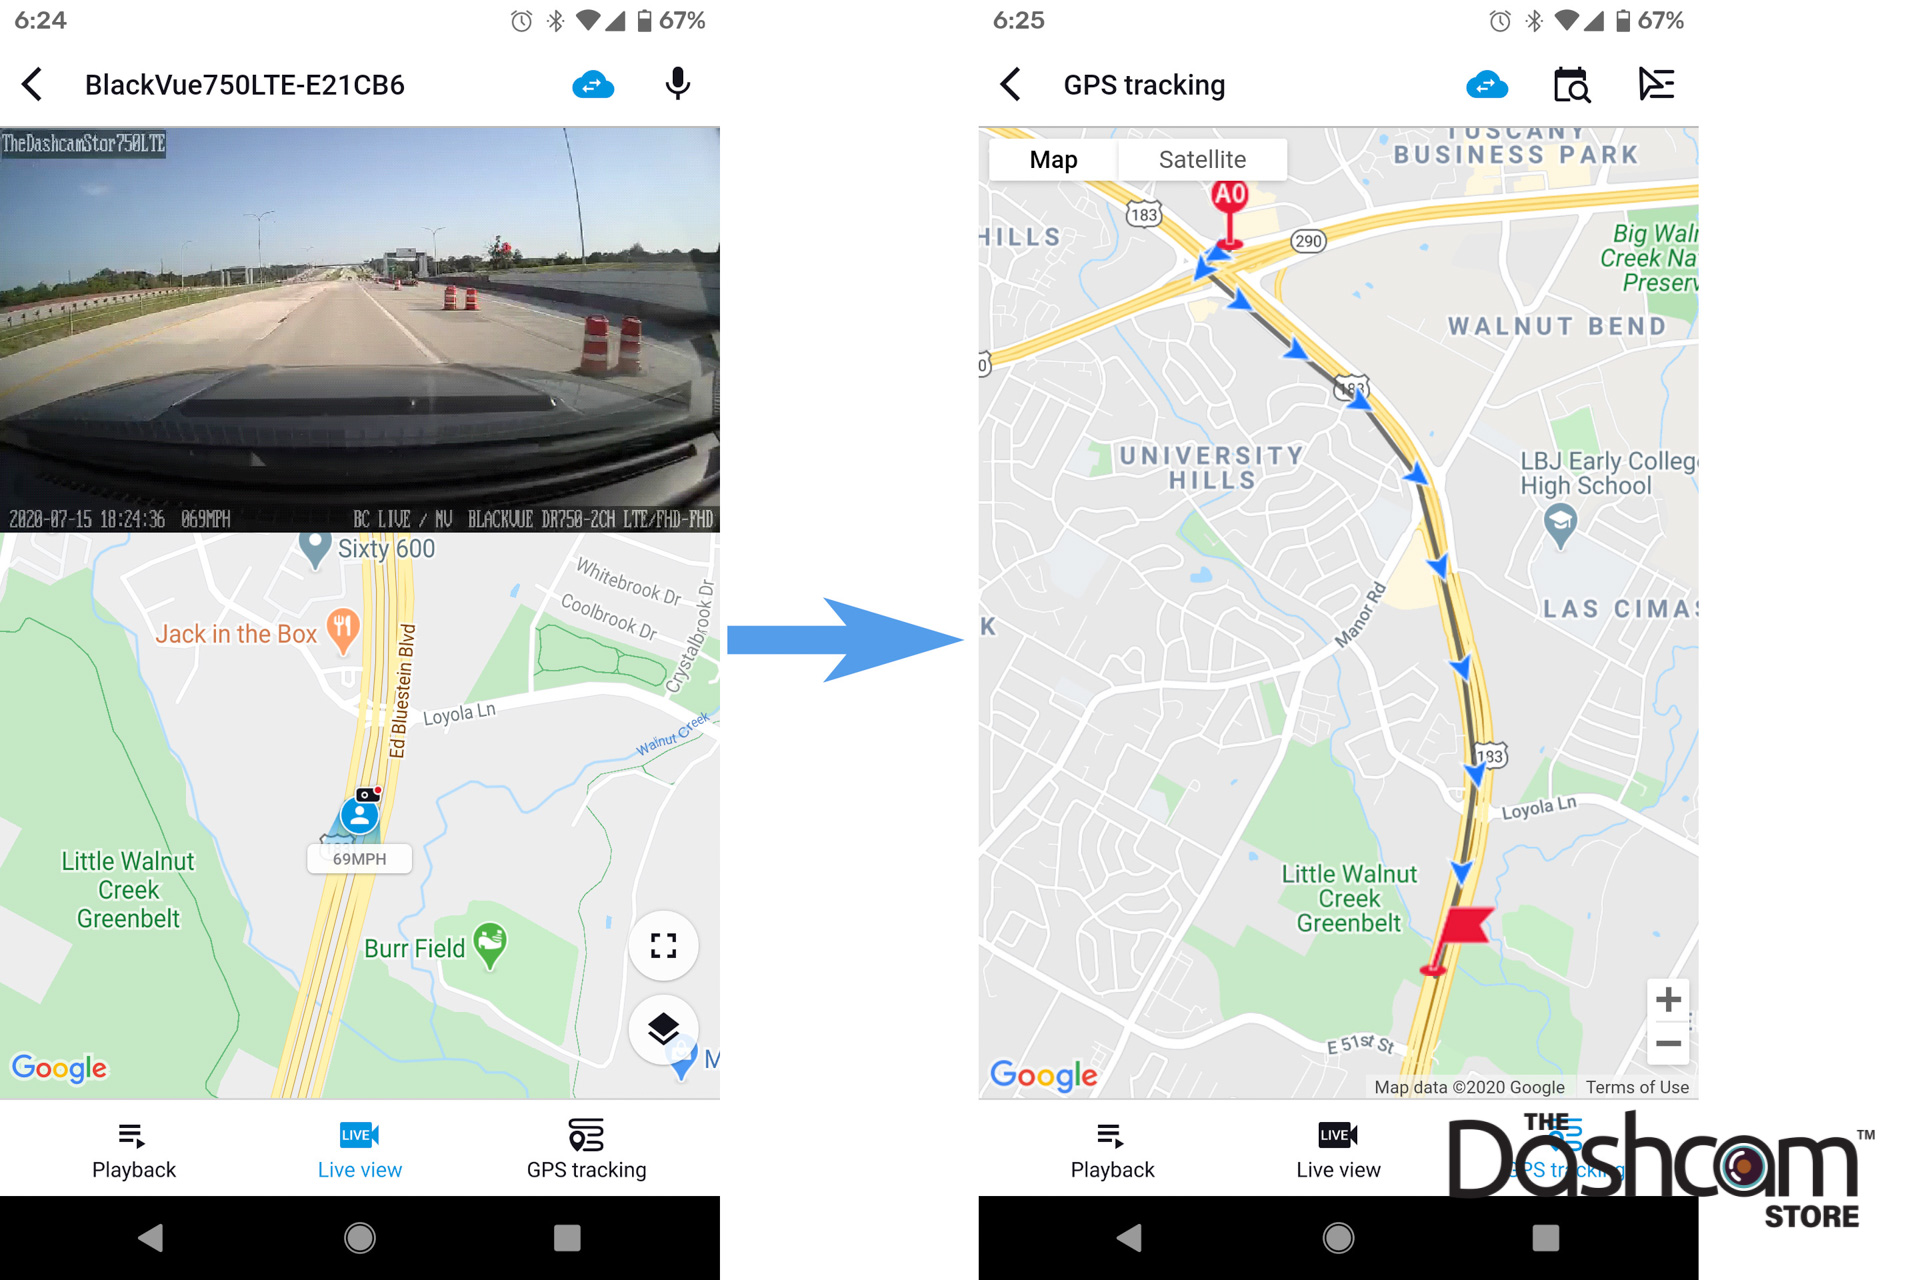
Now with the BlackVue app, select the “Cloud” option from the main menu.
Look for the vehicle icon next to your 750-LTE camera to be blue. If it is blue, it’s on the Cloud and you’re good to go! Tap on the camera icon or name, now you have complete remote access to your dash cam from practically anywhere in the world.
Click here to learn more about the revolutionary new BlackVue DR750-2CH-LTE Dash Cam, with 4G-LTE built-in.
To utilize your DR750-2CH-LTE in parking mode, you'll need to power the dash cam with a Power Magic Pro or B-124X battery pack. Please see our Parking Mode and Power Magic FAQ page for more information.
To request additional information, please don't hesitate to contact us. We give our best effort to respond to all inquiries within 1 business day.