
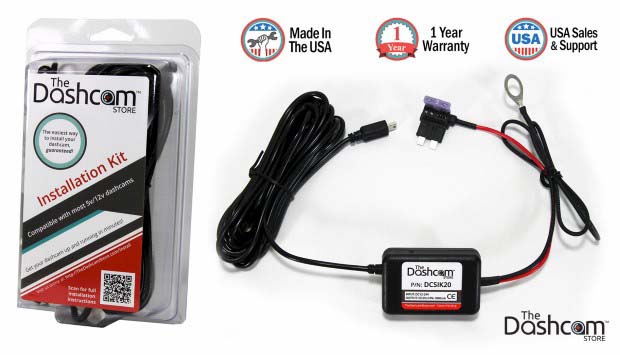
Follow these instructions for installing a dashcam in your vehicle, by tapping in to your vehicle's power supply. This is known as hard-wiring, but it's not hard to do! A dashcam installation kit from The Dashcam Store™ is used in this procedure to make the job quick and easy:
Advanced Dashcam Installation
WARNING: this type of installation should be performed by a qualified individual or business only. Working with your vehicle's power system can be dangerous to both you and your vehicle if you do not know what you are doing! If you have any doubts, please consult a professional.
This vehicle in example is a Honda CRV. This installation write-up is intended only to be a guide since vehicle designs and fuse box locations can vary significantly. The dashcam used in this how-to guide is the ever-popular G1W-C, but the instructions are applicable to just about any USB-powered dashcam available today.
To view the installation process for a BlackVue dashcam please see our BlackVue and Power Magic Pro installation instead of this guide.
On to the installation! Click on any image below to view a larger version.
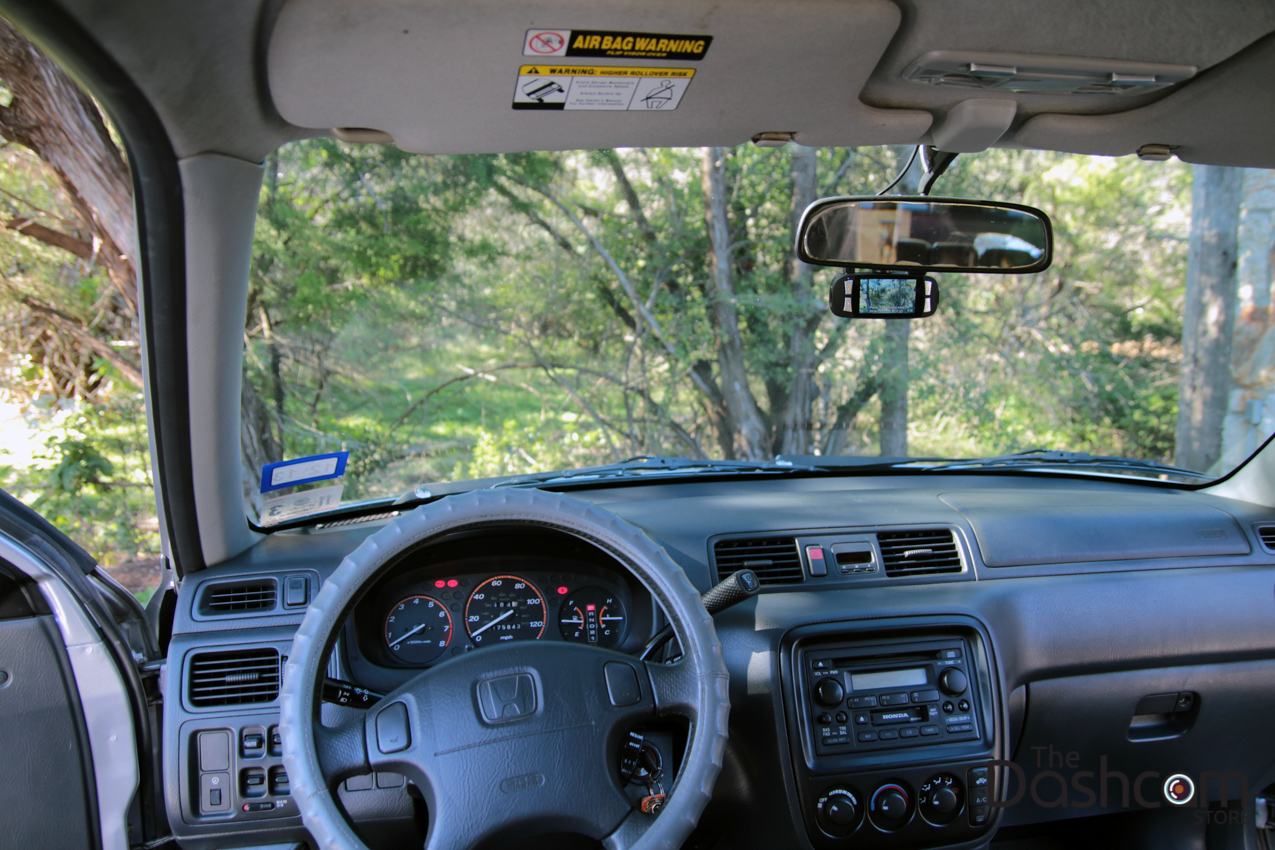
Step 1 - Decide on your dashcam's positioning
Sitting in your driver's seat in your vehicle, you want to try different positions for your dashcam. It's a good idea to place the dashcam within arms reach of your seat, but definitely do not mount the dashcam in a location that obstructs your view of the road ahead. In this example, the customer has chosen to place their dashcam immediately under the rear view mirror.

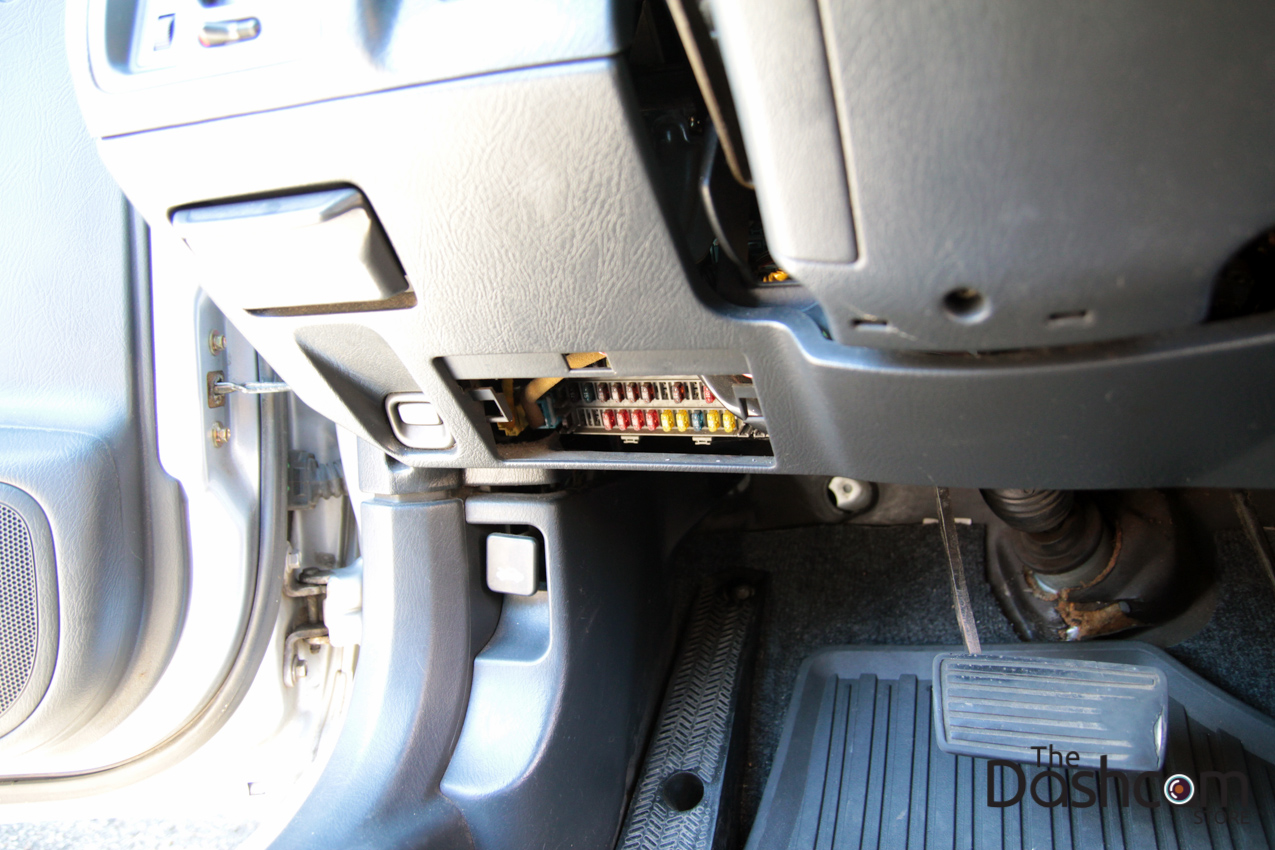
Step 2 - Locate your vehicle's fusebox
Since we are running a power cable from the dashcam to the fuse box, we need to know where the fuse box is. Most vehicles have a fuse box underneath the dashboard on the driver's or passenger's side. In this case, the fusebox is easily accessible below the steering column (behind a removable panel). Consult your owners manual for the location of the fuse box in your vehicle.
Step 3 - Begin routing the power cable
Starting at the dashcam, lay out the power cable roughly where it will run once hidden behind the vehicle's interior panels. This gives you an idea of where to route the cable and how much slack to leave on the way down to the fuse box.
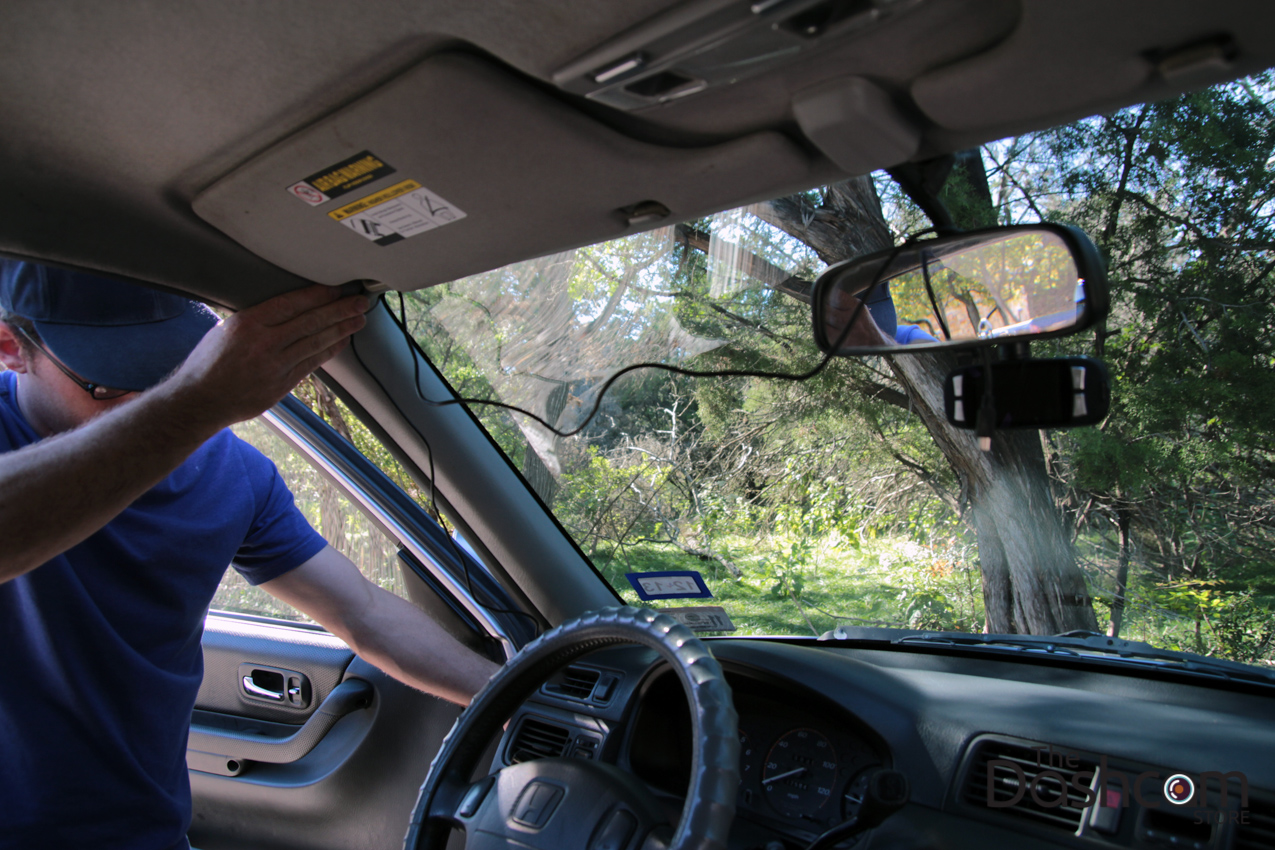
We begin by tucking the power cable into the headliner.
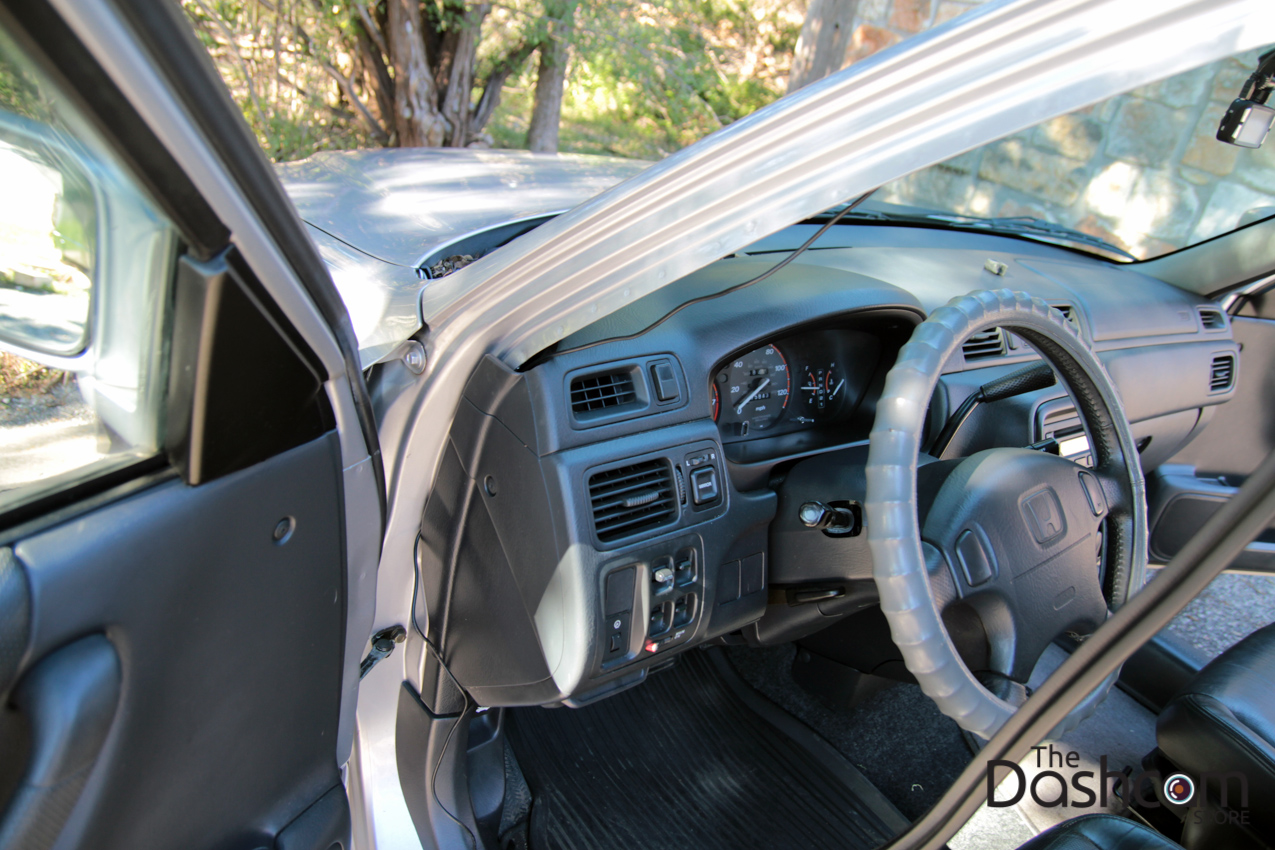
In most cases, simply tugging on the rubber trim along the A-pillar reveals a gap in which the power cable may be run from the headliner down to the fuse box. In rare cases, it may be necessary to remove the A-pillar cover which will allow complete access to this area of the vehicle for the routing of the power cable. Many A-pillar covers can simply be popped off; consult your vehicle's technical manual or consult a professional if you are not sure how to remove interior panels.
For illustrative purposes, we have removed the A-pillar cover during this installation. Again, in most cases, the A-pillar does not need to be removed.
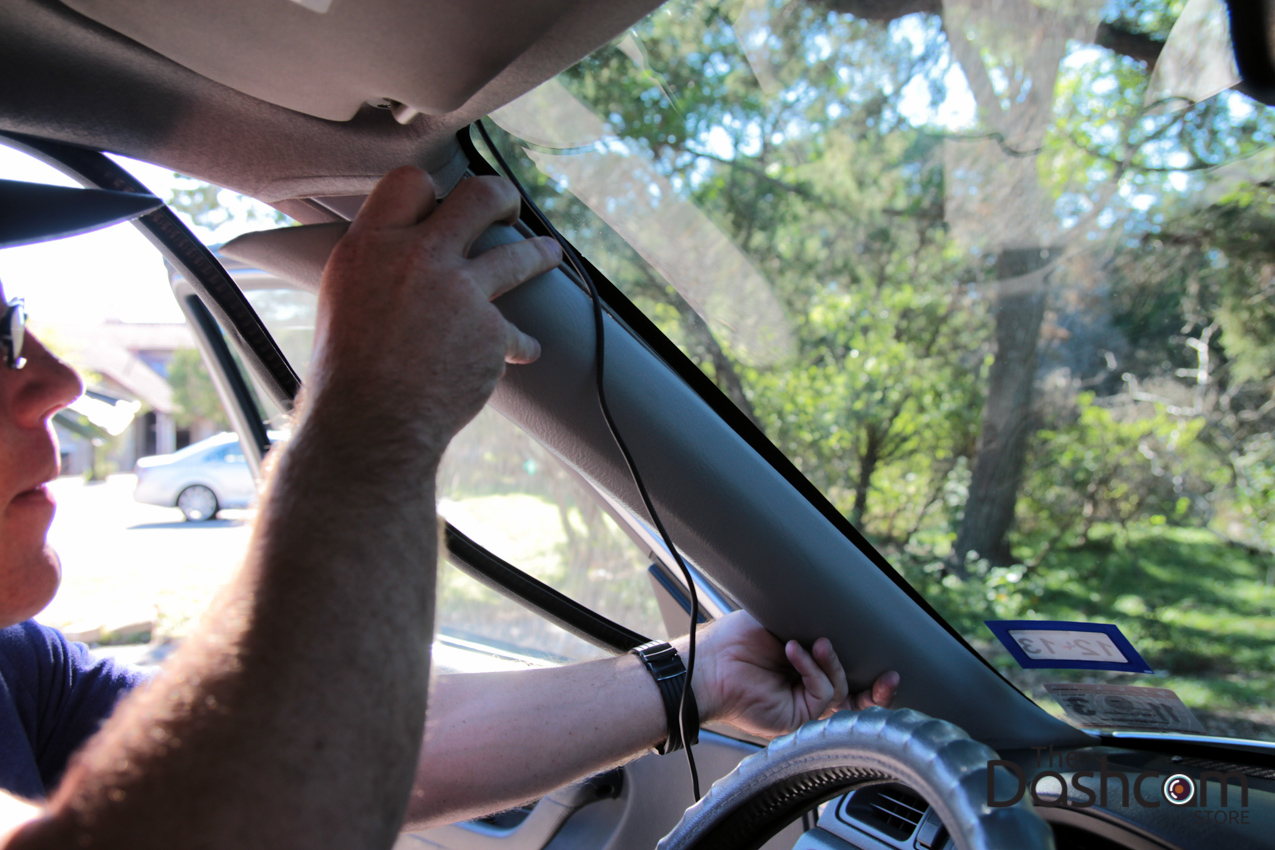
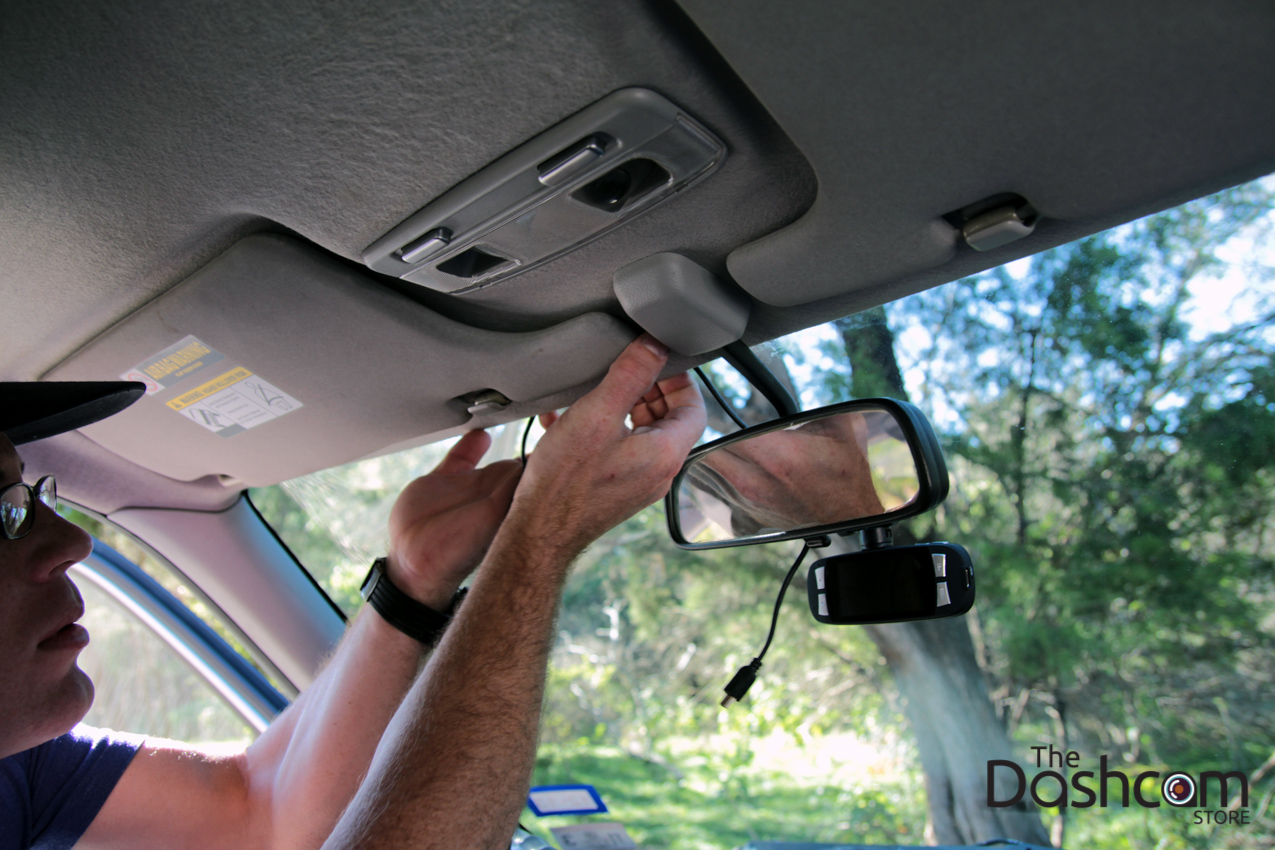
Tuck the power cable alongside the existing wires in the A-pillar.
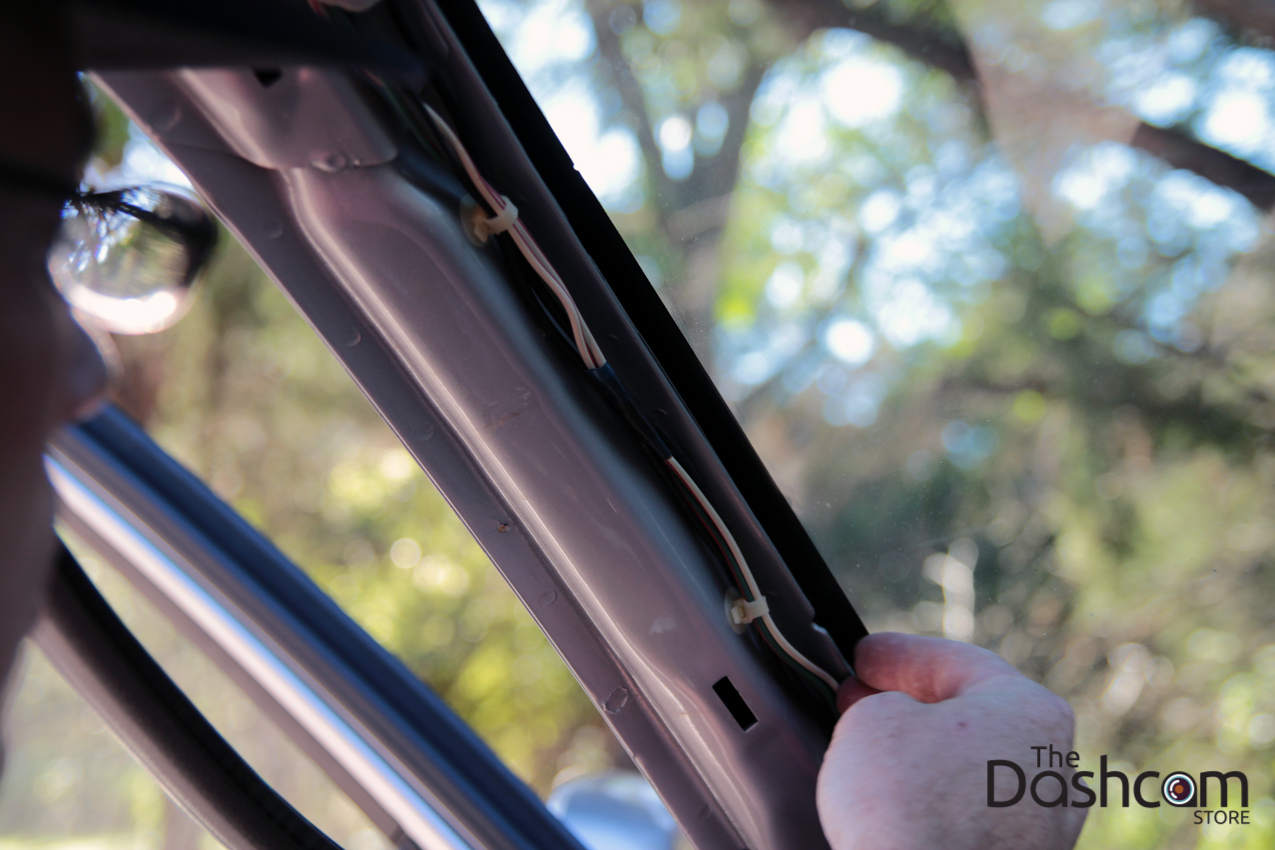
Route the power cable around the side and behind the rest of the interior panels down towards the fuse box.
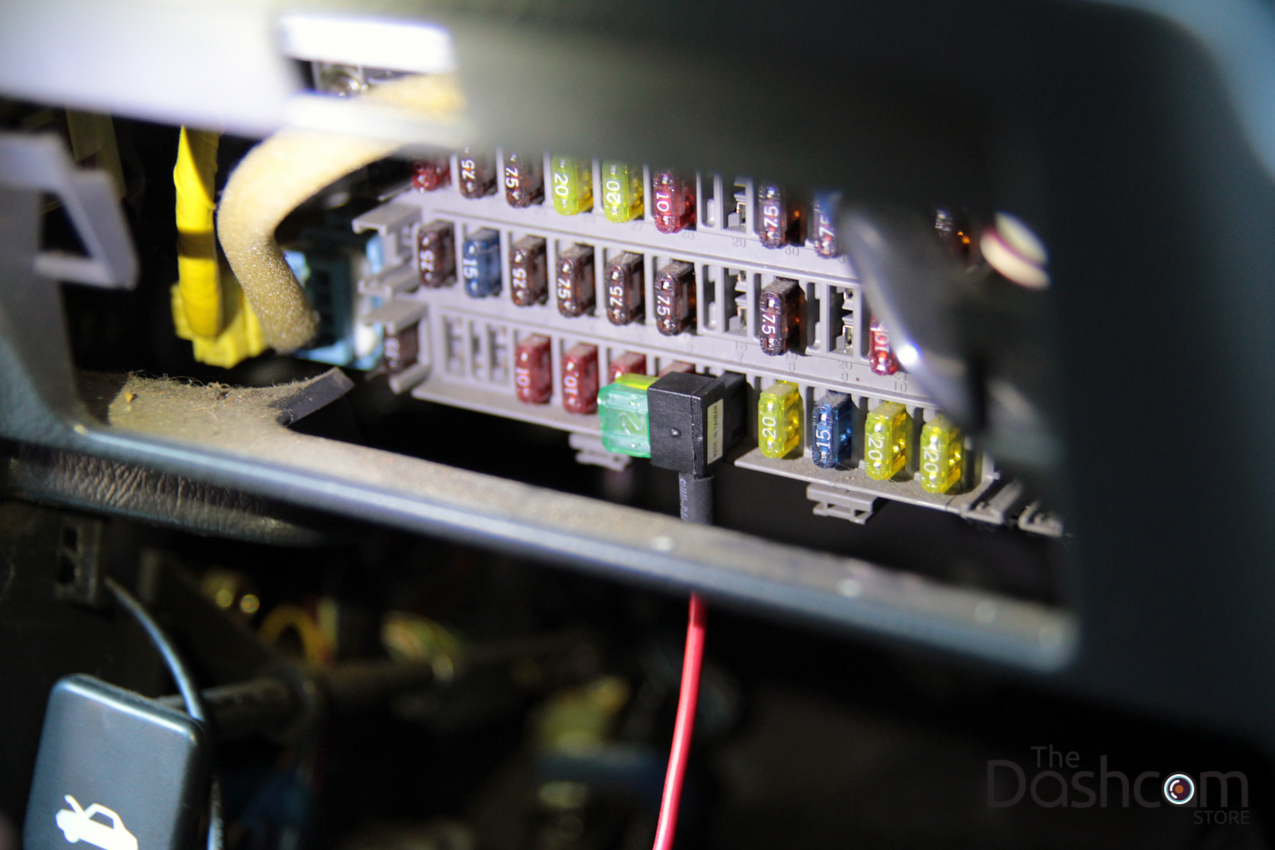
Step 4 - Locate a fuse that is "hot in start"
In general, vehicle fuses may have power at all times (always hot), or only when the vehicle is running (hot in start). In order to have the dashcam come on automatically when the vehicle is running, and turn off automatically when the driver turns off the vehicle, we will connect our add-a-circuit kit to a "hot in start" fuse. In order to identify which fuses are hot in start, we use a simple circuit tester that illuminates when power is present.
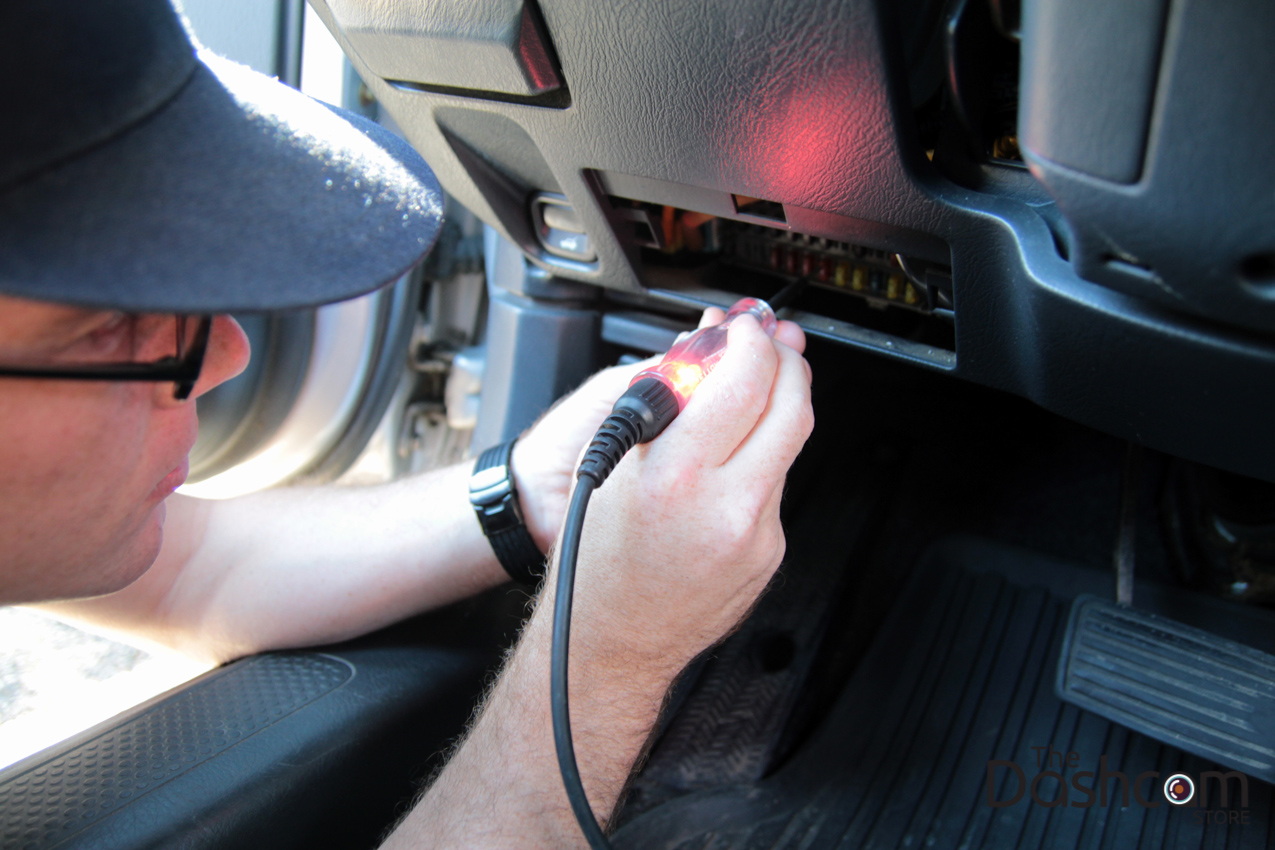
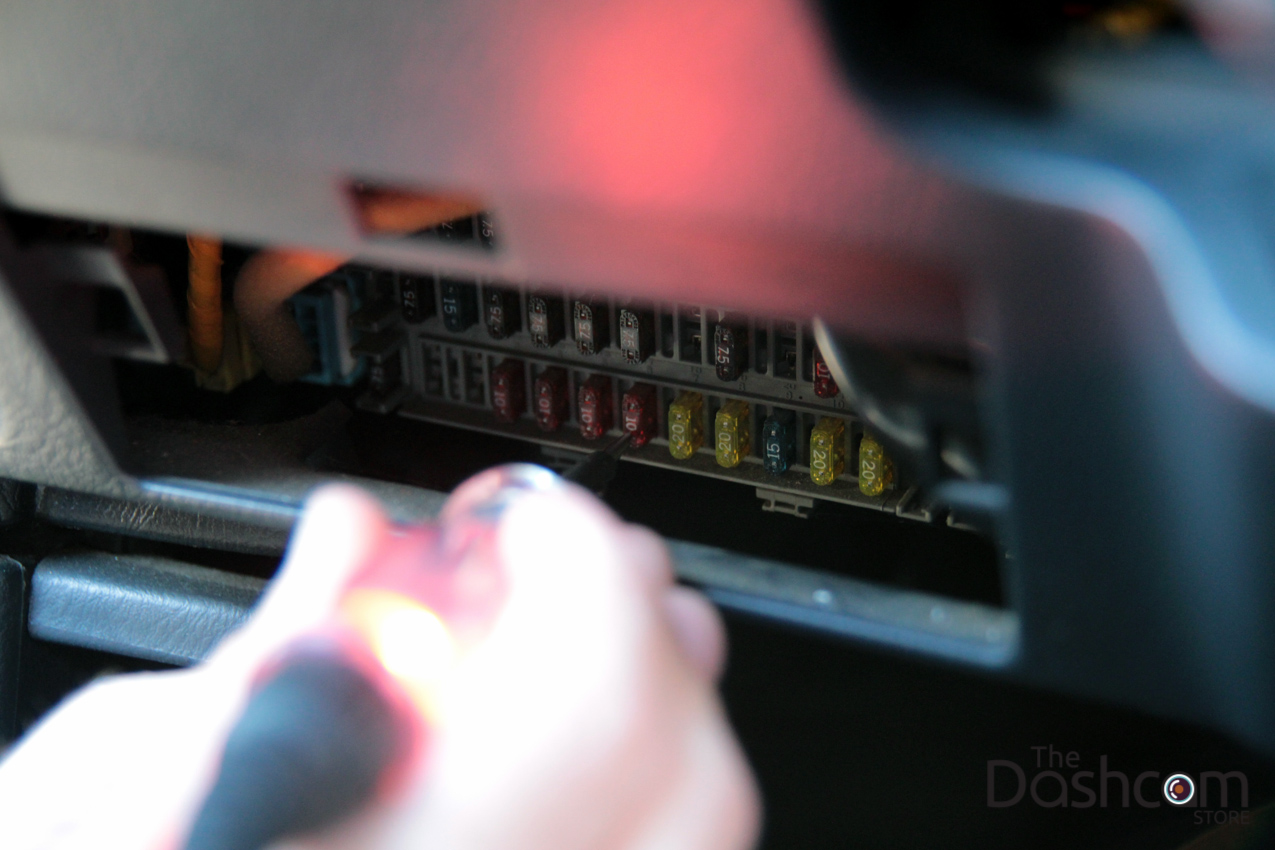
You must use the circuit tester to ensure there is no power at the fuse when the ignition key is off, and power is present only when the ignition key is turned to the run position.
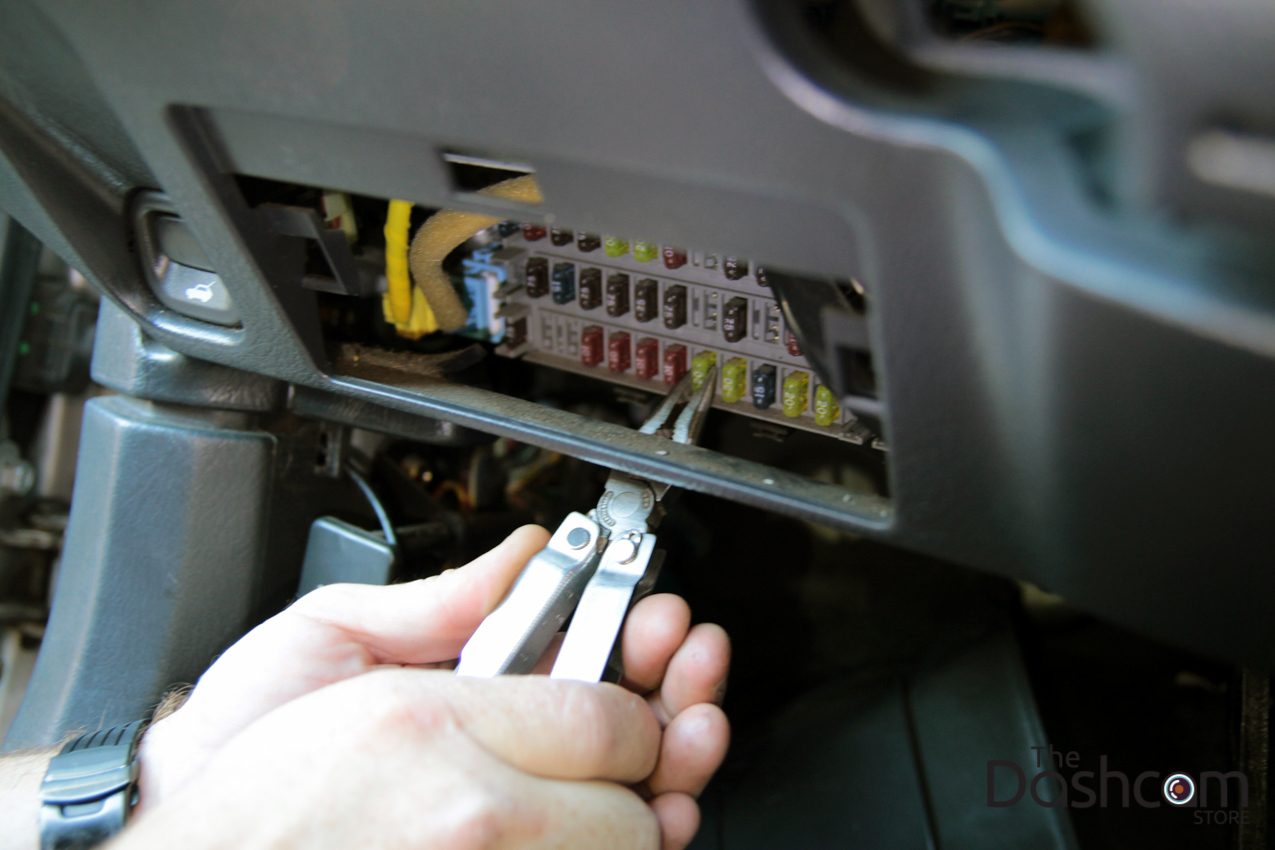
Step 5 - Install the installation kit add-a-circuit power cable
Make sure the key has been removed from the ignition. Using a fuse puller or a pair of pliers, gently remove the fuse you identified in step 4.
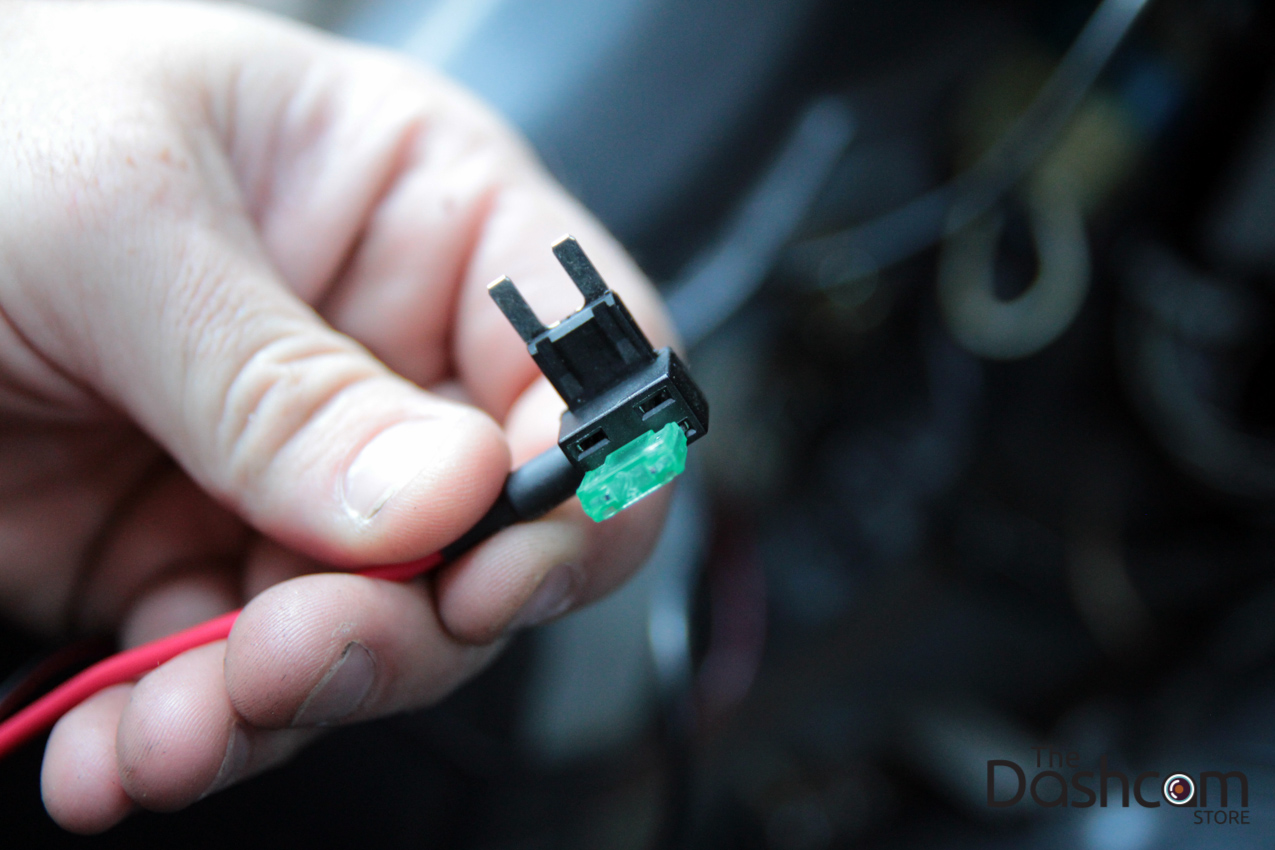
Install the fuse you just removed into the installation kit add-a-fuse circuit. The first image below shows the add-a-circuit as you receive it from The Dashcam Store™. The second image is with your car's original fuse installed into the add-a-circuit.
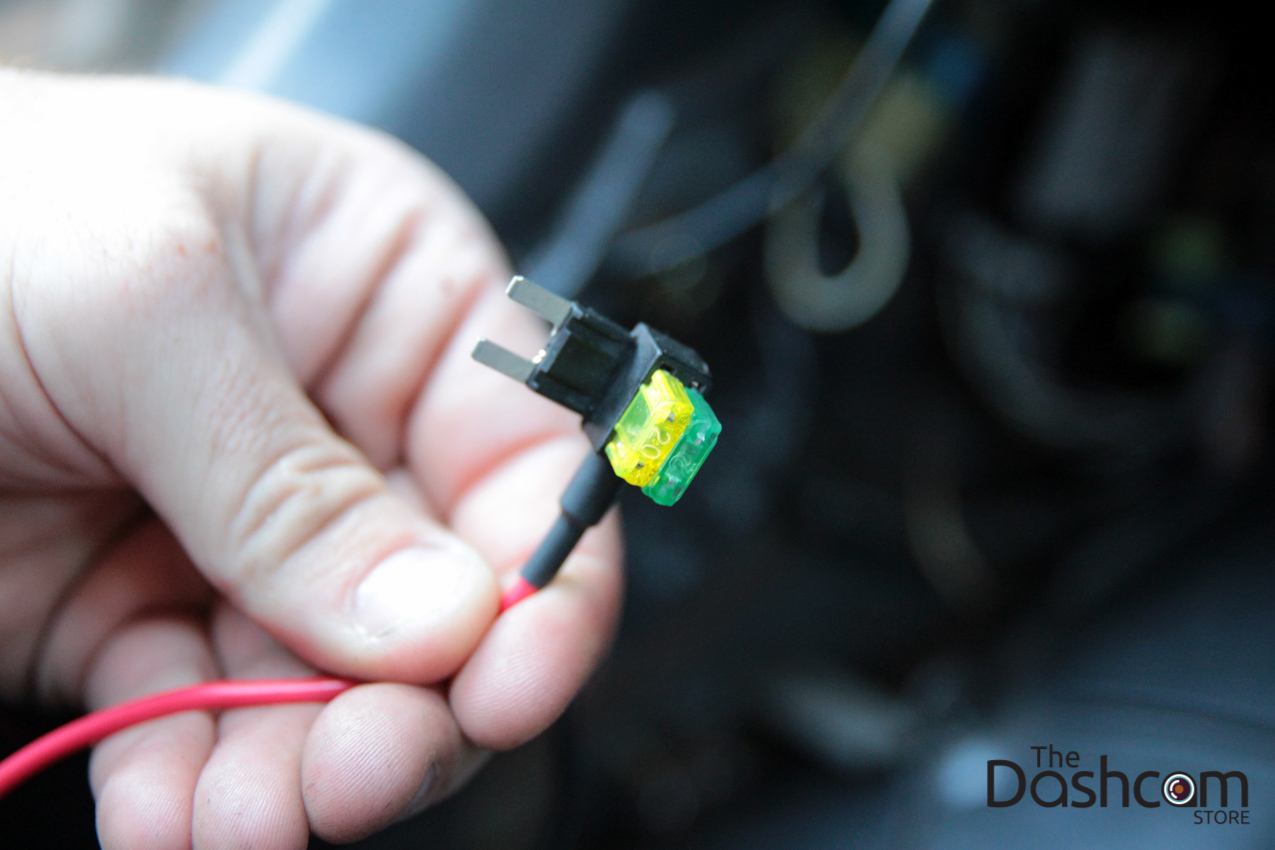
Plug the add-a-circuit in to the empty spot where your "hot in start" fuse was originally.
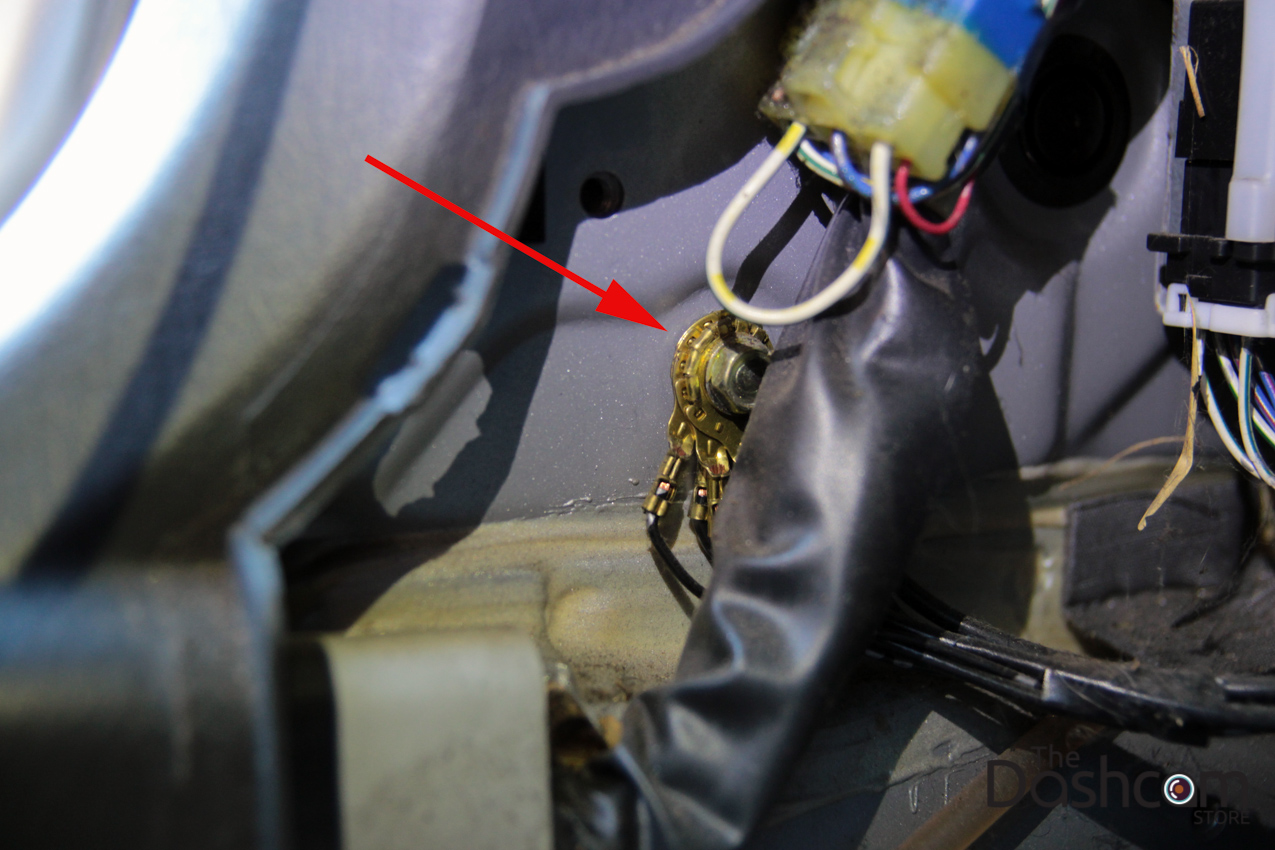
Step 5 - Locate a ground point
The other end of the installation wiring kit must be grounded to your vehicle. Most cars have at least one obvious ground point near the fuse box, as shown in the image below. The lower kick panel has been removed to access this ground point. Remove the bolt and add the ground lug from installation kit (not shown).
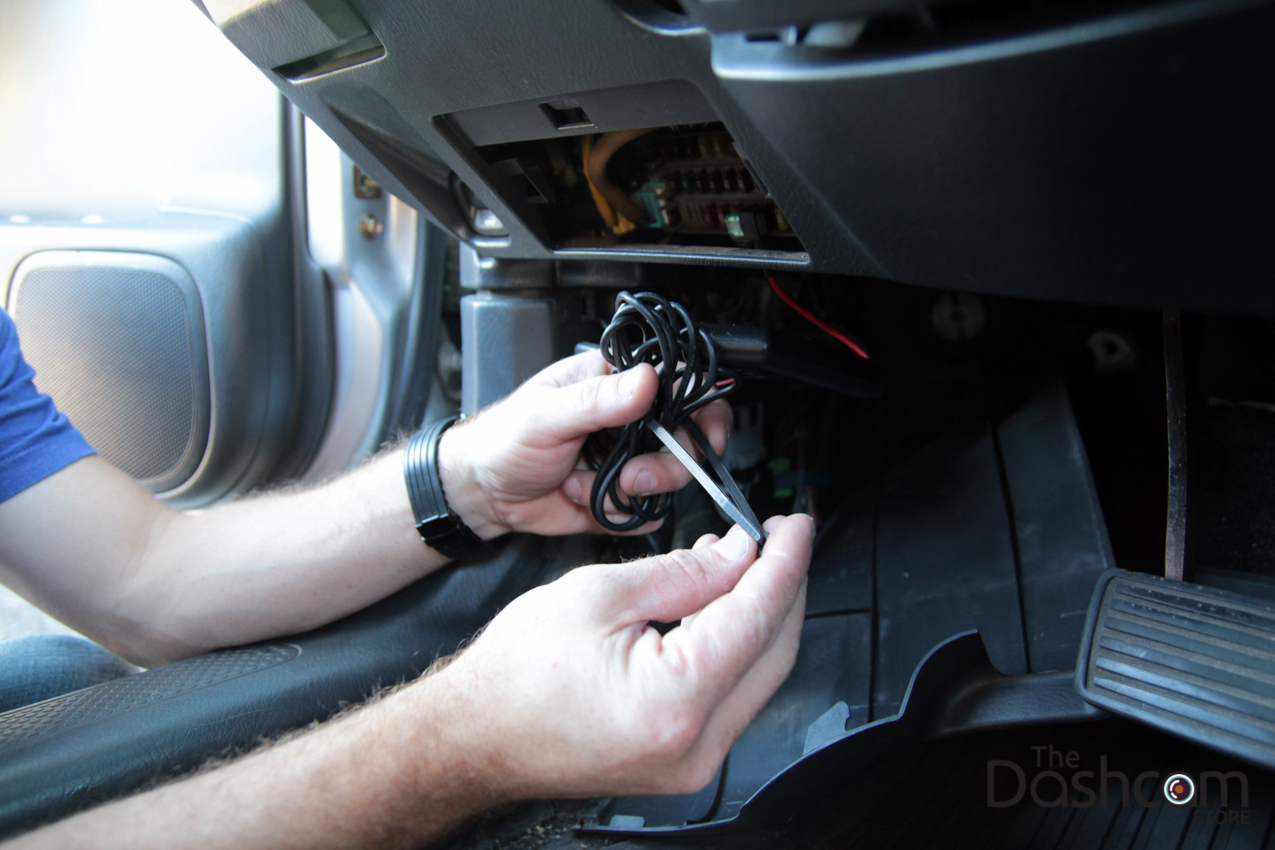
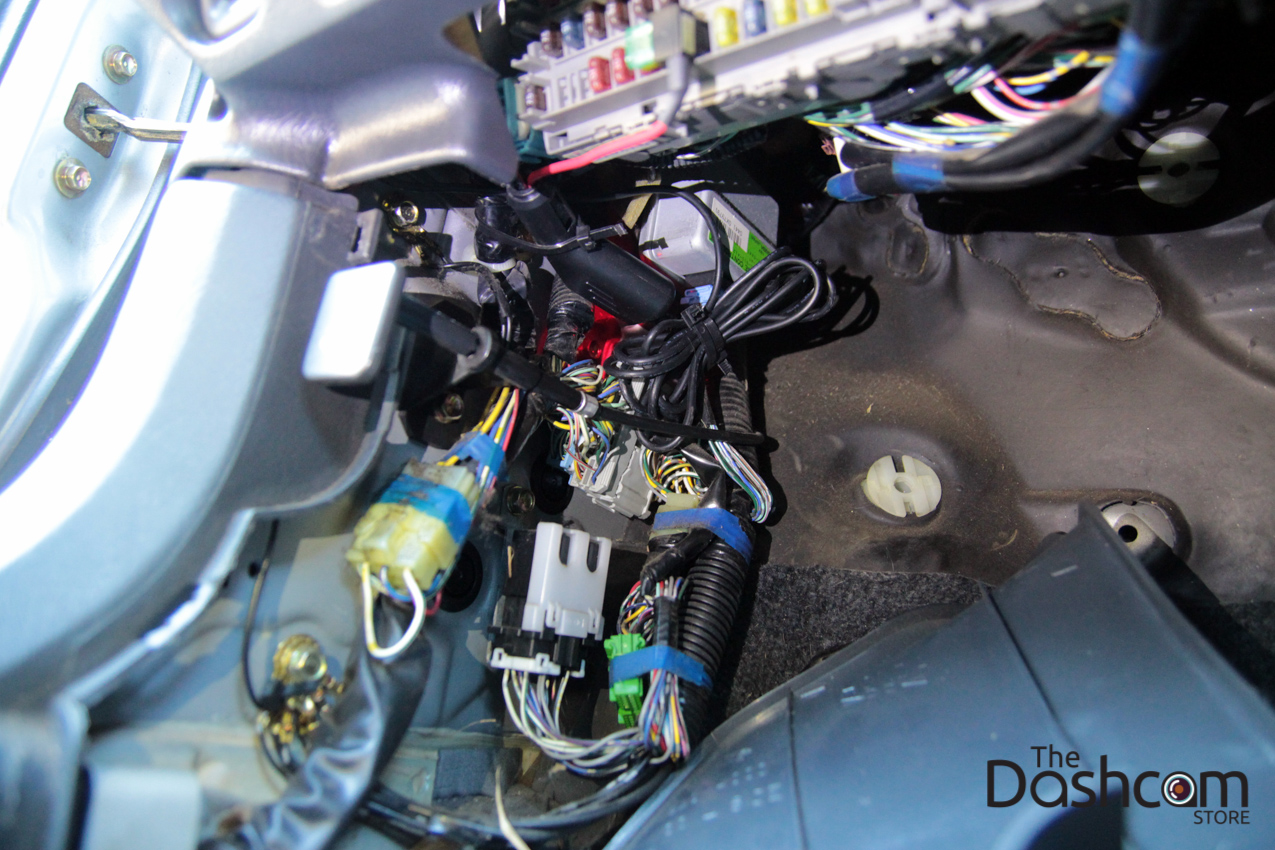
Step 6 - Button up your install
Use a zip tie to bundle the excess power wire together. Then, safely secure the wiring to a solid mounting point underneath the dashboard or behind the kick panel using more zip ties.
Step 7 - Test your installation
Insert your key in the ignition and turn it to the run position. If everything was installed correctly, you should see your dashcam turn on and begin recording! At this point you may go ahead and reinstall all interior panels that were removed to facilitate running the power cable.
Easy, right? Click here to get your own dashcam installation kit from The Dashcam Store™, made right here in the USA. Drive safe!

To request additional information, please don't hesitate to contact us. We give our best effort to respond to all inquiries within 1 business day.
Disclaimer
The The Dashcam Store™ Installation Instructions are proprietary to The
Dashcam Store LLC. ("The Dashcam Store™") and no ownership rights are
hereby transferred. No part of these Installation Instructions shall be
used, reproduced, translated, converted, adapted, stored in a retrieval
system, communicated or transmitted by any means, for any commercial
purpose, including without limitation, sale, resale, license, rental or
lease, without the prior express written consent of The Dashcam Store™.
The Dashcam Store™ does not make any representations, warranties or
guarantees, express or implied, as to the accuracy or completeness of
these installation instructions. Users must be aware that updates and
amendments will be made from time to time to these installation
instructions. It is the user's responsibility to determine whether there
have been any such updates or amendments. Neither The Dashcam Store™ nor
any of its directors, officers, employees or agents shall be liable in
contract, tort or in any other manner whatsoever to any person for any
loss, damage, injury, liability, cost or expense of any nature, including
without limitation incidental, special, direct or consequential damages
arising out of or in connection with the use of these installation
instructions.